Error handling steps, counters, a new flow details experience and more


Error handling
From time-to-time, things don't work out exactly as you expected in your flow — that's where error handling comes in. With error handling, you can define any number of steps to run after the failure of an action. This powerful new feature will ensure that you can run even your most important business processes inside of Microsoft Flow.
How to add an action after a failure
First, you'll have to figure out which action you want to monitor for failures. If you already have actions after that step, you can add a new step after in parallel. In this example, let's look at adding an error handling step for the Dynamics 365 action Create a new record:
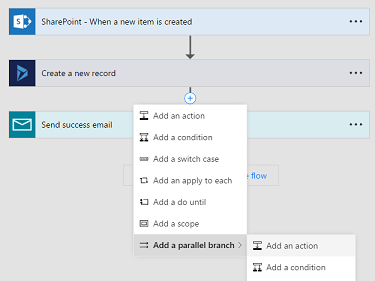
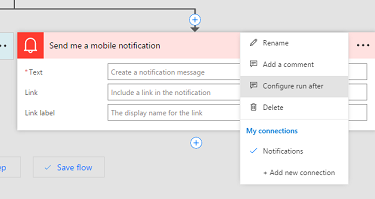
You can then select what action you want. Once you have a new step, select the "…" menu at the top-right of the action and choose the Configure run after menu item:
This will display the new options. You can define steps that run after:
- An action has any type of failure (except timeout).
- An action was skipped. Actions are skipped either when a condition is not met, or, when a previous action before that action fails.
- An action times out. This can happen if the call to the backend times out (120 seconds), or for long running actions such as approvals, after 30 days.
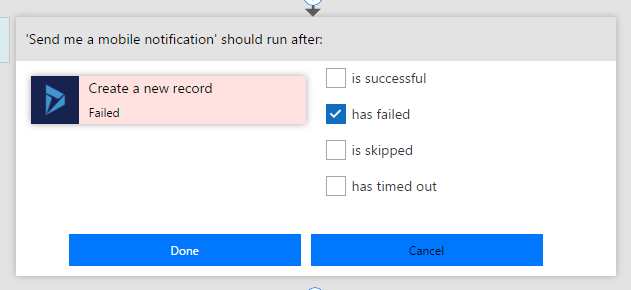
Select any or all of these checkboxes and then select Done. Now, you will get a mobile notification whenever the flow fails to create a new record in Dynamics 365.
Use run after to handle missing records
There are even some cases where error handling may even be part of the "expected" flow. For example, if you are copying records into a system and you want to have different behavior depending on if the record exists. Or, you want to look up someone in the directory, and then if the user doesn't exist you want to use some default values. You can set this up by having an action run after the Office 365 Get user step fails and populate the default data:
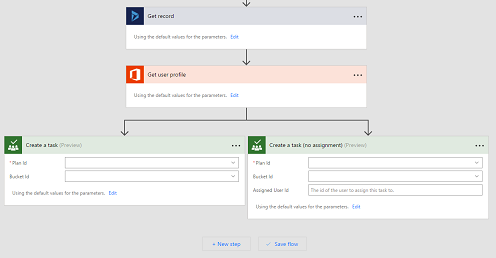
The above template shows how this works. It reads a record from Dynamics 365 and tries to look up that user's email in the Office 365 directory. If the user is found, then a task is created in planner with that email address. Otherwise, the task can still be created in planner, but it won't have email information.
Increment or decrement counters
You can initialize and increment or decrement variables inside of a flow run. This will make it possible to know how many times a certain branch of logic ran, for example.
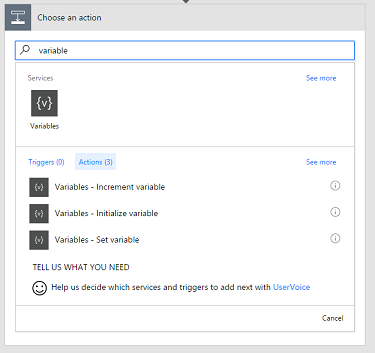
To get started you'll first need to initialize the variable:
Currently, you can create counters that are Integers or Floats (numbers with decimals). Once you have initialized the variable you can then increment or decrement it in your flow. Finally, you can also then reference that variable wherever you want.
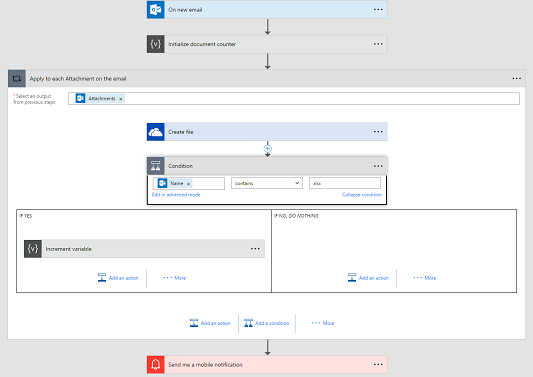
In the above flow you can see at the top the variable is initialized, it's incremented inside a condition in a apply-to-each loop, and then at the end a notification is sent with the contents of the variable.
View organization quotas
Inside of organizations, the number of flow runs you have is a quota that's shared across all users in the company (see the Microsoft Flow Pricing page). Now, tenant administrators can see how many flow runs have been used by members of their org in the Microsoft Flow Admin Center.
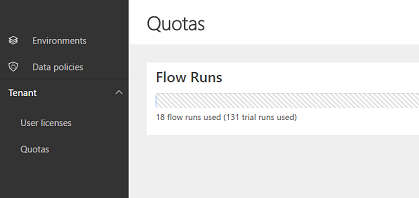
Note that trial (or free) users do not count against the organization quota, but they are included for visibility if the admin wants to understand trial usage. Second, we have added a details view to help admins understand the distribution of licenses inside their org and how each of these licenses are contributing to the quota:
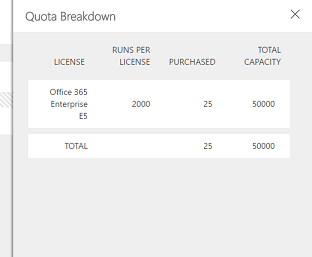
The Quota Breakdown view lists the number of runs per license, the number that are purchased, and thus what your total run capacity is. Finally, you can always purchase additional Flow Runs if your company is nearing its quota at the end of the month.
Flow properties page
Starting this week, when you go to your My flows list and select a flow you'll see a new flow details page (instead of the flow designer itself):
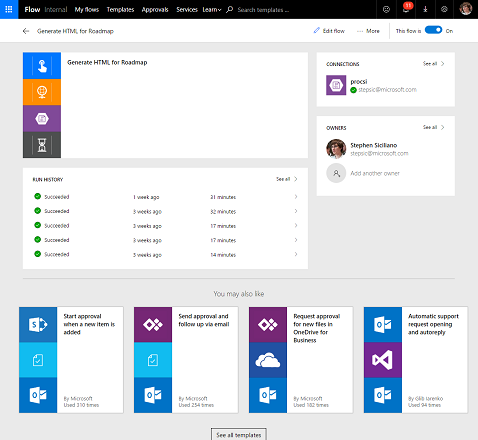
This new page gives you a quick glance at everything that is immediately relevant for your flow, including:
- The connections that this flow uses, and their status (to easily see if a connection is broken)
- Who has access to the flow
- The run history of the flow including both successful and failed runs
To edit a flow you, the the pencil icon on the My flows list, or, select Edit flow in the toolbar on the properties page. You can still access the flow runs page to get the full list of every time that the flow has checked its trigger or failed by selecting the See all link on the Run history tile.
Use different HTTP methods and add path segments for the Request trigger
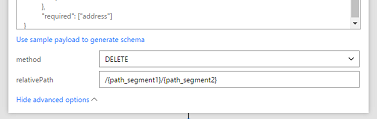
The Request trigger is an easy way to have your application invoke a flow directly. The Request trigger now has the ability to define a different method, so you can use an HTTP GET or a PUT for example. In addition, you can define additional path segments that get added to the URL and then use the values the user passed in those segments in your flow.
Two new services
Finally, we have two new partner services available this week:
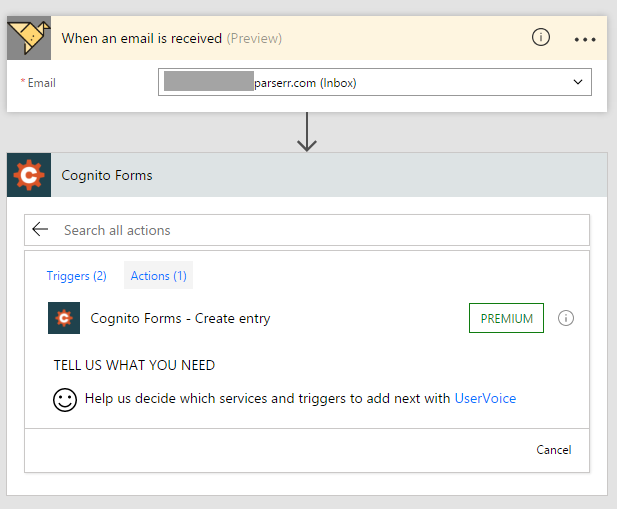
- Parserr – Automate your business and eliminate unnecessary manual data entry.
- Cognito Forms – Cognito Forms lets you easily build powerful online forms, such as surveys, order forms, registration forms and more. For free.