Advanced | Flow of the Week: Send multiple attachments on a single email


Hello, and welcome to another post in the Flow of the Week series. In case, this is the first article you are reading – Flow of the Week is a series of blog posts, which illustrates use cases and scenarios that can be automated using Microsoft Flow – so be sure check out other posts in this series.
Today, we are going to be looking at one of the common asked questions by our customers, sending multiple attachments on a single email. To illustrate this, we will be creating an item on a SharePoint list and attach a few files to it. Our flow will trigger, on this new item being added. The flow will get all the attachments on the item, construct an array of all the attachments and finally we will use this “array of attachments” and send it out on an email. Let’s dig in to it, shall we?
Let start by adding a trigger – “When an item is created” and selecting the correct SharePoint Site and List.
Please ensure that you already have SP List created that allows storing multiple attachments on the items in it.

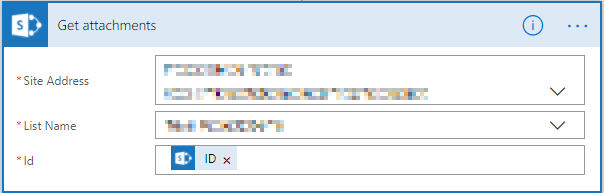
After adding the trigger, we need to fetch all the attachments added to the newly created list item. We should, hence, add the “Get attachments” action. The Site name and List name remain the same from the previous step. We want to then pipe the output “ID” from the trigger, to the input ‘ID’ field.
Now, that we have a handle on all the attachments – we must store these in a single array. Let’s start by initializing an array.
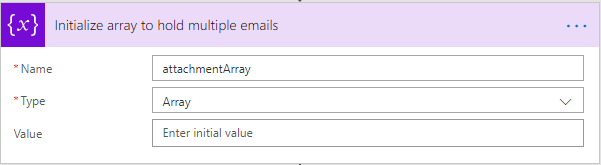
Once the array is initialized, the next step is fetch and store the attachment contents in the array. This is a bit tricky to setup, so be careful to follow the instructions to the T.
-
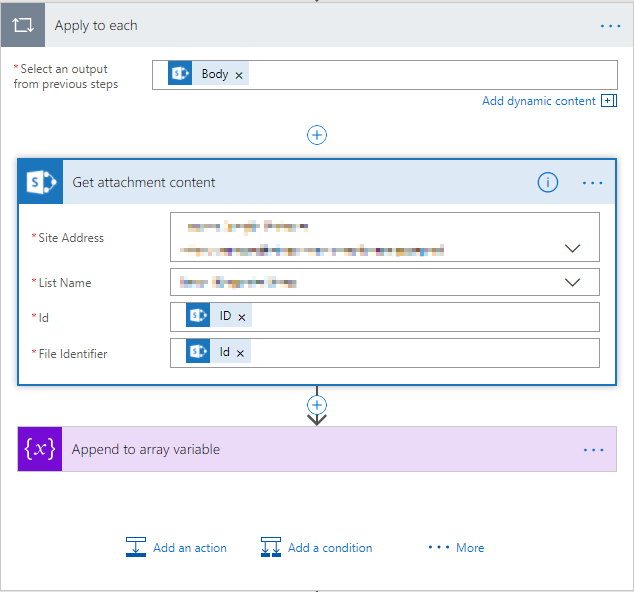
Start by adding a “apply to each loop”, then chose the “body” output from the “Get Attachments”
-
Next add “Get attachment content” action inside the loop. The SP site name and list name don’t change.
-
For the ID field – select ID output from the “When an item is created” trigger
-
For the file identifier field – Select the Id output from the “Get Attachments” action.
-
-
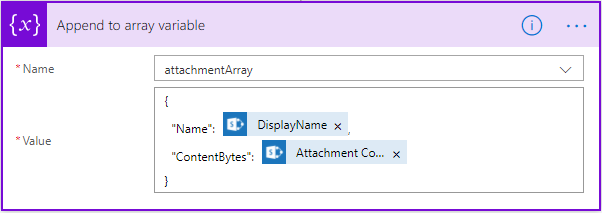
Next, we want to start adding to the array we just initialized. Set it up as shown below
Let’s revisit what we have setup so far –
-
For a new item created – we are first fetching all the attachments that were added to the item.
-
The “Get attachments” action returns the file names of the attachment and a corresponding “file identifier”. It does NOT return the contents of the attachment.
-
The attachment content is fetched separately using the “Get attachment content” action.
-
Our array, contains the attachment item with two properties – Name and ContentBytes. We are assigning the DisplayName, retrieved from “Get Attachments” action to the Name property and the Attachment Content, retrieved from “Get Attachment Contents” action to the ContentBytes property.
Now for the final step, we need to send the email with the attachments array we just constructed.
This step is straightforward, add an action to send an email – using your favorite email connector and pipe in the attachmentArray output to the attachments input field.

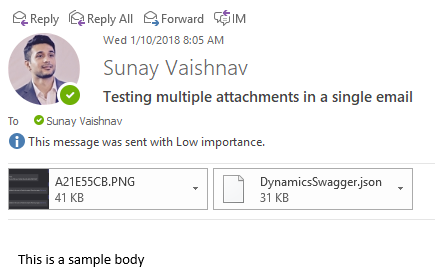
That’s it! Once you have successfully created and saved your flow, be sure to test it by exercising the trigger. You should see an email like as shown in your inbox with multiple attachments sent on a single email.
That's it for this time. If you have any questions, suggestions or feedback about flow, please feel free to post below in the comments, in our community, or reach out on Twitter.