Advanced | Flow of the Week: Get an email with the members of your Office 365 groups


Are you the owner of an Office 365 group that anyone can join, but you still want to, at a glance, understand who is on the group and get some details about them? This flow is for you!
For this scenario, we’ll create a Button flow that collects a search term from you. It will then find all of the Office 365 groups you own that contain that search term, and list the users for each of those groups. You’ll then get an email with a table of all of the users in each of those groups, along with some details about those users.
This flow will demonstrate some advanced concepts, including appending to a string variable, building an HTML email, and nested Apply to each.
Starting the Flow
The flow will start out simple with a Button trigger.
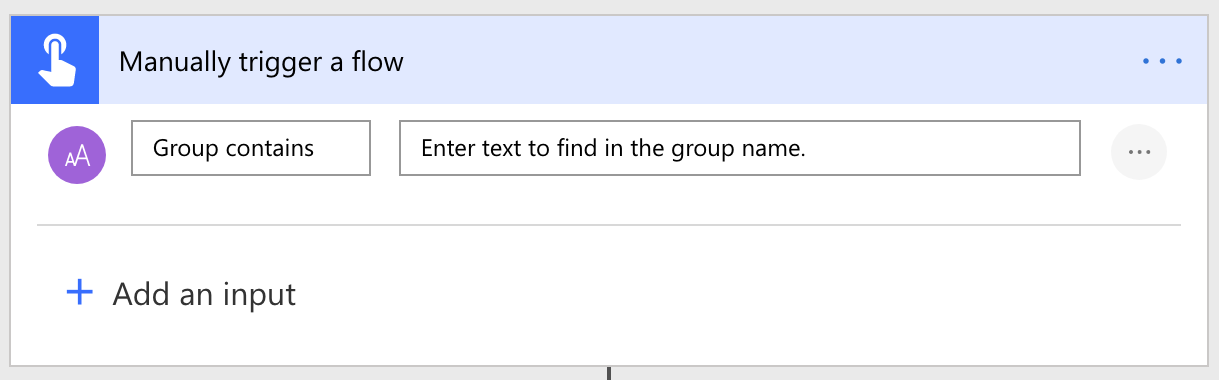
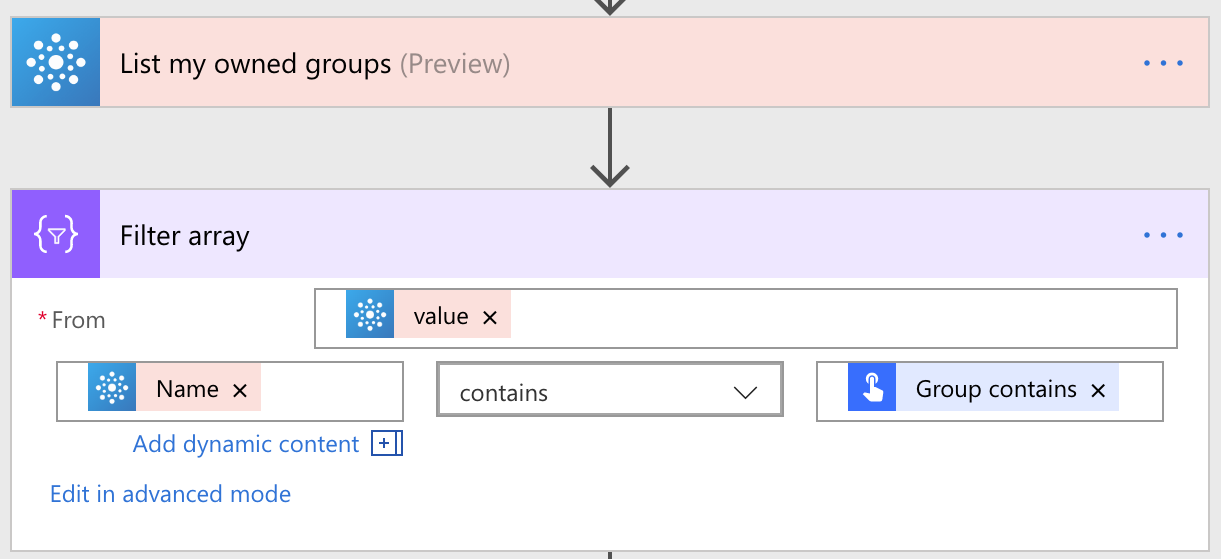
On the Button trigger, we’ll have one input to collect a search term. Next, we’ll List my owned groups in the Office 365 Groups connector – and then use Filter array. In the Filter array, on the left side use Add Dynamic Content to find the Name of the group. Use the contains operation in the middle, and then use Add Dynamic Content to find the input field you added in the Button trigger. This will return an array that only contains Office 365 Groups which contain the search term you’ll enter when you run the button.
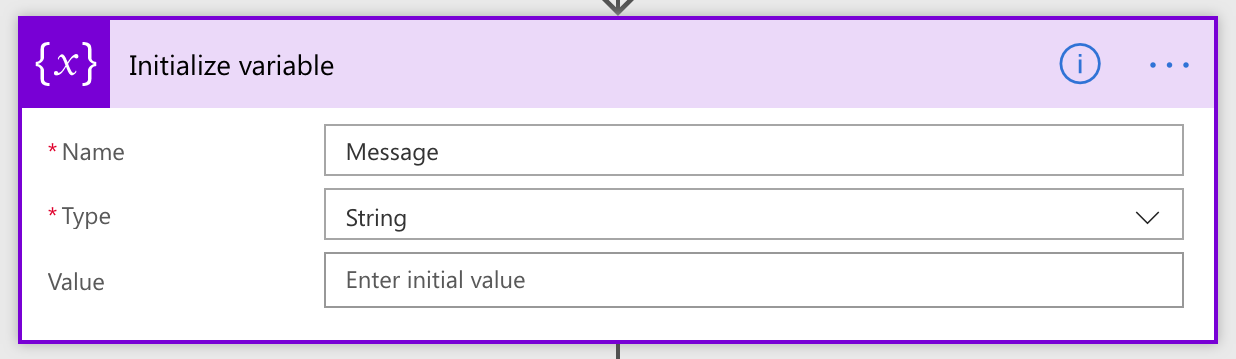
Using a string variable
We will build the HTML email by creating a string variable – a variable is an easy way to collect data each time an action happens inside of a loop. Whenever you use a variable, first you need to use the Initialize variable action. You can name your variable whatever you like, but you need to be sure to set the Type as String.
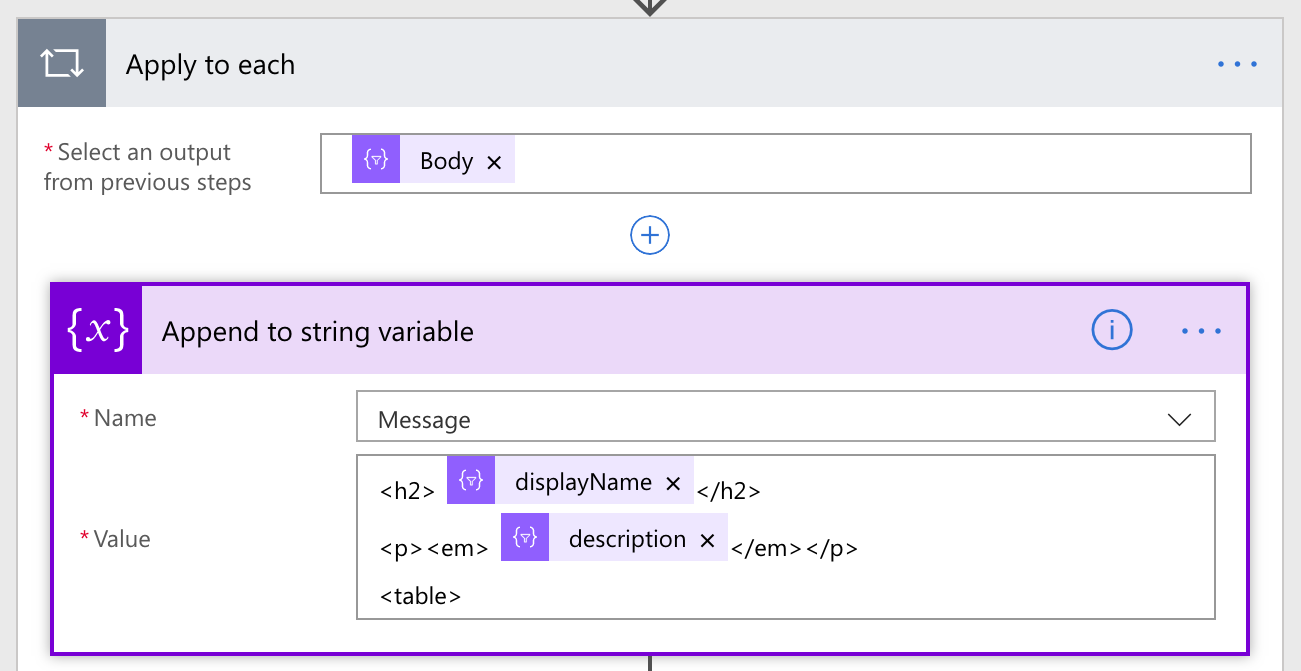
The first loop we are going to create is over each of the Office 365 groups returned by the Filter array action. To add this, select New step and then More and Apply to Each. Add dynamic content for the Select an output from previous steps, and you’ll see the original list of groups from the first action, and the filtered list of groups from the Filter array action. Select that list.
Inside the Apply to each we are going to start constructing the email. For each group we’ll add a heading and the description by using the Append to string variable action. All you need to do is select the variable you created earlier, and then include the content that you want, such as the displayName of the group. Also, for the next step add a new <table> tag at the bottom of the variable.
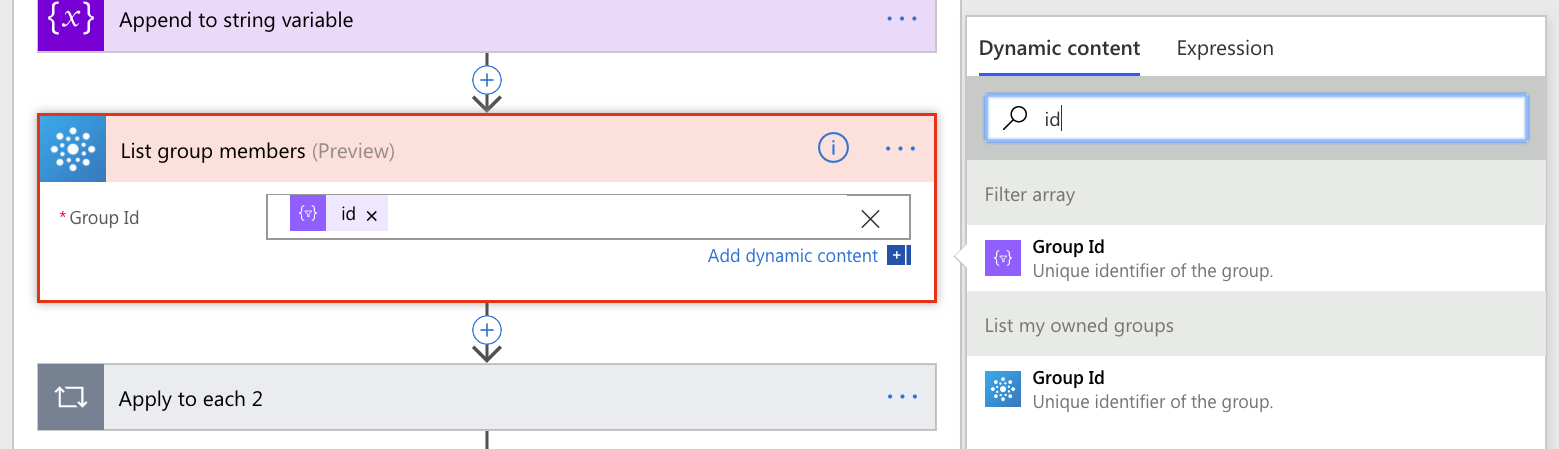
Getting the group members
Now that you’ve started creating the email, you’ll need to actually retrieve the members of the group. Use the List group members action. In the Group Id field, do not select one of the items in the dropdown, but go to Enter custom value instead. This allows you to Add dynamic content and select the Group Id from the Filter array action (you should search in the Dynamic content window to find this).
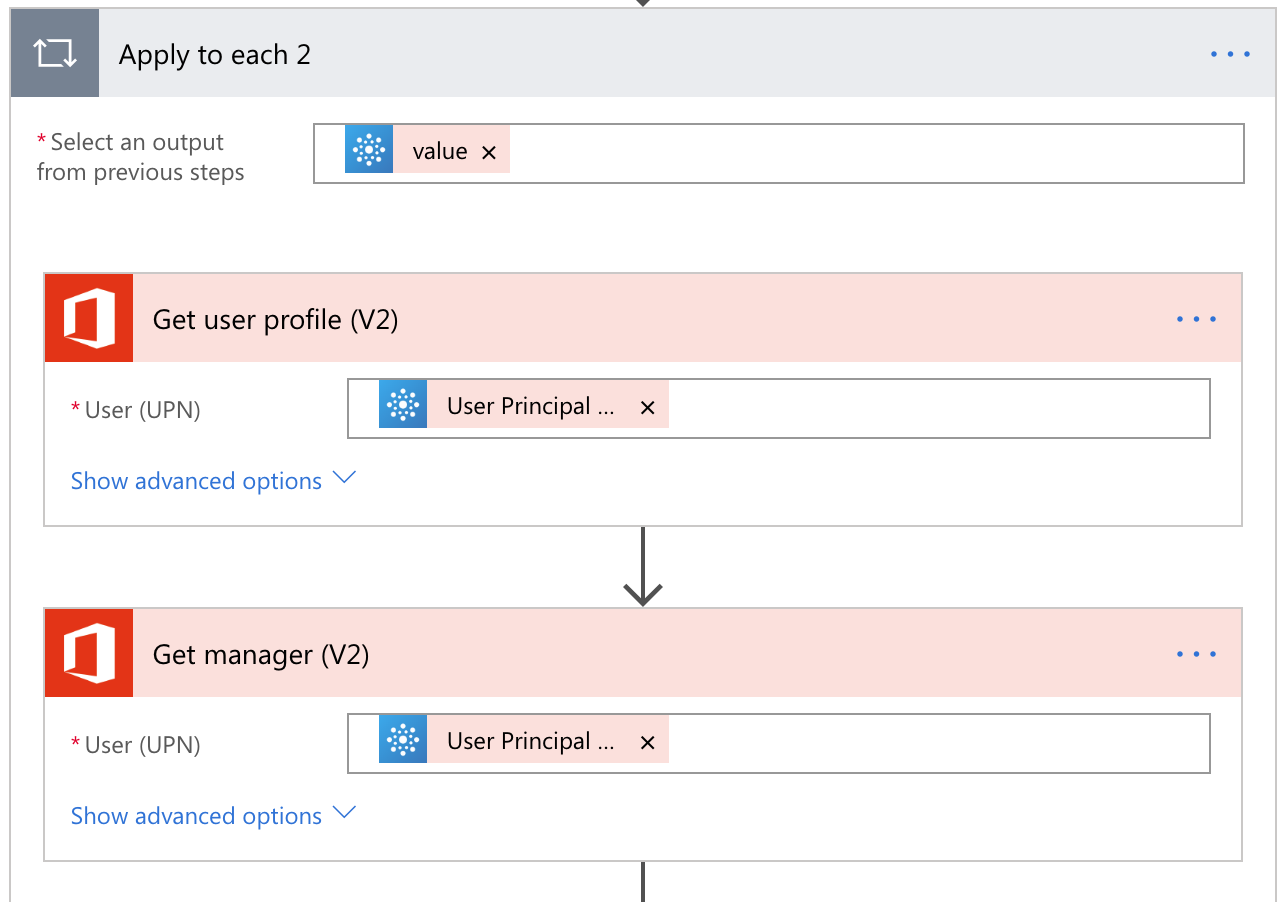
Add the second Apply to each loop like you added the first, but this time select the list from the List group members. Inside this loop you’ll add two actions to get more details about the user:
- Get user profile (V2)
- Get manager (V2)
For both of these steps select the User Principal Name from the List group members action.
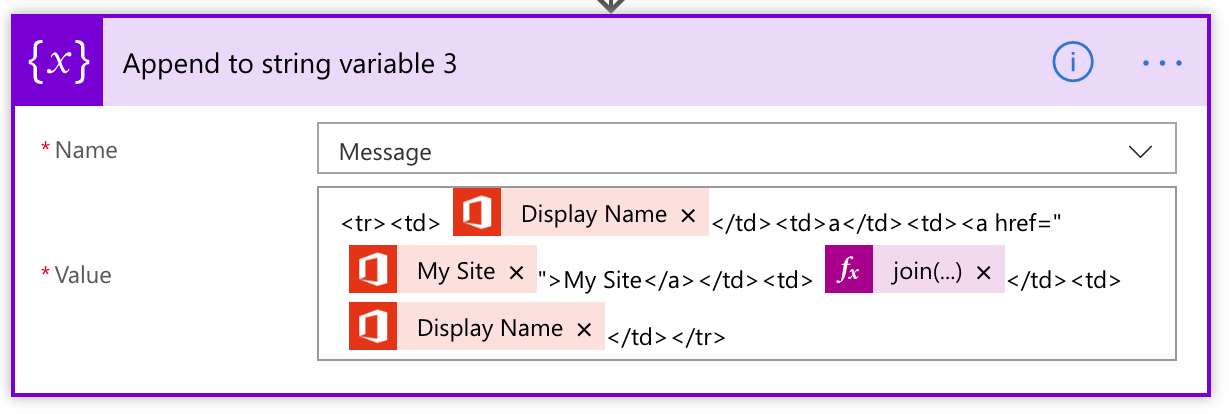
The last action inside this second Apply to each loop is to Append to string variable again. This time, you’ll add the contents of each table row you want inside the email. You can include any fields from the user profile, such as a link to their My Site, About Me, or their Hire Date.
Working with lists from Get user profile
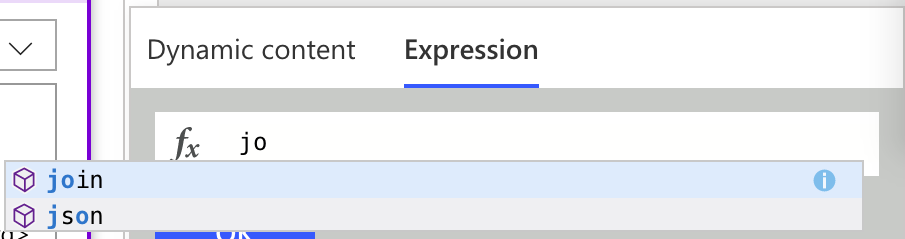
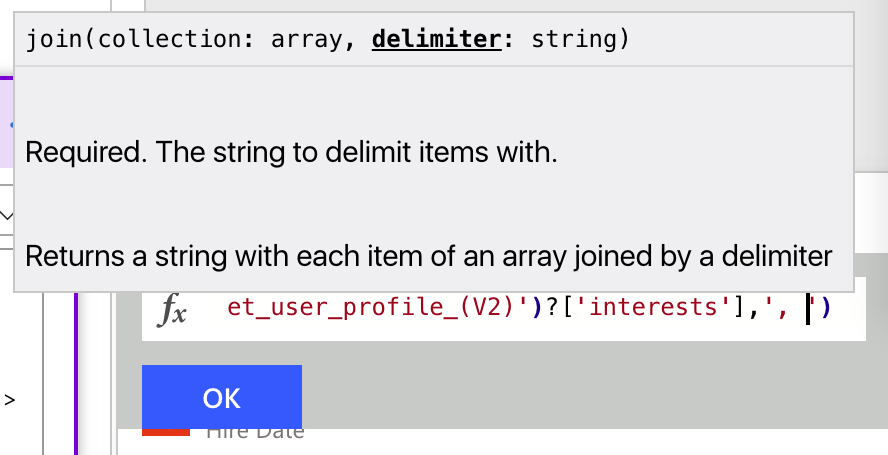
Some of the properties output by Get user profile are lists – for example a list of interests, schools or skills. You can use the Join action to turn this list into a single string that you can use in the email. You can also use the join() expression to do it inline without having to create a different step. For example, I wanted a list of interests and a list of skills and interests, I’ll show how to do that in an expression.
- Select Add Dynamic content and select the Expression tab
- Type join() – you’ll see Intellisense for autocomplete
- Switch back to the Dynamic content tab and find the outputs from Get user profile
- Select the Interests output (or any of the other lists) – this should add the interests array into the join() expression
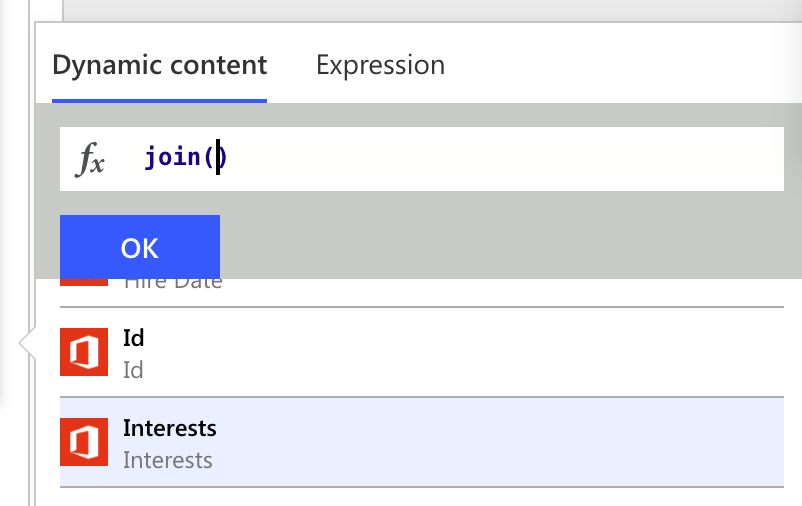
- Finally, for the second parameter of join you need to add a delimiter – something simple like a comma and space works, so you can enter ', ' – be sure to include the single quotes
- Select OK – you should see the expression token in your action
Wrapping it up
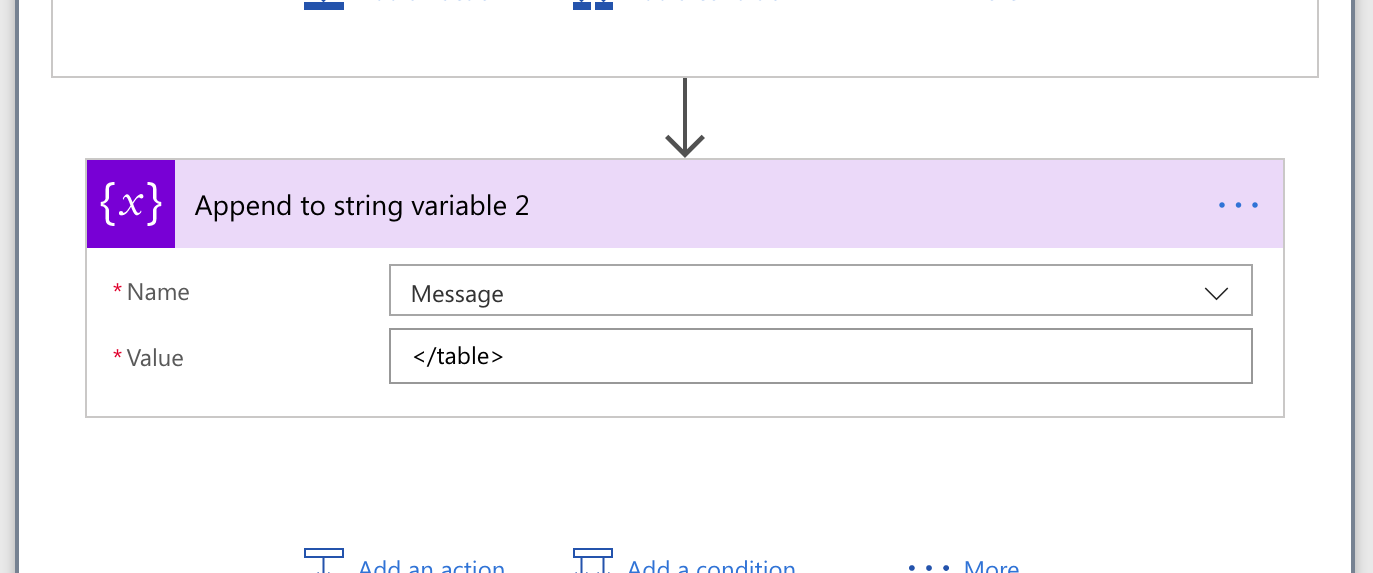
You’ll need to add one last action into the original Apply to each. Because the first Append to string variable created an HTML table, you’ll also need to close out that HTML table with another Append to string action.
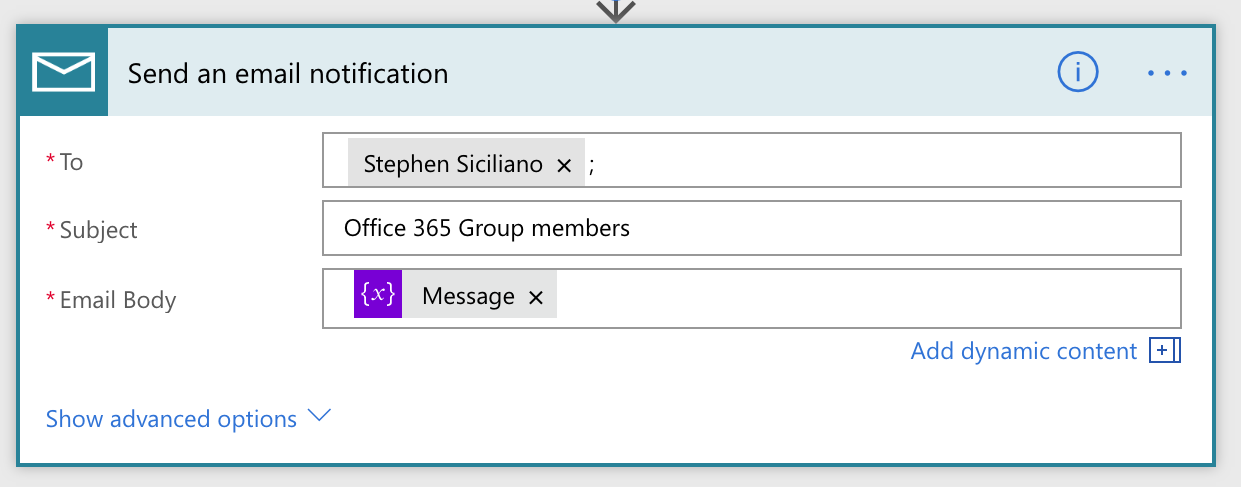
Now you’re ready to send the email. You should add that action at the very bottom of the flow (if you added it in the Apply to each you’ll get more than one email). In the Send an email notification action you can fill out the To and Subject fields with whatever you’d like. In the Email Body, all you need to do is use the Message variable – it already has all of the groups and tables of their members, so you don’t need to add anything else to the Body.
Finally, if you want to run this flow from your phone or your desktop, just enter the name of an Office 365 group you own, and you’ll immediately get a list of all of the members of that group – with helpful details about those members!
