Solutions in Microsoft Flow


In a recent announcement, Microsoft shared news about a new Application Lifecycle Management (ALM) capability for PowerApps and Microsoft Flow. This new capability is built upon the Common Data Service solution system.
In this blog post, we will share more details about how Microsoft Flow makers can use Solutions to bundle related flows (and apps) within a single deployable unit.
Application Lifecycle Management
Previously, we provided the ability to export and import a single flow from one environment to another environment. While this feature was useful for promoting individual flows between environments, it required many clicks to move multiple flows.
We have also received feedback from our customers regarding the ability to logically group related flows as they are being built and managing them. For example, you may have multiple flows that are part of a project you are working on. While working on, or managing these flows, you don’t want to have to scroll and search for these flows when you want to access them.
Solutions address deployment needs by allowing you to export and import a set of flows (and apps). In addition, you can organize these flows within a single ‘container’ which simplifies navigating and managing these flows.
Accessing Solutions
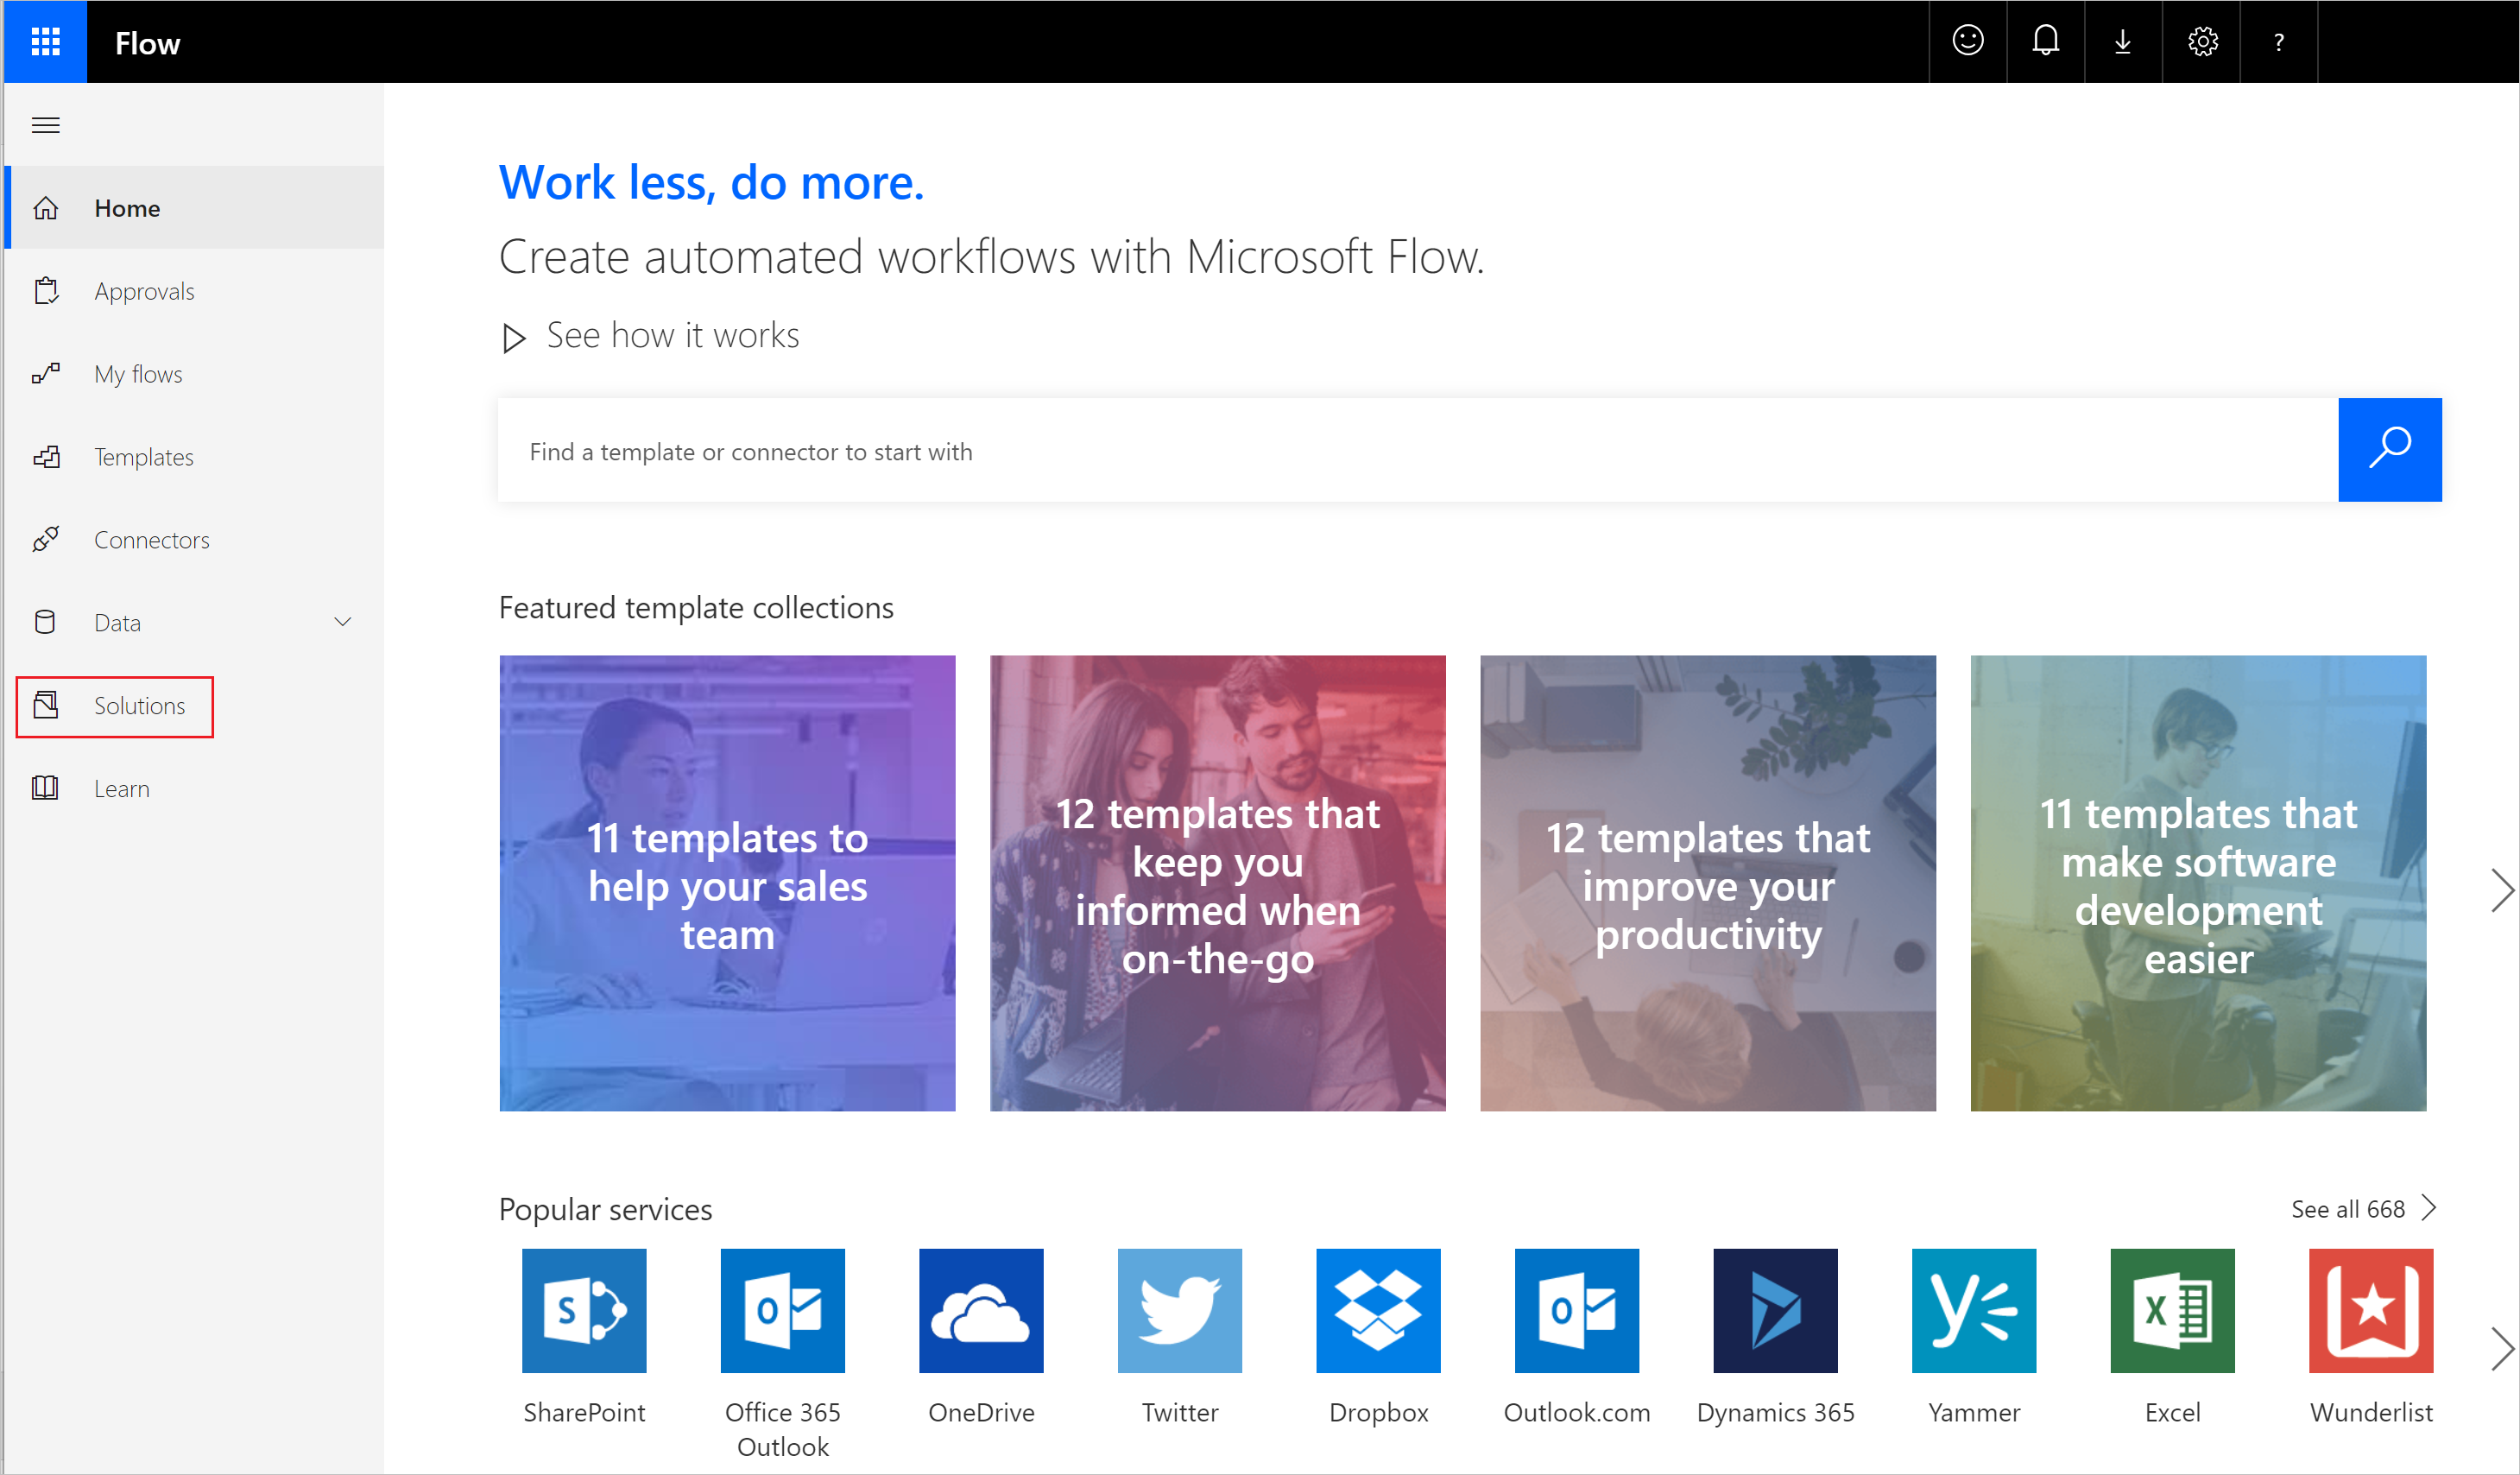
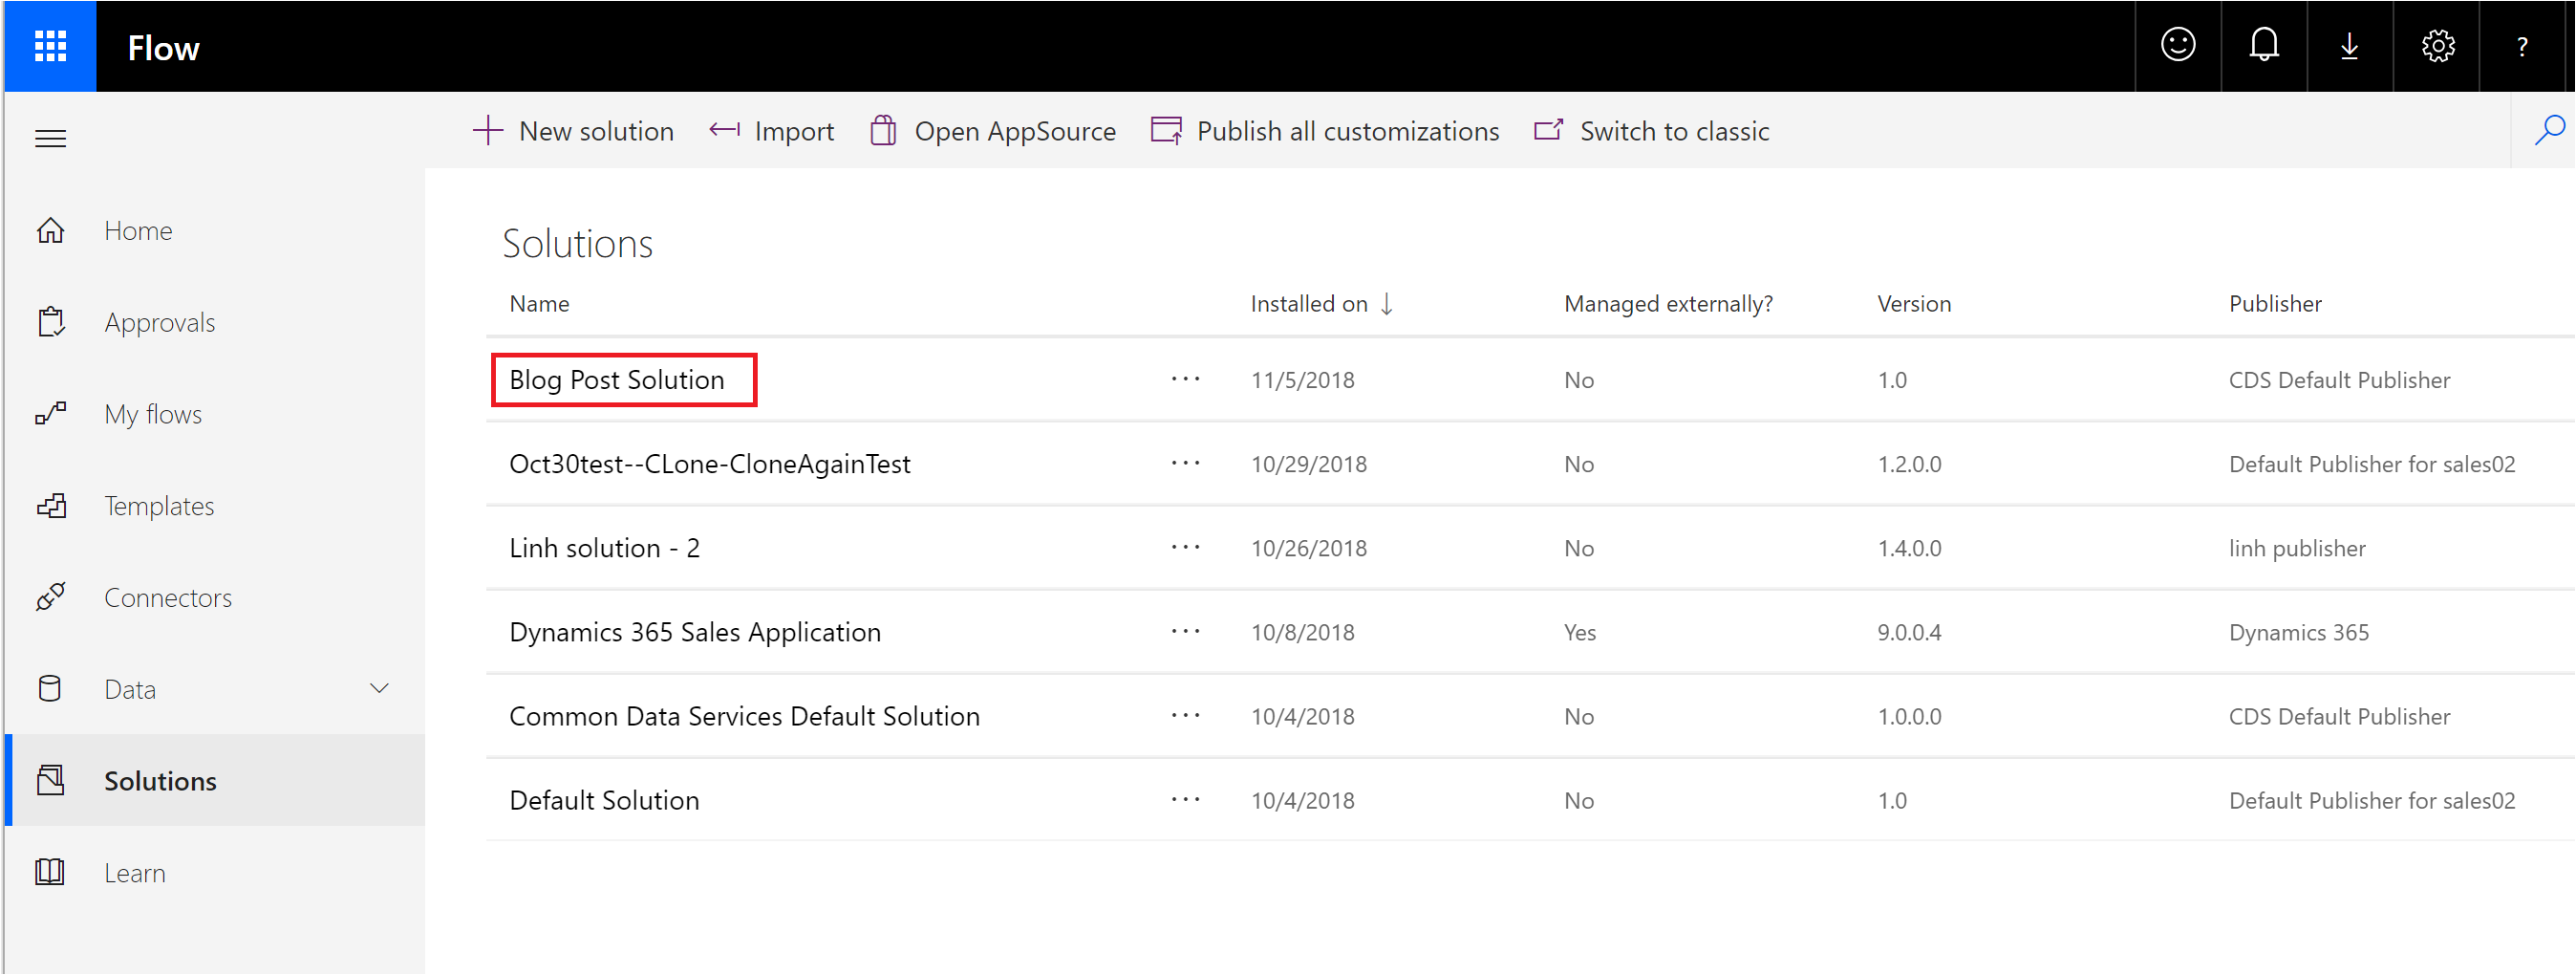
For customers who meet the environment prerequisites (see more below), a Solutions link will appear within the left navigation of the Microsoft Flow maker portal.
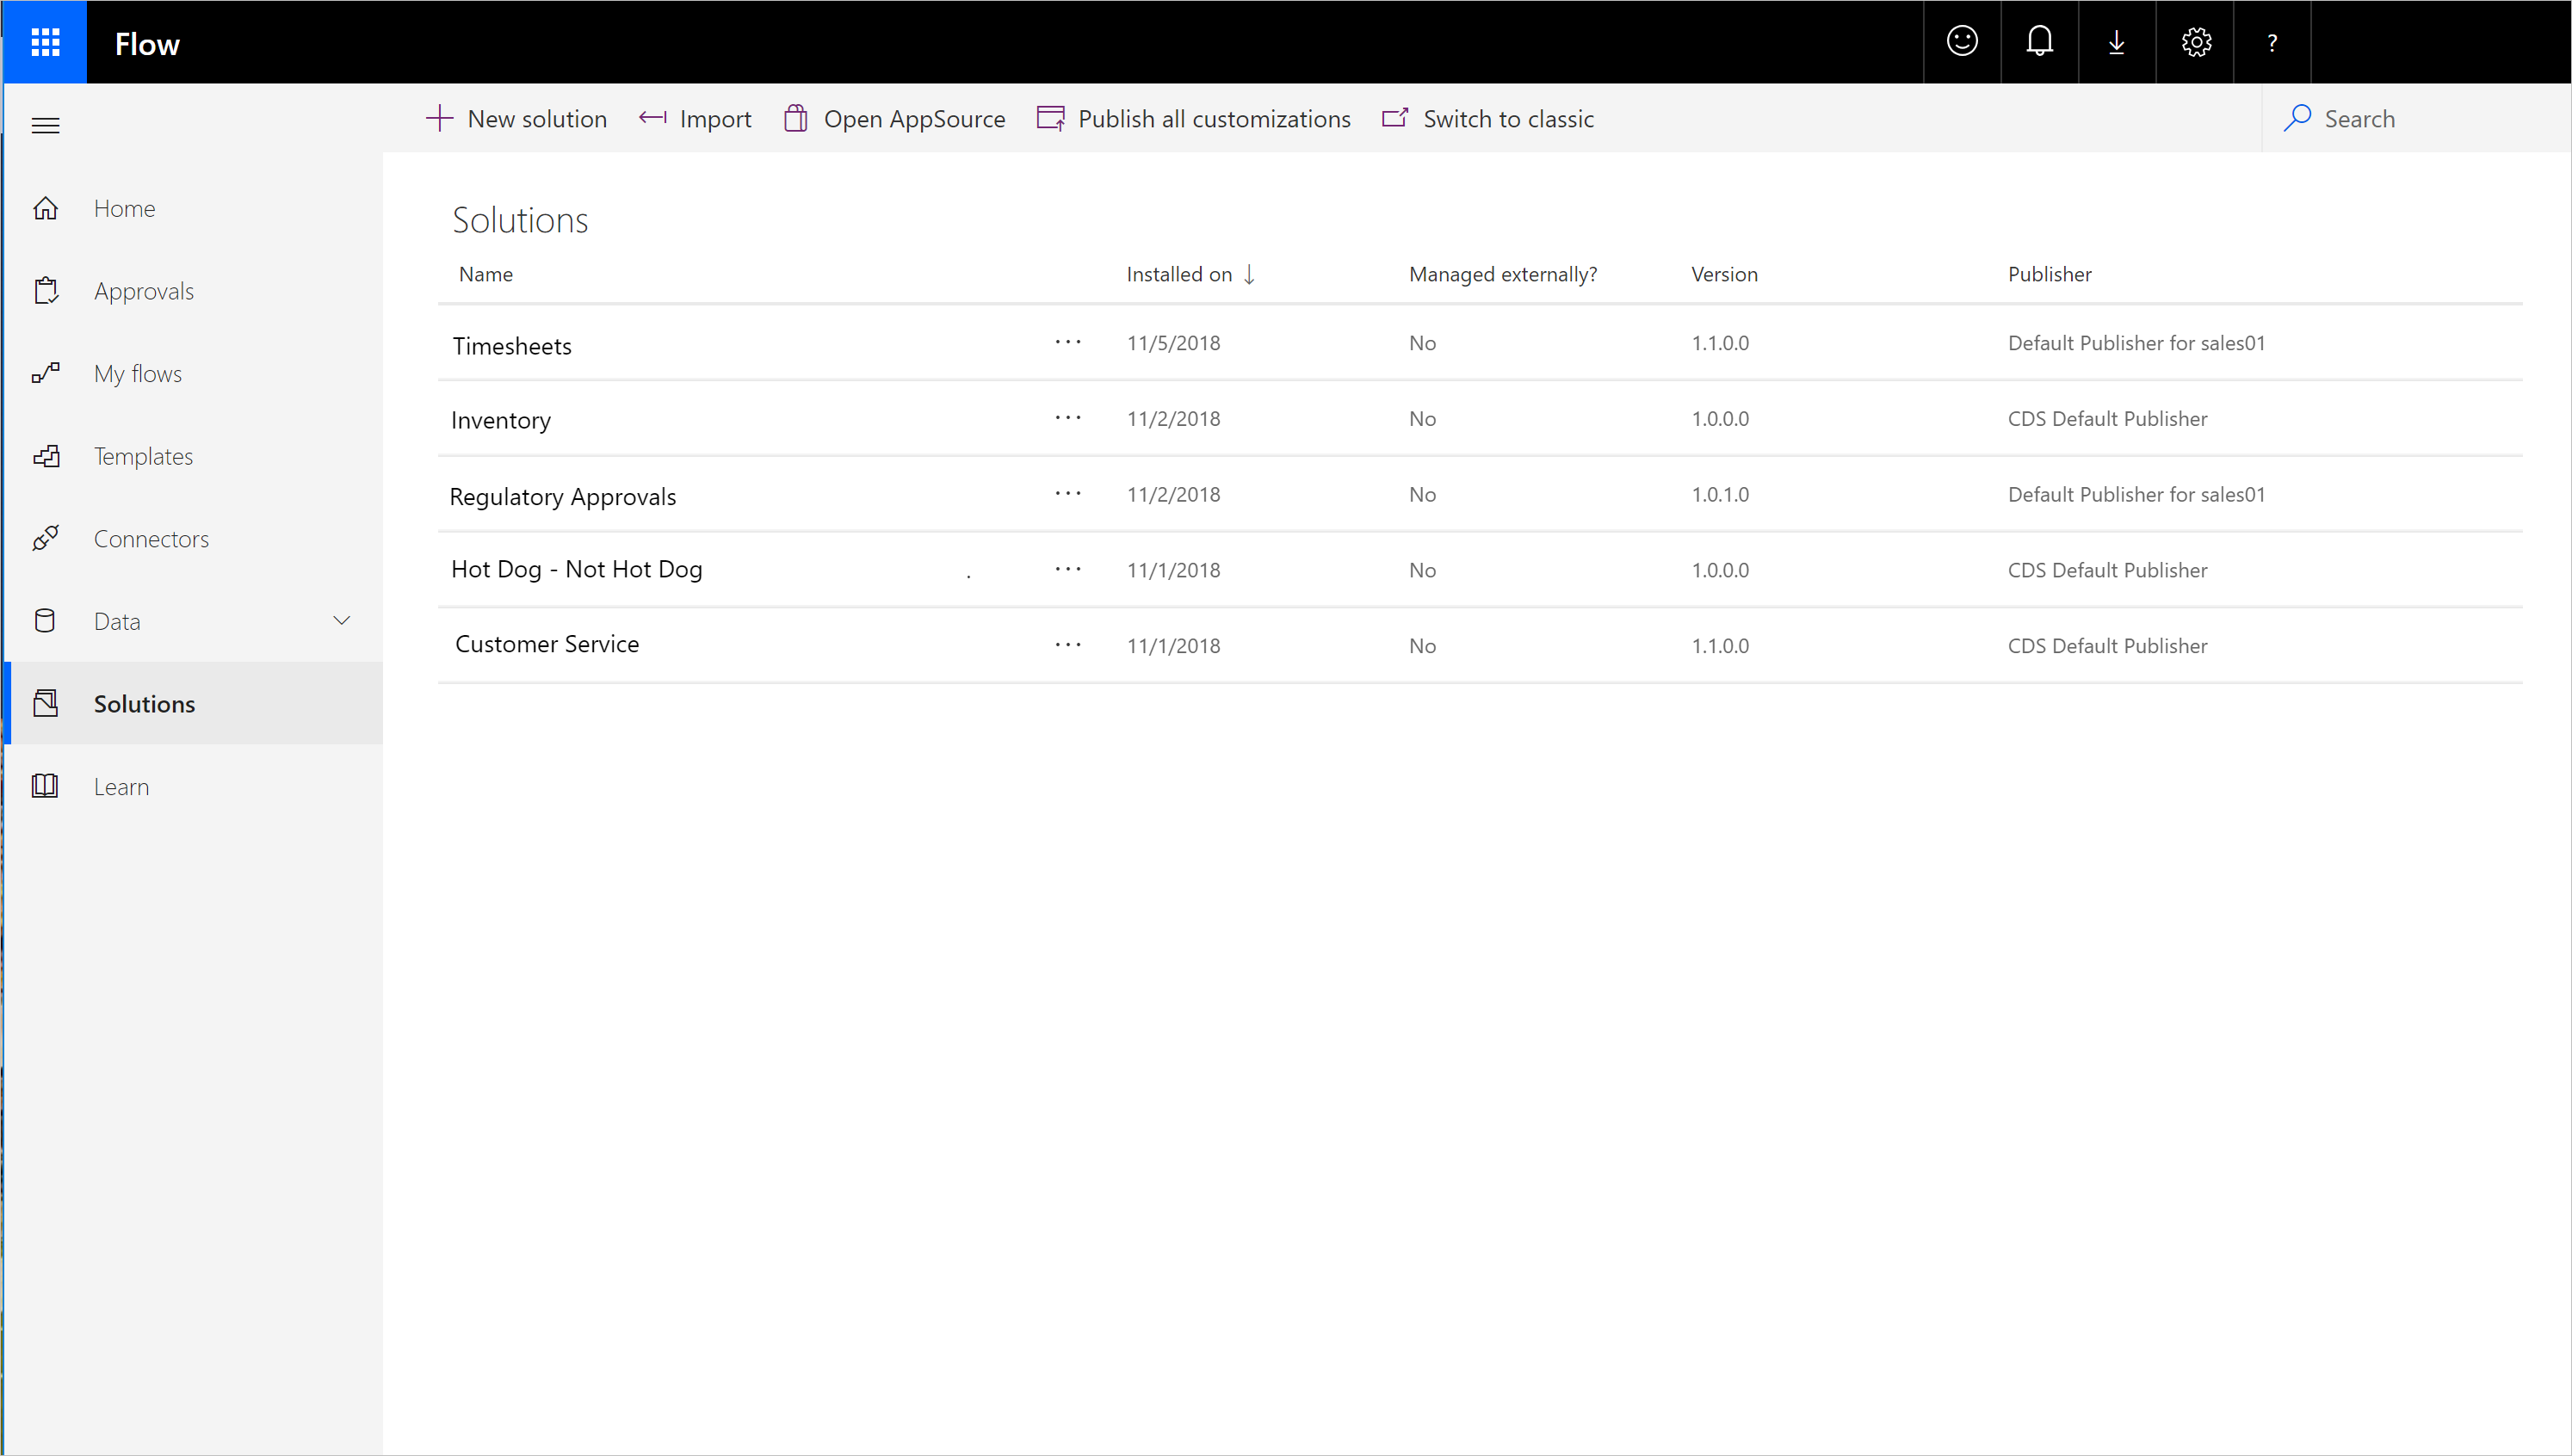
The Solutions experience will be loaded where we can find our deployed solutions. As part of this experience we can determine the Date it was installed on, if it is Managed externally, Version and the name of the Publisher.
Creating a new Solution
From the Solutions experience, we have the ability to create a new solution by clicking on the New Solution button.

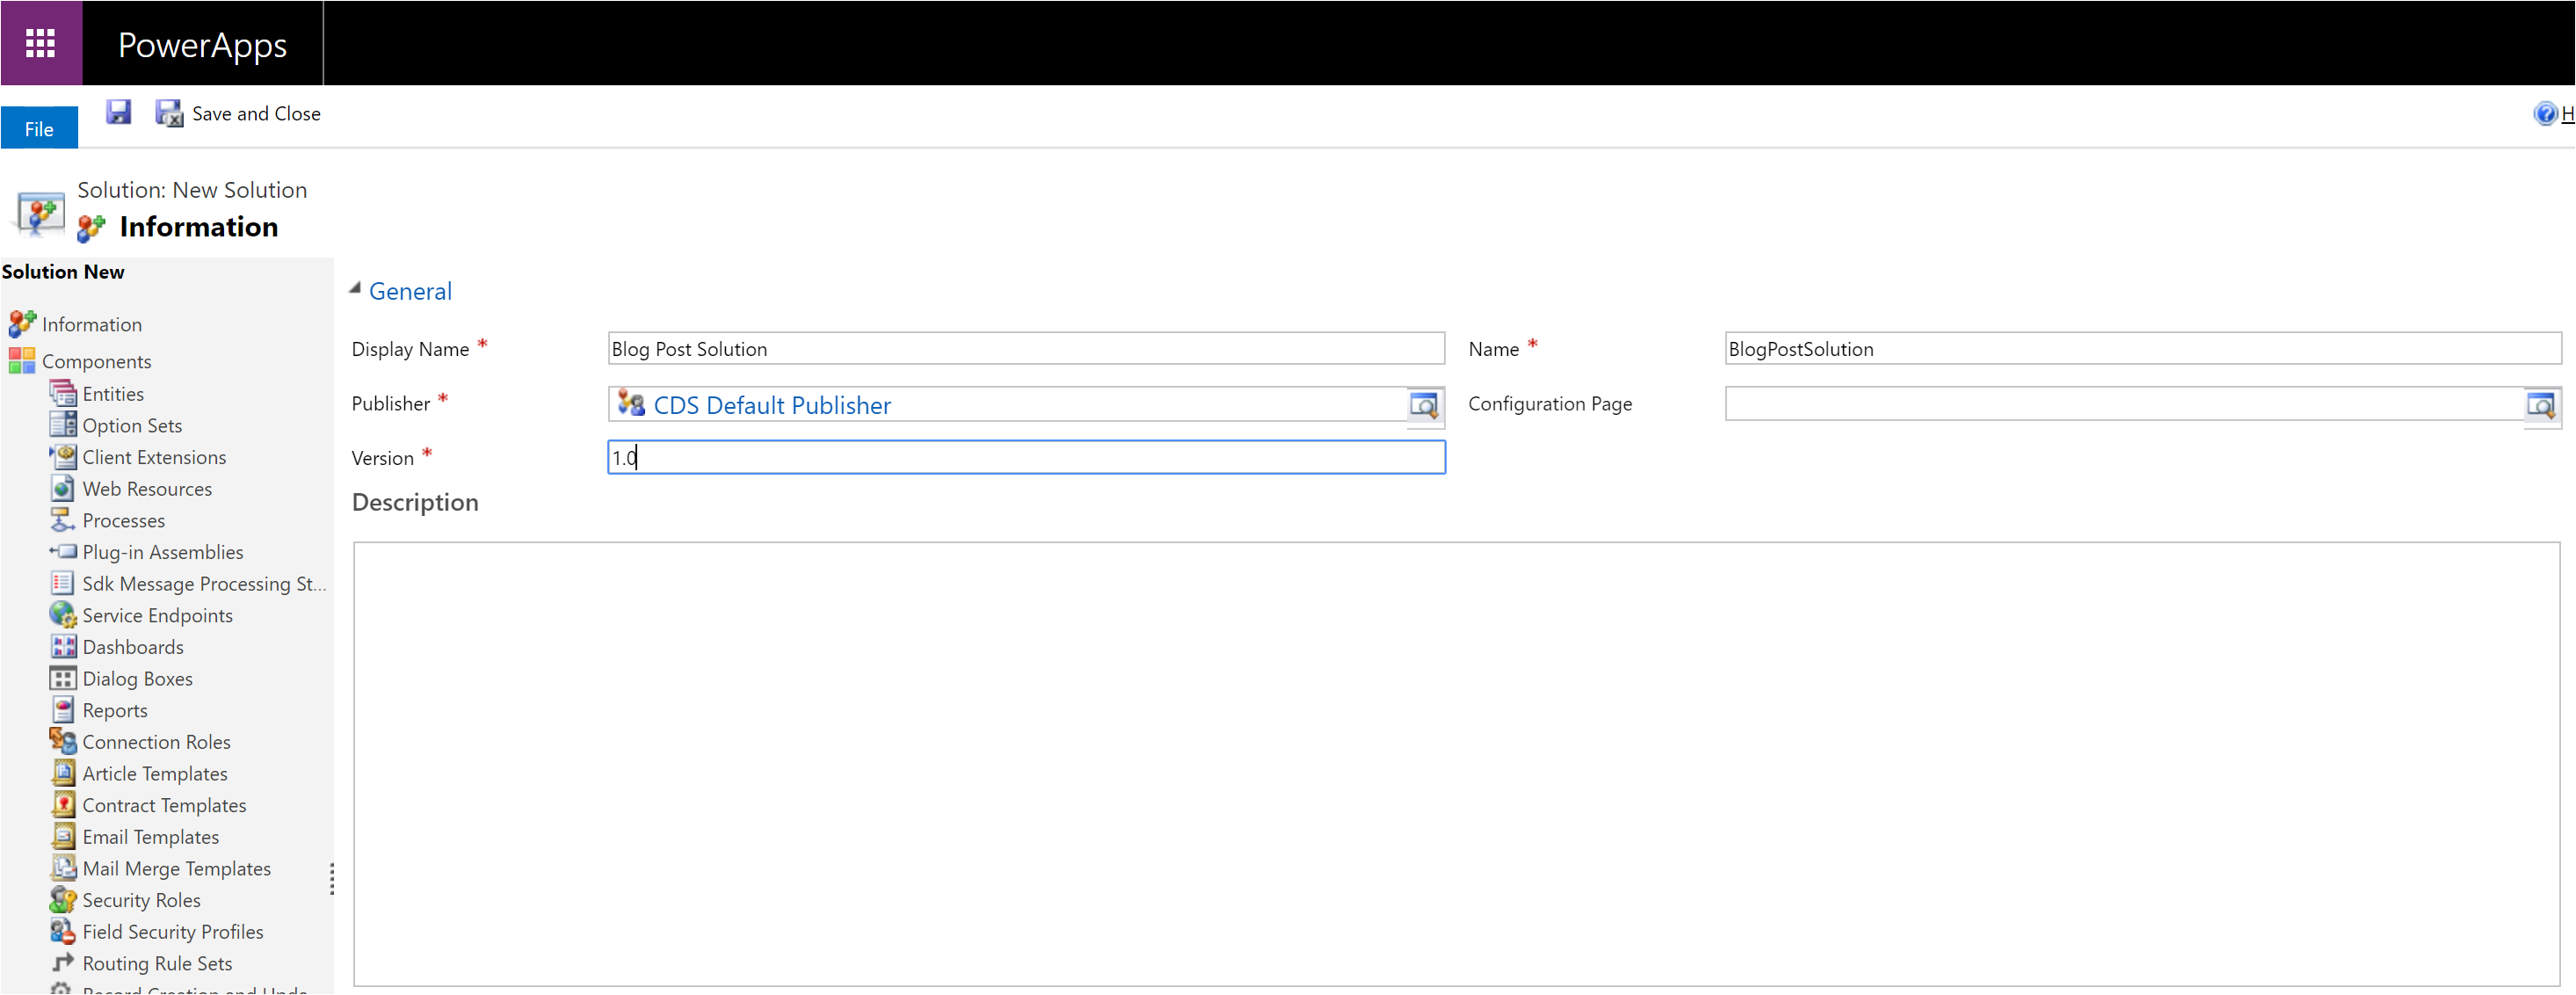
A new tab will open where we can provide the Display Name, Publisher and Version of our solution. Once we have provided these details, we can click Save and Close.
Adding flow(s) to a Solution
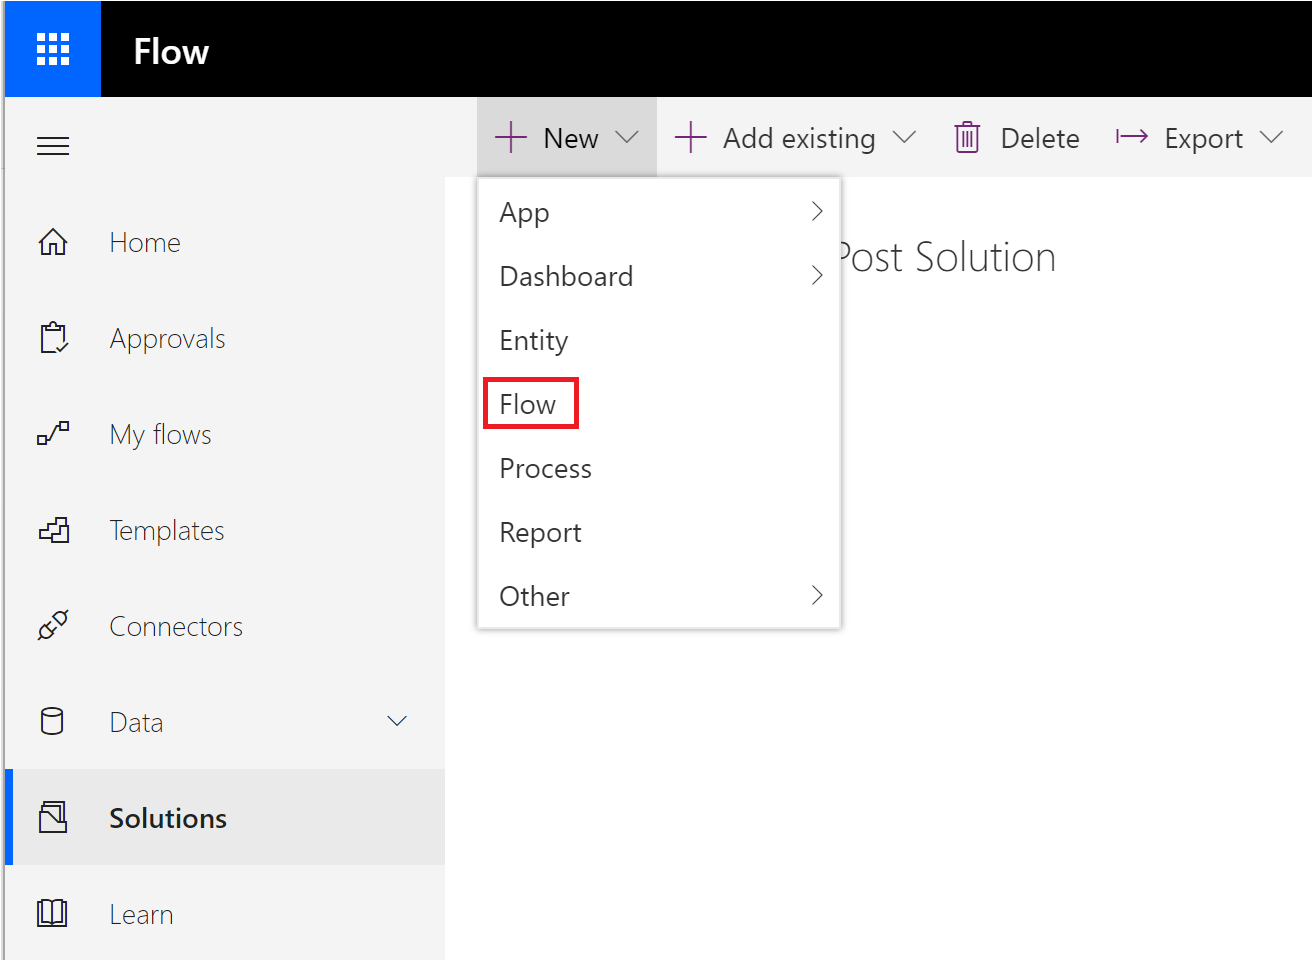
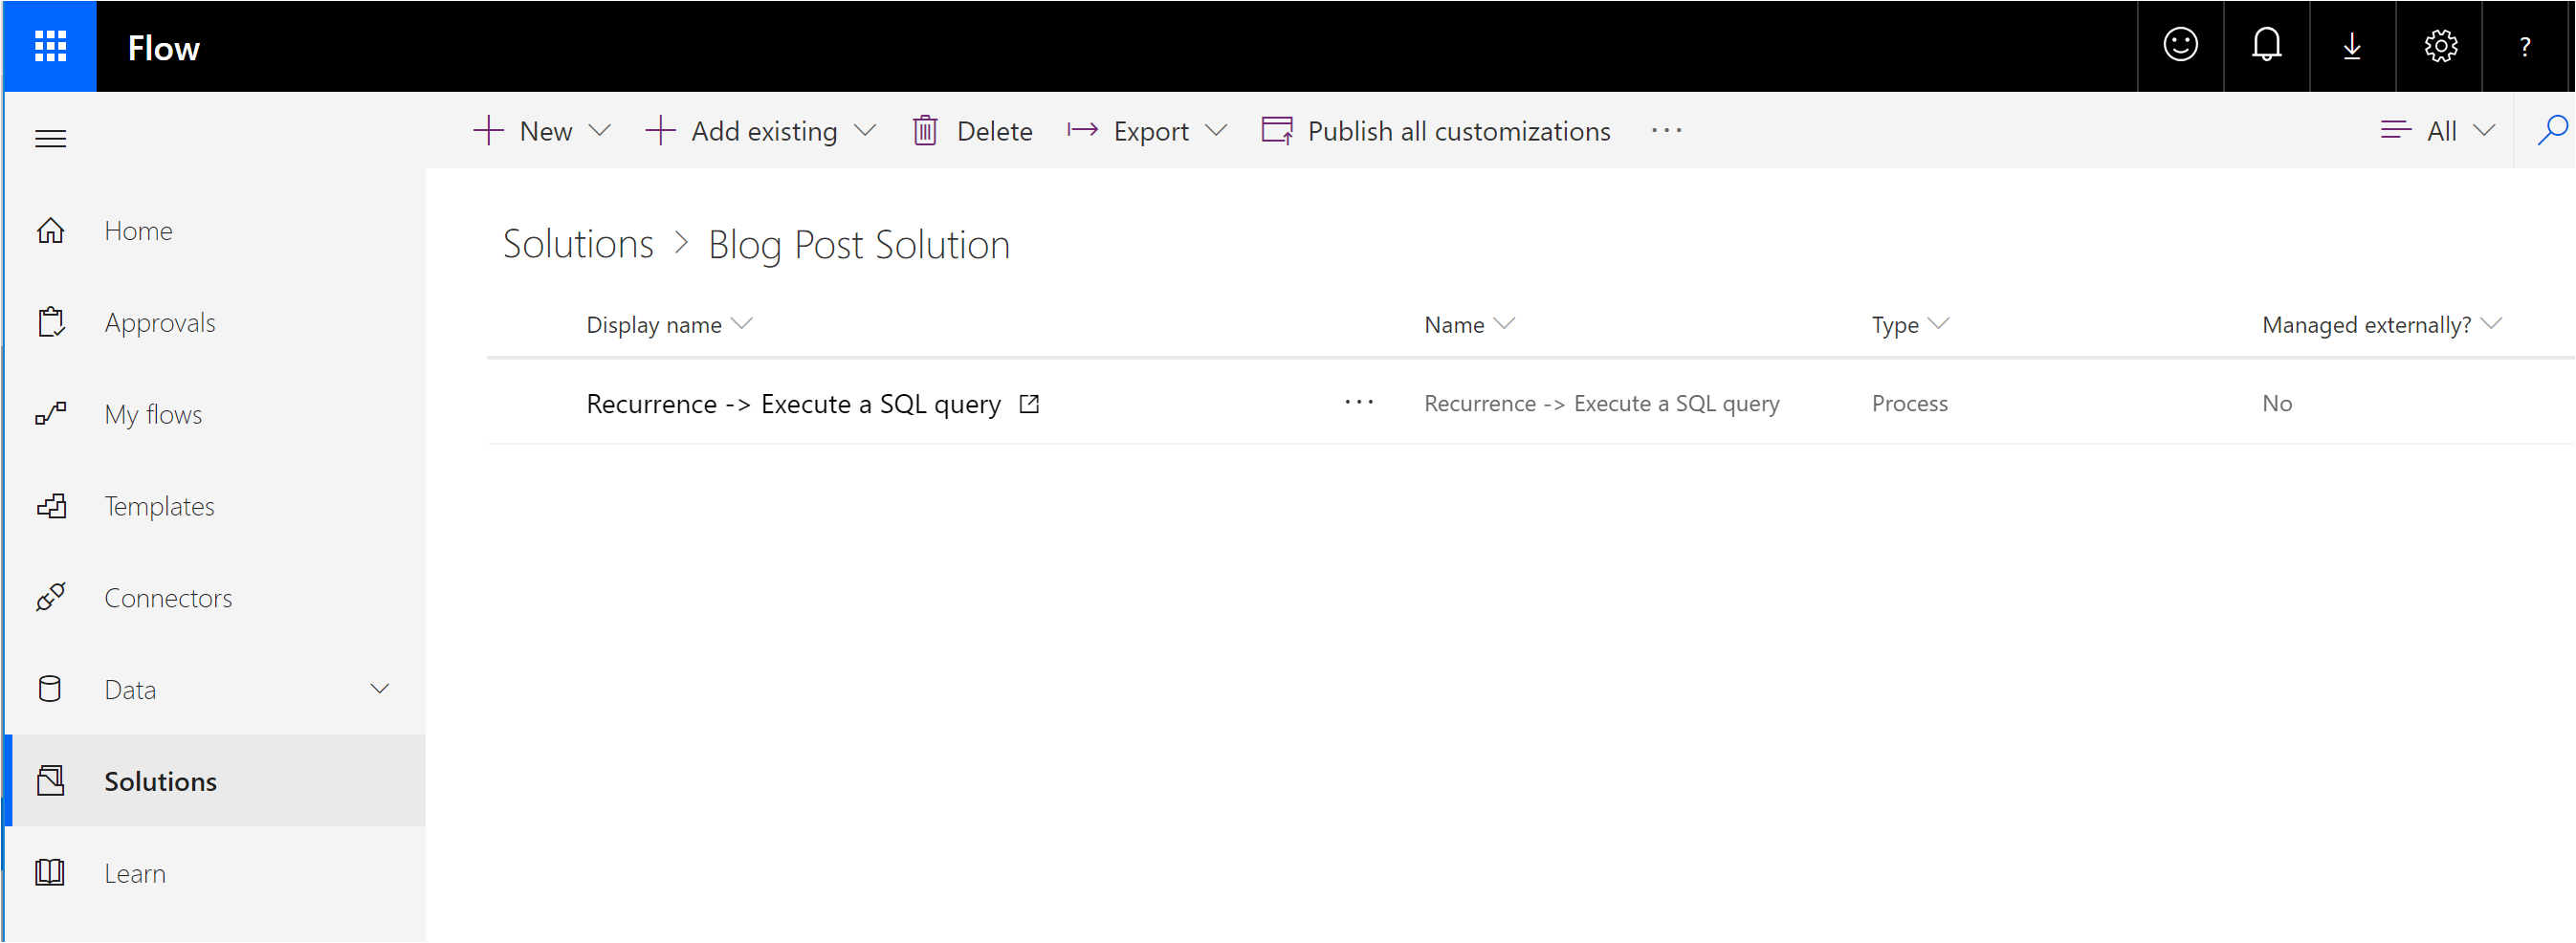
From the Solutions experience, we can click on our newly created solution and navigate to its default view. A context-aware menu will appear that allows us to add New and Existing assets to our solution. Click on New – Flow to add a new flow to our solution.
A new tab will open that will take us to the flow design surface where we can construct our flow and add our related trigger and action(s). Once we are done editing our flow, we can press the Save button to save our flow.
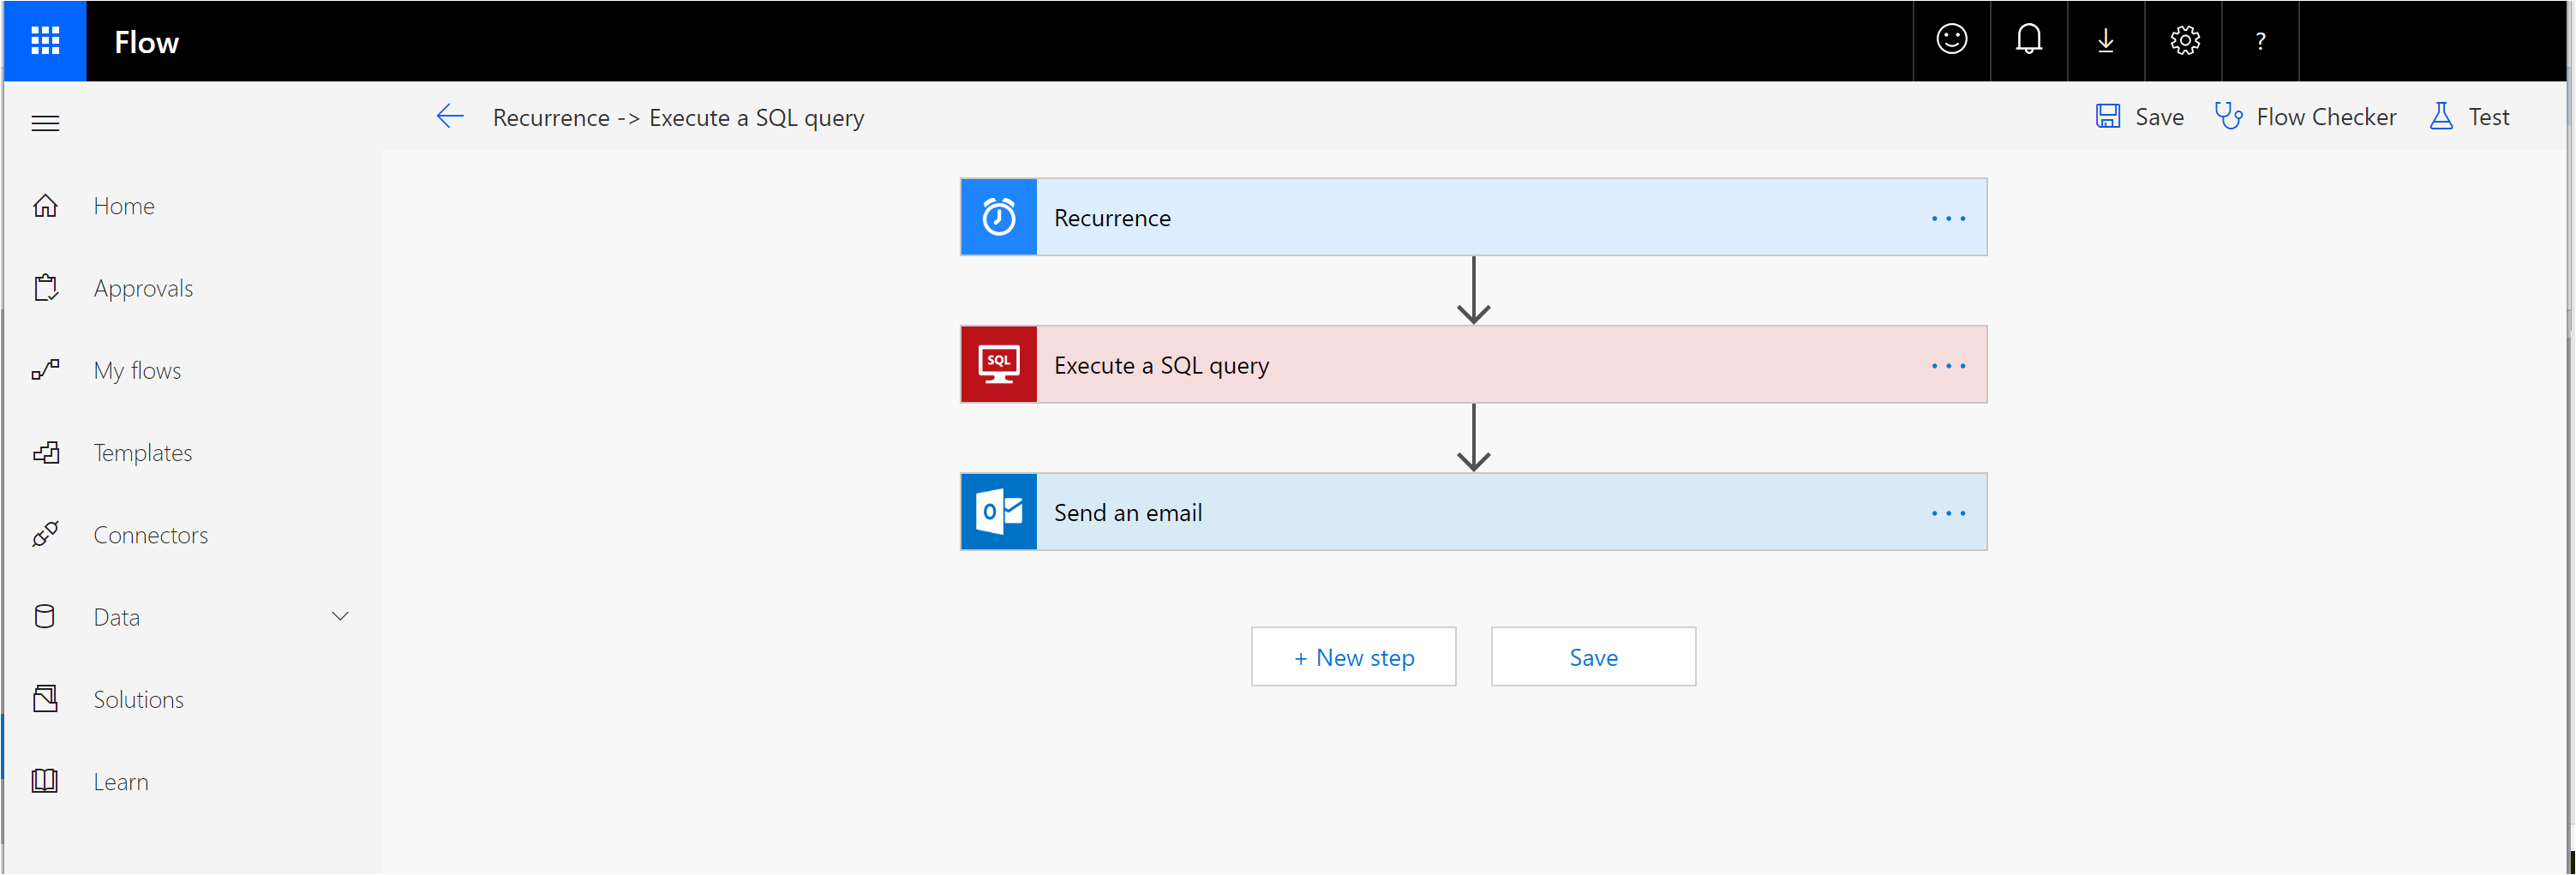
Once we have saved our flow, this flow will be part of our solution.
We can repeat these same steps to add subsequent flows to our solution.

Exporting our Solution
After validating our flows work in our test environment, we now want to promote it to our production environment. We can export our solution by finding it in our Solutions experience, clicking on the …, selecting Export and then clicking on As unmanaged.
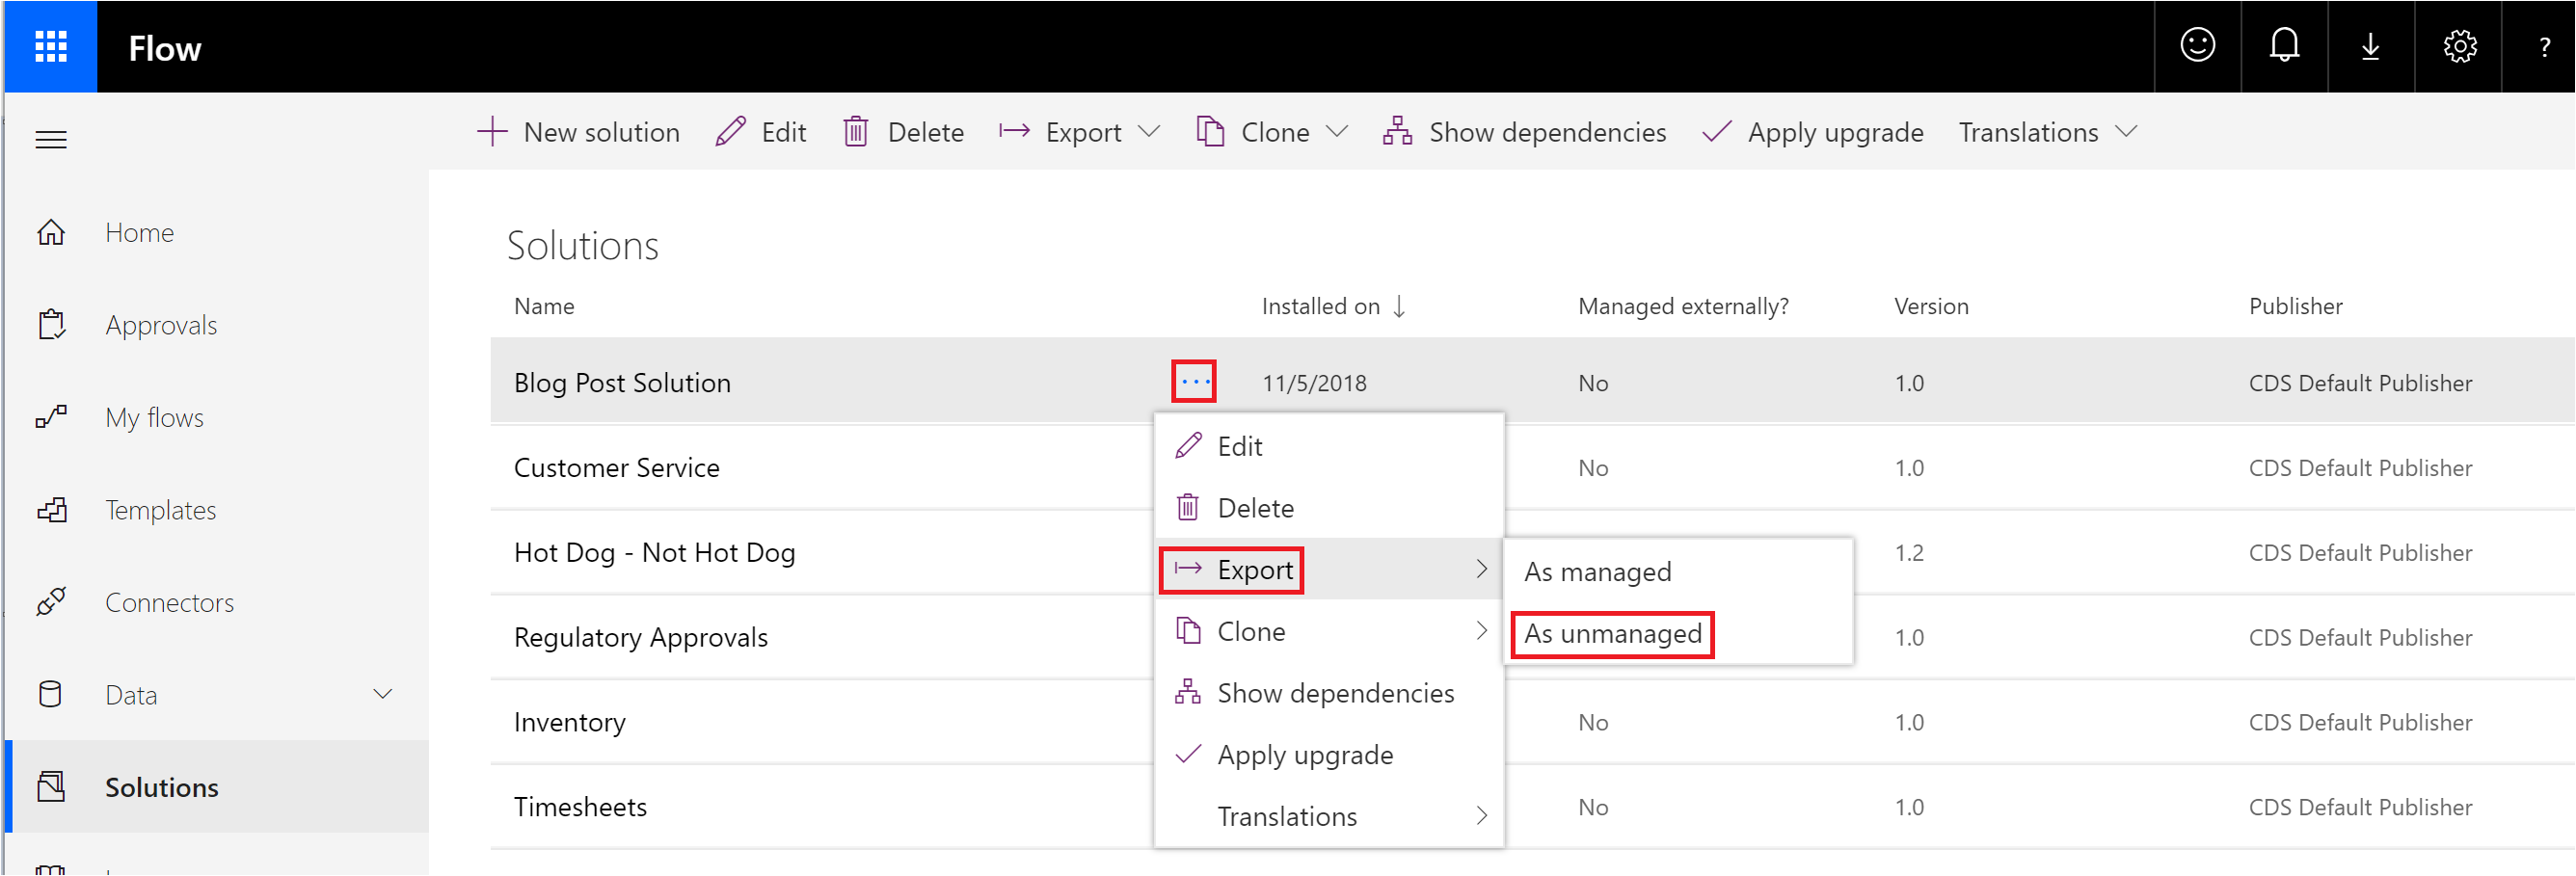
Once we click As unmanaged, a zip file will be made available for us that we can download and store locally.
Importing our Solution
With our solution exported, we can now import it into another environment, such as a production environment. With our production environment selected from the environment picker, we can now choose to import our package by clicking on the Import button.

We now need to browse to select our solution package and then complete the wizard to load the solution.
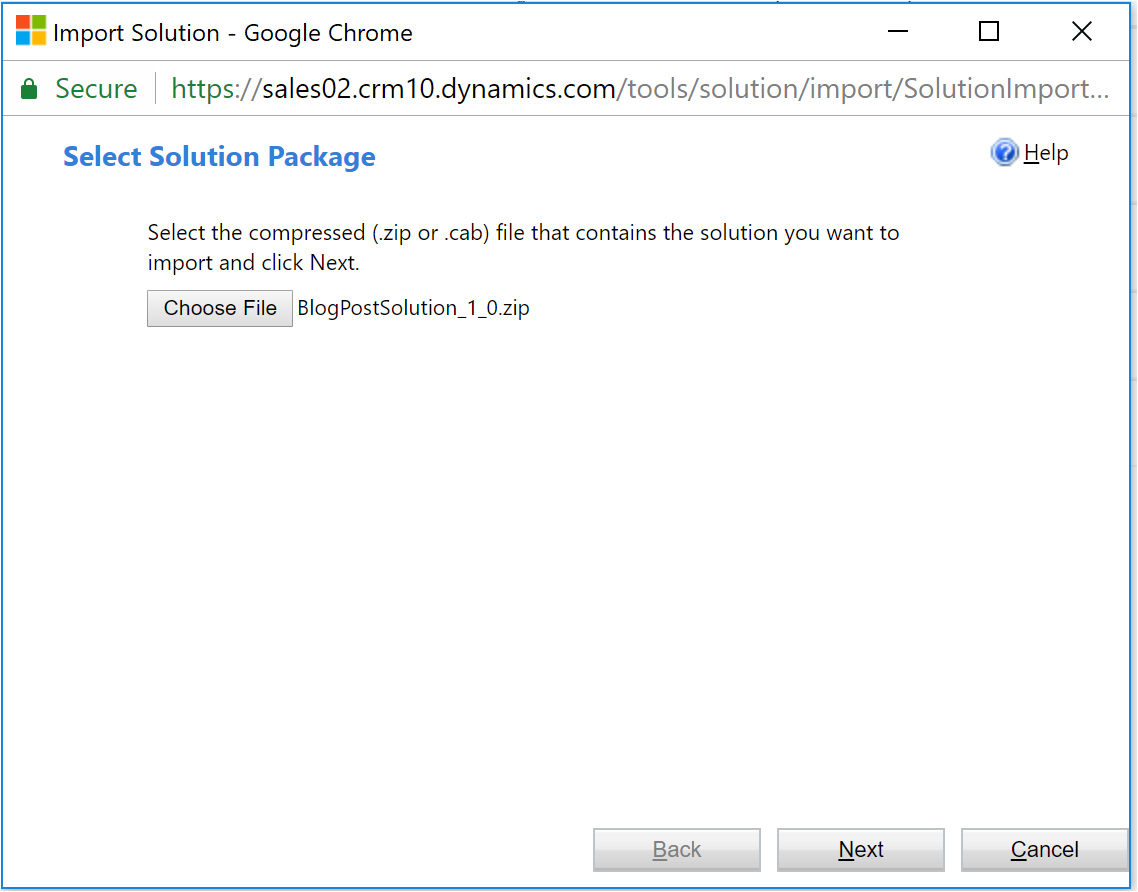
Once we complete the import process, we will find our solution deployed within our new environment.
Configuring and Enabling our Solution
With our solution imported, there are still a couple of activities that we must perform:
- For each flow that we have imported, we need to wire-up connections for our trigger(s) and action(s).

- By default, when new flows are imported, they will be in a disabled state since connections still need to be established. Upon establishing connection(s) and saving the flow, the flow will become activated.
Note: You cannot save changes to a flow that is activated. You need to de-activate it first either from the Solutions experience or the flow maker portal by turning the flow off.
Pre-requisites
The solutioning experience is available only online and for environment version 9.1.0.267 and later. To check your version, please go to …PowerApps admin center> Environments > select your environment > Details tab.
Future Investments
This is the initial release of solution support for PowerApps and Flow. This experience will be enhanced over time as new features are added and the process of deploying apps and flows is further streamlined.
Additional Resources
In this article we focused on including multiple flows within a solution. PowerApps can also be included in solutions as can a mix of powerapps and flows be included. Please check out Linh Tran’s post on the PowerApps’ blog regarding canvas apps in Solutions.