Flow of the Week: Schedule tweets from a SharePoint list


Often you want to schedule some sort of post to happen in the near future, but the service doesn't have an auto-schedule capability. For example, you have a Twitter post that you want to make tomorrow at 8am. It's easy to set this up with SharePoint and Microsoft Flow.
Set up your SharePoint list
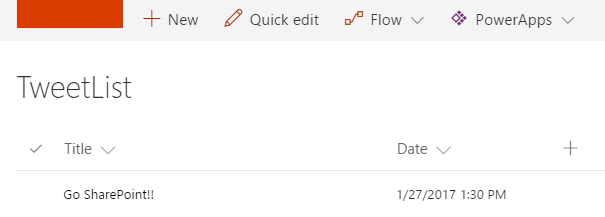
The first step is to set up a SharePoint list to save your scheduled posts to. You will need to have at least two columns:
- The content of the post you want to create
- The date-time that you want the post to be made at – make sure that this column is of type Date and Time
The list will look something like this:
Set up your flow
Now you can set up your flow. You can use this template here, or build it from scratch.
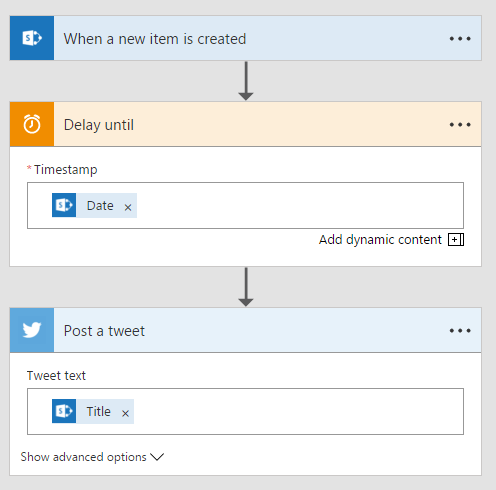
The first step in the flow is going to be triggered when a new item is added to the SharePoint list that you just created. Select SharePoint and then When a new item is created. Select or paste the Site Url and the List name.
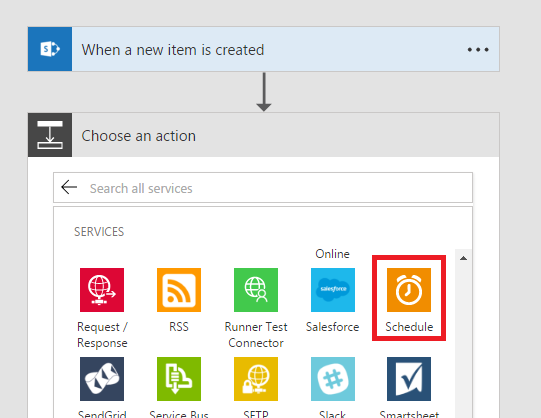
Next you will need to add a Delay until step. To find this action, select New Step, Add Action then Show more at the top to see all of the different types of actions Microsoft Flow supports. When you scroll down you should see Schedule:
Schedule has two actions — select Delay until. Inside of Delay until select Add Dynamic Content and choose the column in the SharePoint list that contains the date-time you want to post at.
Now, find the Post Tweet step by adding an action and selecting the Twitter service. If you haven't connected to Twitter before with Microsoft Flow you will need to sign in. Last, click in the Tweet Text field and select Add Dynamic Content. This time, choose the column that contains the text of the tweet you would like to send.
Since you have finished setting up your flow, select Create flow at the top of the screen.
Schedule your tweets
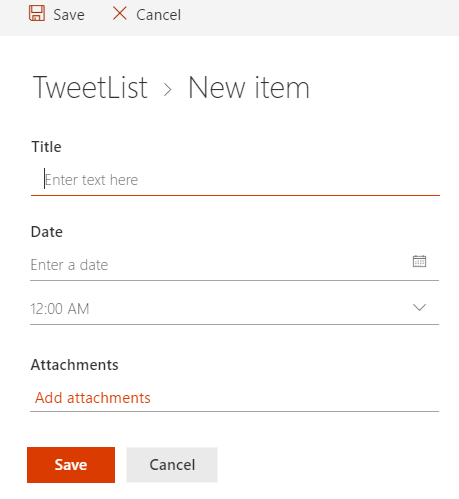
When you want to have a tweet be sent out, go to the SharePoint list you created and select New Item. Fill in the columns for Tweet text and the date to post. As soon as you click Save your tweet will be scheduled.
You can monitor your flow activity by selecting the (i) icon in the My Flows list. For example, if you accidentally scheduled a tweet that you don't want to go out, find the Running flow run that was created when you created the SharePoint item, select it, and then click Cancel in the command bar at the top of the screen. This will prevent the tweet from being sent.