By Industry – Social Media: Flows that will save you hours


Today we are going to start a new series called Flow by Industry, and our first focus will be for those of you working in Social Media.
Let’s face it, effective Social Media management can be a real struggle! Even if we focused on Twitter use only, it's full of tasks like maintaining an editorial calendar, posting tweets, responding to mentions, moderating spam, and then the reporting on all the above actions and their impact Wow, that’s a lot! Luckily, with Flow, we can take some of the frustration out of those tasks.
Use a SharePoint list to automatically post your tweets
First, let’s automate your editorial calendar and Twitter posting, as you probably either spend a lot of time doing this manually or pay for a tool to handle it. Instead of those two options, let's use what we already have and simply be more effective with it!
For this demo, we'll use a SharePoint list as the place to organize our Tweets. To follow along, you’ll need to make a SharePoint list, and give it the following headers:
- Title: This one is there by default. Use it to title things how they make sense for you.
- Tweet Content: This is where you will place your tweets themselves, including all links and hashtags.
- Tweet Date: This is the date/time you want the tweets to be published. When setting up your list, ensure that you choose Date & Time, not just Date. Also, check the box to display both Date & Time.
Now that that's set up, let's get started with Microsoft Flow!
- head on over to the Microsoft Flow website and select the template Post Tweets at a specific time. It should look something like this:
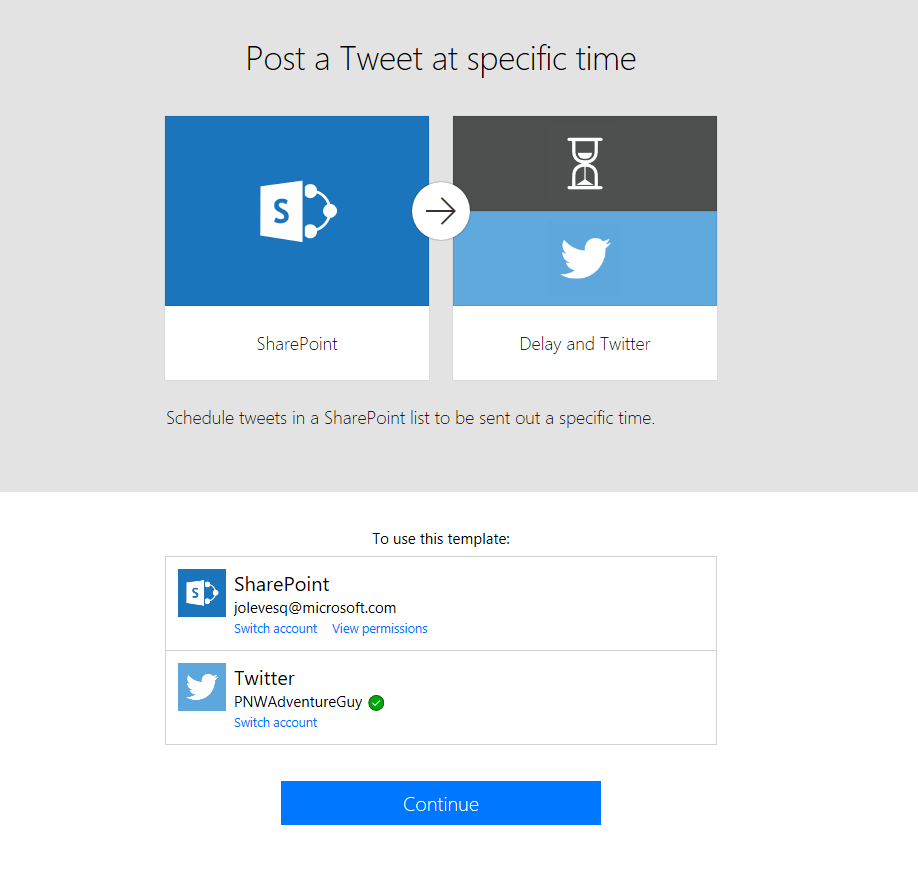
- Next, click Continue and you’ll get taken to a screen where you can customize the Flow to work for you. It looks something like this:

- Enter the URL where the SharePoint list we want to use is held, and selecting the list we want to use from the dropdown. Mine is called ScheduledTweets, just to keep things simple. Now let’s set up the actions we will be using to post our tweets automatically!
- Use the Delay Until function and click the Add Dynamic Content button. Scroll to the bottom of the list and select the Tweet Date title from your SharePoint list. With this setup, your tweets are delayed from posting until the Tweet Date condition is met. It should look something like this:
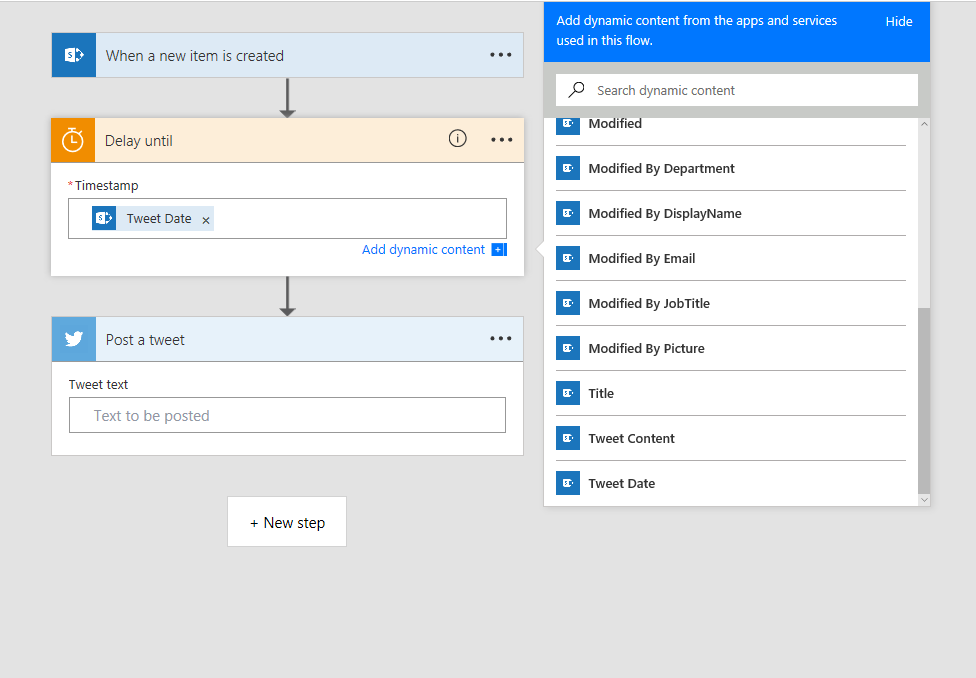
-
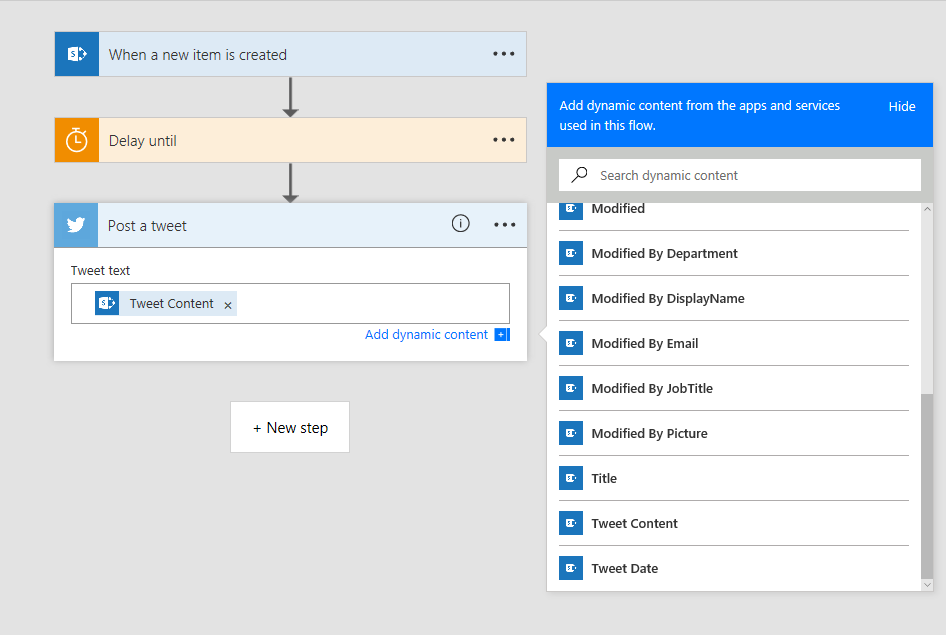
We've now established where our tweets will be coming from and when they will be posted for us. It's time to use the SharePoint list to establish WHAT will be tweeted out at those times. In the Post a Tweet box, let's also choose Add Dynamic Content, and this time let's select Tweet Content so that what gets tweeted is what we put into the SharePoint list column titled Tweet Content . Here's an example:
- From here, click on Create Flow near the top of the screen.

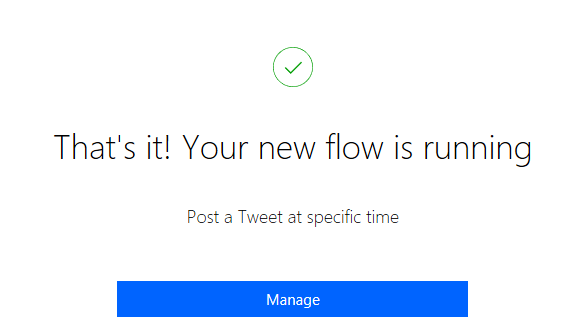
You should now see a screen like this:
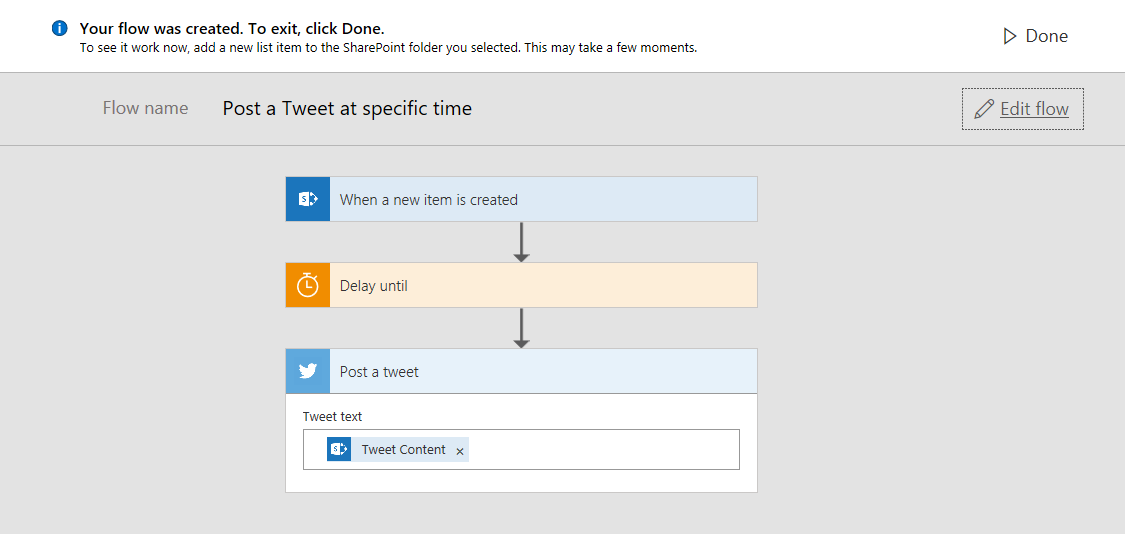
- Click Done at the top of the page… and that’s it!
Monitor a Twitter hashtag and add to a SharePoint list
Now, let’s look at how we can automate the opposite action, and collect tweets containing a certain hashtag into a SharePoint List, so we can run NSAT and other tools against the data.
First, you’ll need to make a SharePoint list, and give it the following headers:
- Title: This one is there by default. Use it to title things how they make sense for you.
- Username: This is the Twitter username of the person who tweeted your hashtag.
- Tweet Content: This is the content of the tweet.
- Date: The date the tweet was posted.
Let's get started!
-
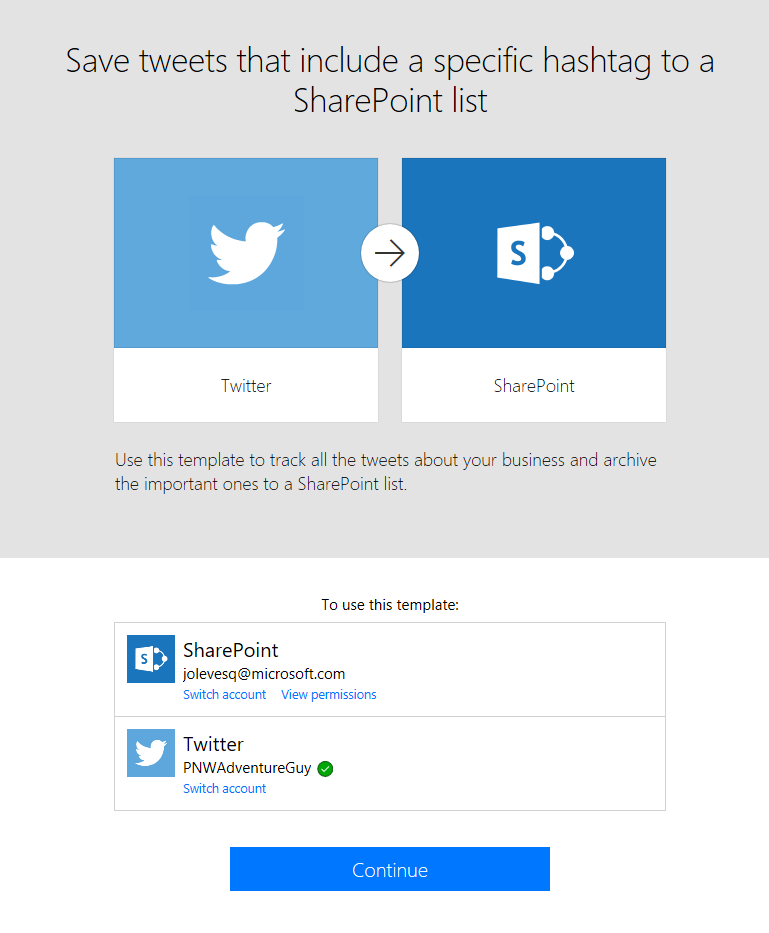
Click on over to this template on the Flow website. Got it open? Great. It should look something like this:
-
Once you have made your SharePoint and Twitter connections, go ahead and click on continue. You should see a screen like the one below, where you can set the specifics of how you want tweets to be put into the SharePoint list.

-
In the top box, labelled When a new tweet appears, enter the hashtag you would like to track for this list. I am using #microsoftflow, as I like to see the conversation around our product in a manageable fashion.
-
Now, in the Create item box, we need to define a few things so that the Twitter data we want goes into our list in expected ways.
-
First, for the top two entries, enter your SharePoint site URL, and then select the SharePoint list you created earlier from the dropdown menu.
-
You can customize the title any way you want. Personally, I simply say “Tweet From <Name>” – that being the dynamic name content pulled from Twitter.
-
Map the Username dynamic content field to the User name field.
-
Map the Tweet text dynamic content field to the Tweet Content field.
-
For the date column, I map the Original tweet created at dynamic content field.
-
Now that I have filled all of that out, I click Create Flow near the top of the page, and then Done.
And that’s it! My first flow is actively tweeting all of my pre-determined content at the times I told it to, and my second Flow is now actively searching Twitter for my hashtag and filling my second SharePoint list with those results for me!
I just saved myself HOURS of work with a few clicks, connecting the tools I already have, to work in more efficient and automated ways.
Which flows are you using for Social Media? Which industry should we cover next?
We would love to hear from you on Twitter, in our Community, or here in the comments!
Thanks for reading!