Automating document workflows with Power Automate and Adobe


PDFs are core to how businesses get work done today. Businesses around the world can become paperless businesses because of PDF. It is the primary archival format for documents. Whether it is contracts, offer letters, brochures, many of the PDFs that are stored within Microsoft 365 are in fact PDFs. According to Adobe, there are over 2.5 trillion PDFs in the world today, and its growing day by day. PDF is the universal format everyone can open.
Unfortunately, many times documents are the bottleneck of workforce productivity. Often, people will perform manual processes like printing and scanning when there are digital ways for them to do that with PDFs. For example:
- Sign them with an electronic signature
- Combine them together into one document
- Convert Word, PowerPoint, and other files into PDFs
- OCR documents so that they can be searchable in SharePoint
- If a PDF is your only copy of a document, then convert them back into document formats like Word, PowerPoint, etc.
Fortunately, Adobe as the inventor of PDF and strategic partner with Microsoft, has brought many of these types of tools directly into Microsoft Power Automate to help you streamline and automate many of your document workflows. Through these connectors, all Adobe connectors are also available in Power Apps, Power Virtual Agents, and Azure Logic Apps to build integrated custom document workflows within the Microsoft ecosystem.
Adobe connectors in Microsoft Power Automate
Adobe has offered integrations for Microsoft Power Automate since 2017 with tools to help with document automation and has continued to expand and update the connectors with new features and templates:
Adobe Sign
![]()
Adobe Sign connector enables you to take your Word, PDF, PowerPoint, and other formats and route them for electronic signature. Using Adobe Sign connector with Power Automate allows you to dynamically route documents for approval based on data.
Some useful examples include:
- Send a selected file in SharePoint for signature.
- Send a selected record in Microsoft Dataverse for signature and merge data into fields.
- Create PowerApps with an e-signature
- Dynamically route documents for signature based on data and Azure. AD profiles.
- Automatically storing signed agreements and contracts in Microsoft SharePoint after they are signed.
Adobe Sign has over 30 templates and triggers pre-created for you to get started quickly.
Adobe PDF Tools
![]()
For people familiar using Adobe Acrobat for creating, editing, and manipulating PDF documents, the new Adobe PDF Tools connector these tools to your flows such as:
- Convert your Word, Excel, PowerPoint, and other formats automatically into PDF
- Convert PDFs back into editable formats like Microsoft Word, PowerPoint, Excel, and other formats
- OCR your scanned PDFs
- Convert HTML and data into PDF
Adobe PDF Tools connector has over 30 templates and triggers pre-created for you to get started quickly.
Quick Start example
Let’s walk through a quick example of how you can use some of the different connectors. We will use this template to demonstrate how you can use Adobe Sign and PDF Tools connectors together in the same workflow. In the example below, we will show how you can compress and optimize your PDFs using Adobe PDF Tools connector and then send them out for signature using one of the templates available.
Get your Adobe PDF Tools API credentials
If you haven’t already created credentials to use with Adobe PDF Tools API, you can create them here. PDF Tools API provides a 6-month trial to get started for free.
Once you provide a name and description, your client credentials will be generated. Keep this window open; you will need this information to create a connection in Microsoft Power Automate.
IMPORTANT NOTE: Adobe PDF Tools is a Premium connector so you will need to have the proper Microsoft Power Automate license to use the connector.

Get your Adobe Sign account
To use Adobe Sign connector, you will need to have an Adobe Sign for enterprise subscription. If you don’t and just want to give it a try, sign up for a developer account.
Create a new flow from a template
In this scenario, the flow has us taking a PDF, compressing it, and sending it for signature using Adobe Sign. Because sometimes PDFs can be large with huge images, we are going to have it compress the PDF first using Adobe PDF Tools and then send it for signature using Adobe Sign.
- Go to this template.
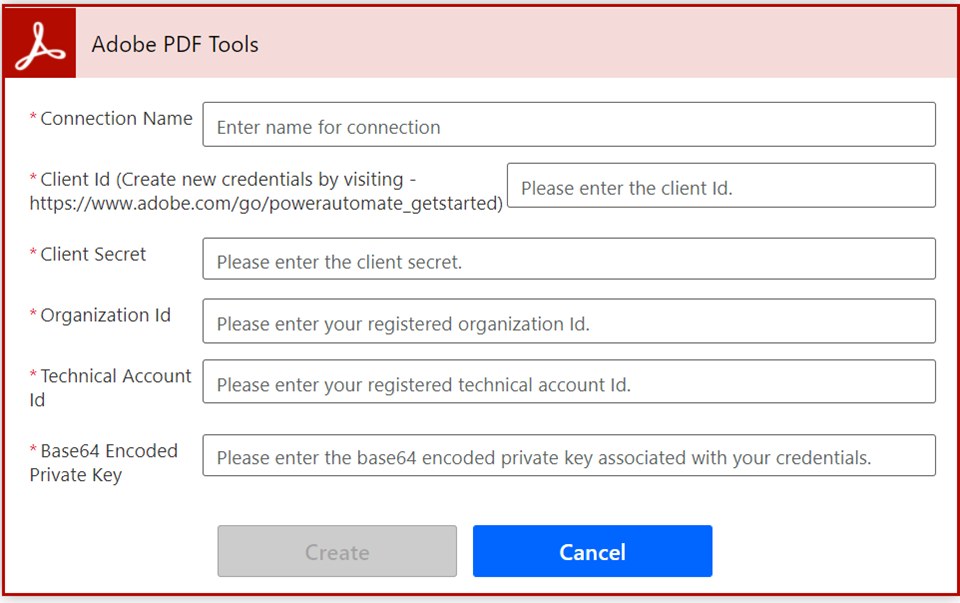
- Create a new connection for Adobe PDF Tools. You will need the Client ID, Client Secret, Organization ID, Technical Account ID, and Private Key from when you setup your key.
- When you have entered all your credentials, click Create.
- For Adobe Sign, create a new connection.
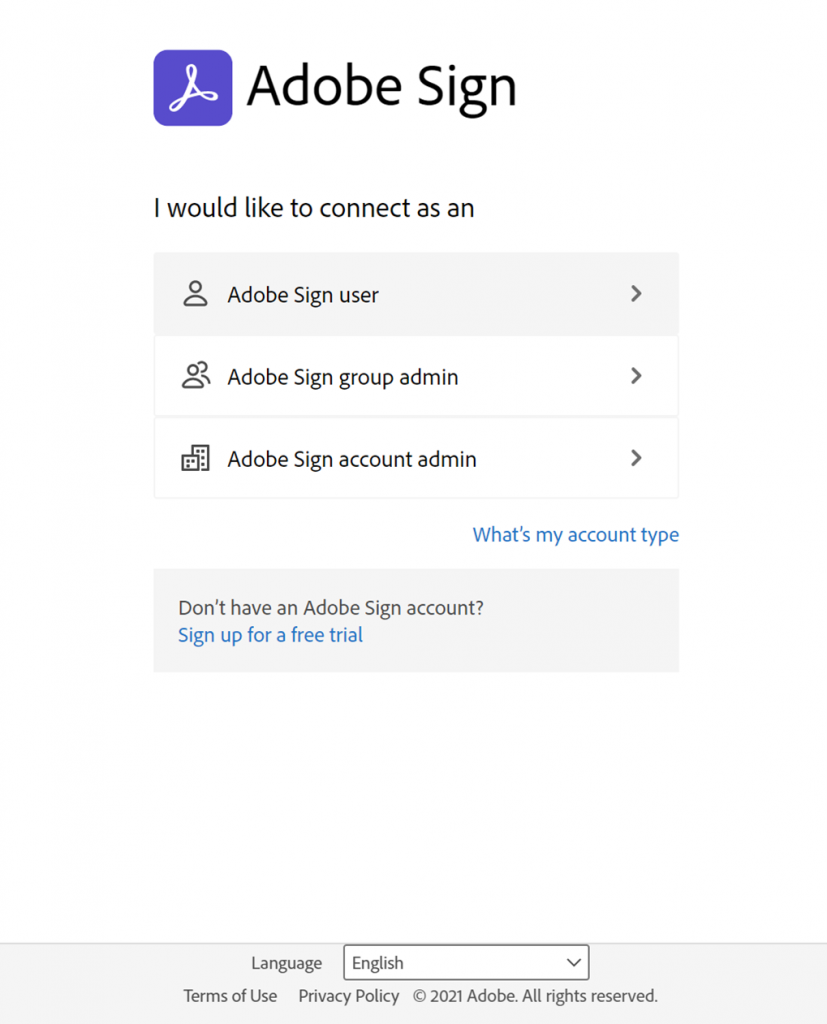
- You may be prompted to choose what authentication level you want to connect as. Choose whether you would like the scope to be for you as an individual Adobe Sign user, group admin (i.e. access agreements within your user group you are an admin for), or account admin (you have full privileges across users).
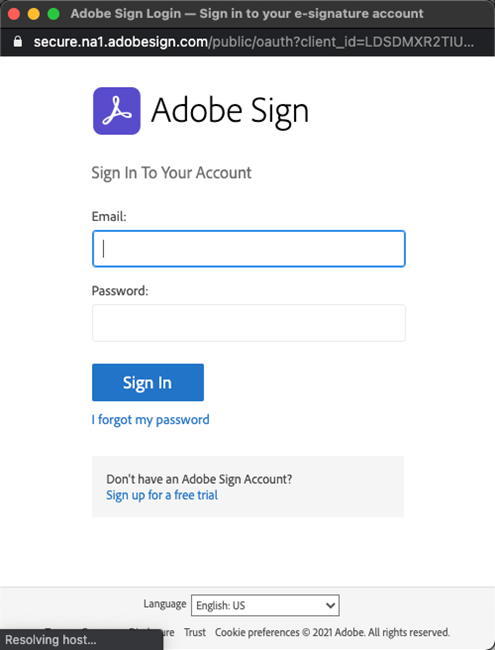
- You will then be prompted to log in with a pop-up to Adobe Sign using your credentials. Login and Allow Access.
- When all your connections are created, click Continue to create your connection.


Configure SharePoint settings
Because the trigger for this template is a selected file in SharePoint, we need to set each of the SharePoint actions.
For the For a selected file, Get file properties, Get file content and Get file metadata actions, set the Site Address and Library Name to your desired SharePoint site.
![]()
PDF Services connector action

The condition in the flow is to determine whether the document is a PDF or not. It determines this based on the file extension. If it is a PDF, it will skip to the end. If it is not, then it will convert the document to a PDF.
The “Convert document to PDF” will take whatever document you have selected and convert it into a PDF.
You will notice that the action, like all the Adobe PDF Tools connector actions, have mainly two inputs:
- File Name: The name of the file of the input. It is important to have a file extension so that it knows which format to convert it from.
- File Content: The file content of the document you want to convert to PDF.
The file content is coming from the file contents of the selected file. Previously in the flow, the file content is stored in the FileContent variable. You don’t have to do it this way, but it is how this template is setup. You can also have it passed directly from Get File Contents with SharePoint.

After the condition, you will then see there is another action called Create Searchable PDF using OCR. This is used to OCR any PDF in case it is a scanned document that needs to be optimized. Like the previous action, we can see that it asks you to input the File Name and File Content. These values are coming from the output of the previous PDF step.

Why is it using variables?
The reason that there are variables is because of the condition. If the document is a PDF, then it is skipping the condition. But if it is not a PDF, it needs to get converted which will change the input going into the Create Searchable PDF using OCR action. By using variables, it makes it easier to change the values going into that action.
Adobe Sign connector actions
After the Create Searchable PDF using OCR action, there are two Adobe Sign connector actions. Let’s walk through what each of them do.
Upload a document and get a document ID
When you want to send a document for signature using Adobe Sign, you need to upload it to Adobe Sign as what is called a transient document, which returns a Document ID. The reason for this is it also allows you in other scenarios to upload a document once to Adobe Sign and then send it multiple times without having to upload a document every single time.
Like Adobe PDF Tools, you need to provide a File Name and a File Content value. In this template, these are passed from the Create Searchable PDF using OCR action.

Create an agreement from an uploaded document and send for signature
Once the document is uploaded to Adobe Sign, now you can send an agreement for signature.
Document ID the documents you would like to include with the agreement you send for signature. You can attach many by clicking “Add a new item”. The input is the Document ID from the Upload a document and get a document ID action.
Next, we need to add a recipient. Click on Add new item under Signature Type. This will expose a few settings. First is the email address which you can pass. For this example, we will set a static example email address, but you can use Dynamic content to pass the email address from a previous action.

Participant Order specifies in which order the recipient is signing. You can specify recipients to be in a parallel order or sequential order.
Participant Role allows you to specify what type of role the recipient needs to be such as Signer, Approver, Certified Recipient, Form Filler or Form Filler. If you want to learn more about the roles, you can learn about that here.
Message field is the message that will show up in the email to the recipient.
Expiration Time allows you to set limit for a recipient to sign a document. Once that passes, then the link to view and sign will no longer be active.
Reminder Frequency allows you to set how often Adobe Sign will send email reminders to the recipient.
Document Password allows you to encrypt the final PDF with a password.
Form Fields allow you to pass field values into a document. Adobe Sign allows you to merge form field values into fields in a document. You need to specify the Name (which corresponds to the name in the document) and the value you want to pass. This is also an array so you can add many. For more information on adding form fields to your document see the Adobe Sign Text Tag documentation.
Redirect Delay and Redirect URL allow you to specify which address to redirect a signer after they sign.

Once you trigger the agreement, the recipient(s) will receive an email with a link for them to view and sign an agreement.
Other Helpful Scenarios
There are several other scenarios that can be helpful for document processes:
Store signed agreements into SharePoint
OCR PDFs as they are imported into SharePoint
Password protect a new file in OneDrive and email as an attachment
What’s Coming Next
Adobe is only getting started with these connectors in Microsoft Power Automate. Coming soon, Adobe will be bringing additional features from its Adobe Document Services to Power Automate. Here are a few of the highlights:
Adobe Document Generation API

Document Generation API enables you to dynamically generate documents based on JSON data. Document templates are creating in Microsoft Word, and there is even an Add-In for Microsoft Word to allow you to easily tag your documents based on data. Whether it is data from Microsoft Dataverse, SharePoint, Excel, or other sources, you will be able to dynamically generate your documents, which also includes some of these features:
- Simple and easy template creation in Microsoft Word
- Support for complex data sets, so you can push data from your Power Automate actions directly in, even if there are complex data structures.
- Dynamically change and import images.
- Set conditional text and paragraphs based on data and conditions.
- Numerical calculations to calculate sum, average, etc. Inline from arrays of data inline in the template.
- Dynamically populate tables with data values.
- Integration with Adobe Sign to create tagged documents ready to be sent for signature.
- Export in multiple file formats such as Word or PDF.
An overview of the highlights are available here.
Adobe PDF Extract API
A lot of data is stored inside of PDFs, but it’s often difficult to reliably extract that data for use elsewhere. PDF Extract API converts PDFs into JSON data to reliably capture content structure, element positions, and relationships, which can be parsed and placed into data systems, republished in other platforms, or for search and analysis. Some the key benefits are:
- Reliable extraction of tables, even if they cross pages
- Reliable reading of columns of data and understand when related paragraphs span across columns or pages
- Understand and tag data into structures such as titles, headers, paragraphs, tables etc.
Final Thoughts
Adobe has provided a number of great connectors to help with document automation using Microsoft Power Automate. In addition to Power Automate connectors, Adobe PDF Tools and Adobe Sign also have add-ins for other Microsoft applications such as Adobe Acrobat for Microsoft Teams, Adobe Sign for Microsoft Teams, Adobe Sign for Word, Adobe Sign for SharePoint, Adobe Creative Cloud for Word and PowerPoint, and many others. These can be a great addition to the automated flows you create in Power Automate.