Introducing Microsoft Flow integration in Excel


We’re pleased to announce that Microsoft Flow is now integrated into Excel. With this integration that uses the For a selected row trigger and the Flow launch panel, you can create and trigger on-demand flows for selected rows in any Excel table on spreadsheets hosted in SharePoint or OneDrive for Business. The Microsoft Flow for Excel add-in enables you to connect your data to a wide range of services such as SharePoint, Outlook 365, Dynamics 365, Teams, Visual Studio Online, Twitter, Approvals, etc. In this post, we’ll walk you through this new capability with a hands-on example.
Install the Flow Add-in
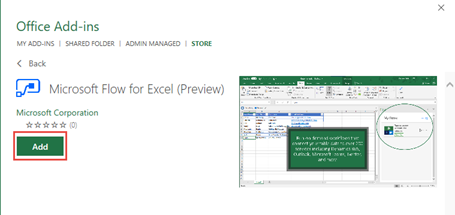
To get started, in Excel, go to the Insert tab in the ribbon and select Store. Then, in the dialog, search for Microsoft Flow. Then, click Add.
Scenario
Let’s imagine that you work for Cronus Energy, a multi-national energy production company, which generates energy through wind turbines and hydroelectric power plants. Cronus is on the lookout for better ways to streamline and standardize internal processes to make things easier for their employees. They’ve identified a key process they want to modernize:
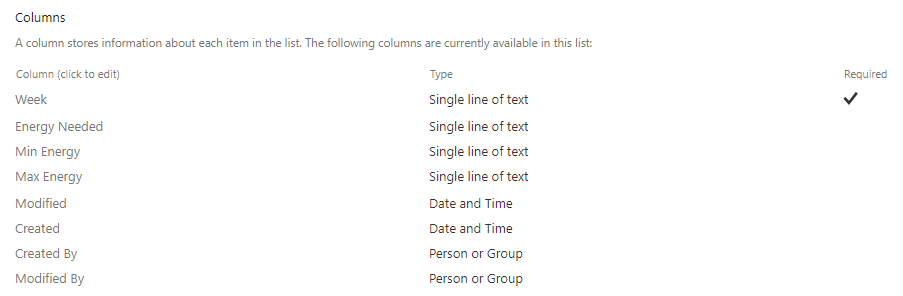
Transfer market data entered by Commercial Analysts (minimum energy to generate, maximum energy, and target energy based on revenue goals) to SharePoint so that the Operations team can decide which turbines to use for the week. After moving the data to SharePoint, they also want to send an alert to the team on Microsoft Teams and facilitate a discussion if needed. The Operations team uses a SharePoint list called Turbine Energy Distributions with the columns shown below.
Their development team is already short on resources, so they want to be able to stand up the solution quickly while avoiding as much custom development as possible. Let’s see how Flow can help.
Create a flow
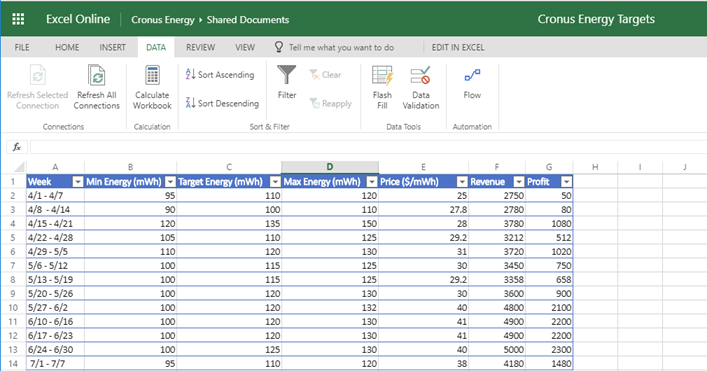
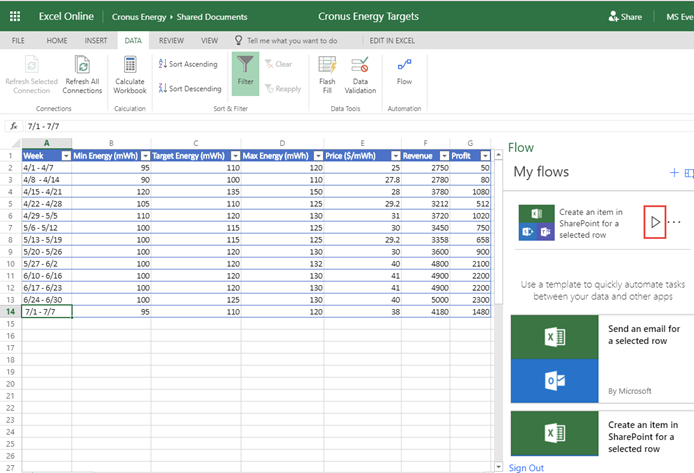
The Commercial Analysts at Cronus Energy enter market data in a spreadsheet hosted in SharePoint. To follow along, download this spreadsheet and upload it to SharePoint or OneDrive for Business.
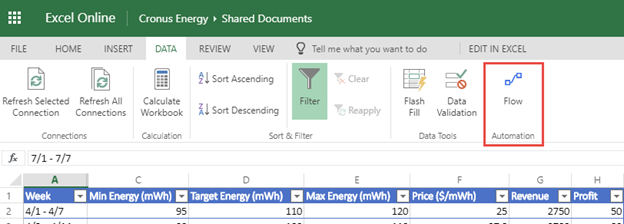
To get started, click the Flow menu from under the Data tab in the ribbon.
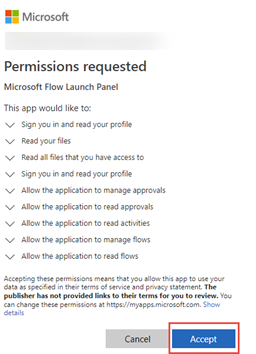
This will open the Flow launch panel in Excel where you will be prompted to Sign in and consent to the permissions requested by the add-in. Click Accept.
Once you’ve signed in, you can explore several templates to quickly connect to a wide variety of services with minimal set up. Scroll down the screen and choose Create an item in SharePoint for a selected row.

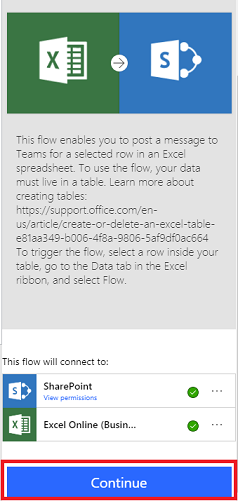
Selecting the template will prompt you for your credentials and provide additional details about the template. Click Continue.
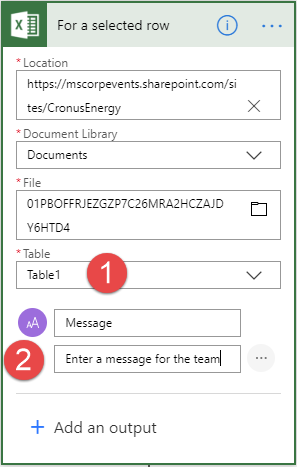
In the trigger (For a selected row), click the drop-down next to the Table field and select your table, e.g. Table1. The trigger may be collapsed; if so, click on Edit and confirm that the Table field is set to Table1.
The For a selected row trigger is similar to other manual triggers like the Flow button for mobile or SharePoint’s For a selected item – users can be prompted for inputs when they run the flow (Text, Yes/No, File, Email, or Number) and all flows run with the credentials of the invoker. For this flow, add a Text input called Message with the hint text of “Enter a message for the team.”
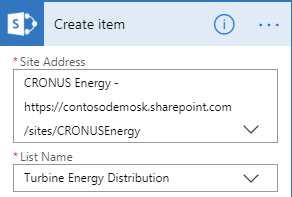
In the SharePoint-Create item action, enter the Site Address and List Name for Cronus Energy’s Turbine Energy Distributions List.
Click the Week field and select Week from the Dynamic content pane.
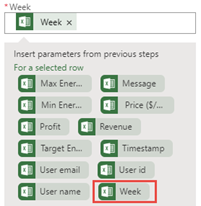
The parameters in the Dynamic content pane consist of your table’s columns – Week, Min Energy (mWh), Target Energy (mWh), Max Energy (mWh), Price ($/mWh), Revenue, and Profit, information about the person invoking the flow – Timestamp, User email, User id, and User name, and lastly any “manual” Outputs you add to the trigger like Message.
Repeat this for the Energy Target, Min Energy, and Max Energy.

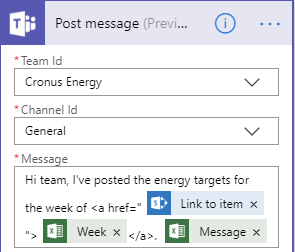
Now, add a Microsoft Teams – Post message action. Choose a Team and Channel to post your message to. In the Message field, enter a link to the newly created item along with the Message populated by the flow invoker.
Save the flow by clicking the Save button.
Run flow
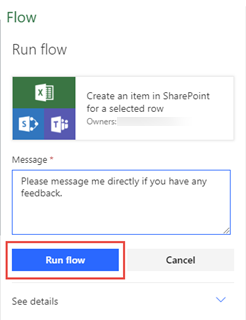
Select a row in the table and then click Run flow in the Flow launch panel.
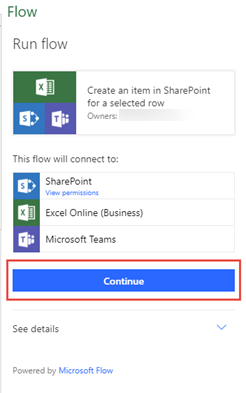
The first time you run this flow, you’ll be asked to confirm your credentials. You can also learn more about what this flow does. Click Continue.
Now enter a message to send to your team, requesting feedback. Click Run flow.
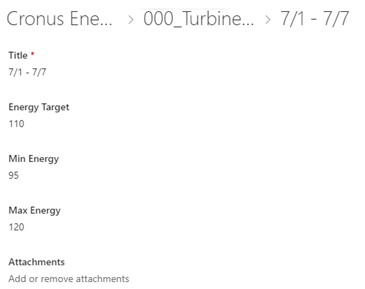
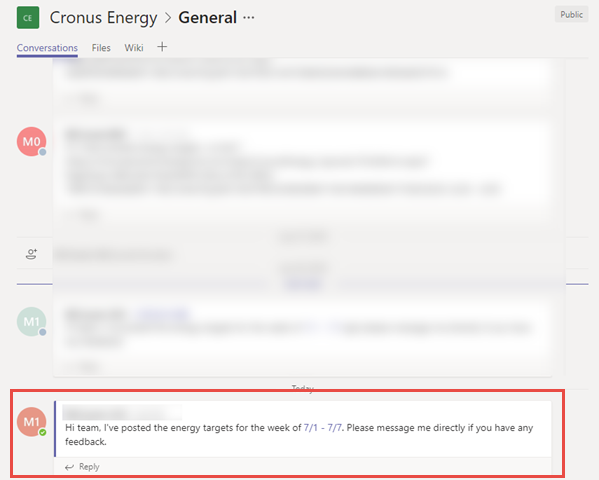
Voila! An item is created in SharePoint with details from the row you selected in Excel and a message is posted on your behalf including your note asking for feedback and a link to the item.
Share a flow with run-only permissions
Now that you’ve created the flow, you can share it with colleagues either by adding them as an owner of the flow or as a run-only user. The latter allows you to maintain ownership of the flow, while enabling your colleagues to run it. In Flow, head over to My Flows and choose the Create an item in SharePoint for a selected row flow. Note – To run the flow, they must have access to the spreadsheet.

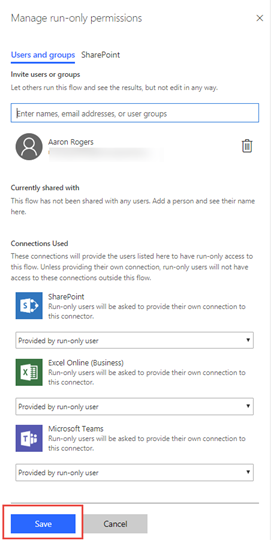
Under Manage Run-Only Users, click Add another person.
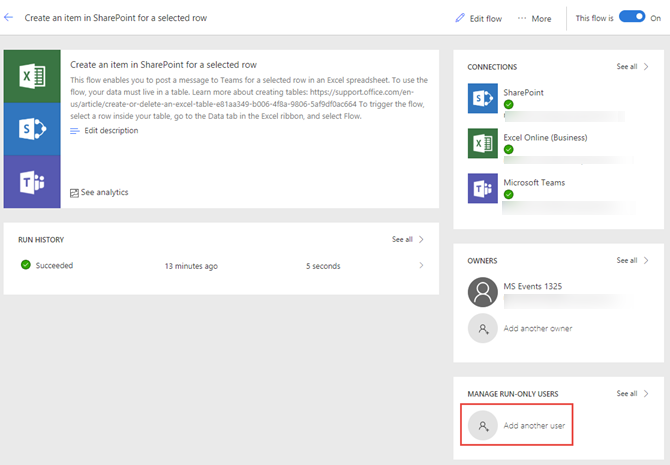
Here you can enter individuals, AD security groups, O365 groups, or even anyone that has access to the SharePoint list. For each connector used in the flow, you can decide whether the invoker should bring their own credentials (“Provided by run-only user”) or use your credentials (“Use this connection”). Click Save to add the user as a run-only user.
We hope you enjoy this new update. If you have ideas for templates or other feedback, please leave us comments below or post on our Community forums.