Create your custom integrations in Microsoft Flow using our new and improved Custom API experience


This week we are announcing new features in the Custom API experience in Microsoft Flow. In case you are not familiar with this area, Custom APIs offer the ability for users to allow Flow to integrate with any RESTful API service. You can read more about Custom APIs here. In this release, the new functionality that has been added allows you to:
-
Create a custom API from Postman collection
-
Edit and add new actions to your existing custom APIs
-
Test your custom API
This week we are also announcing the availability of two new services inside Flow: PowerApps Notifications and PivotalTracker.
Create a Custom API from Postman collection
Custom APIs are described using Swagger, an open standard for defining the interface of an HTTP api. However if you don’t already have a swagger file for your API it can be difficult to create a Custom API from scratch. In our latest update, we have made this easier by adding an option to import from a Postman Collection — which automatically generates the swagger behind the scenes.
Postman is a great tool to make your API development faster & easier. To get started, install the Postman App for your preferred platform.
The first step in creating a Postman collection is to create a request. When creating the request, you can set the HTTP verb, the request URL, query or path parameters, headers and the body. More details on sending request through Postman are available here.
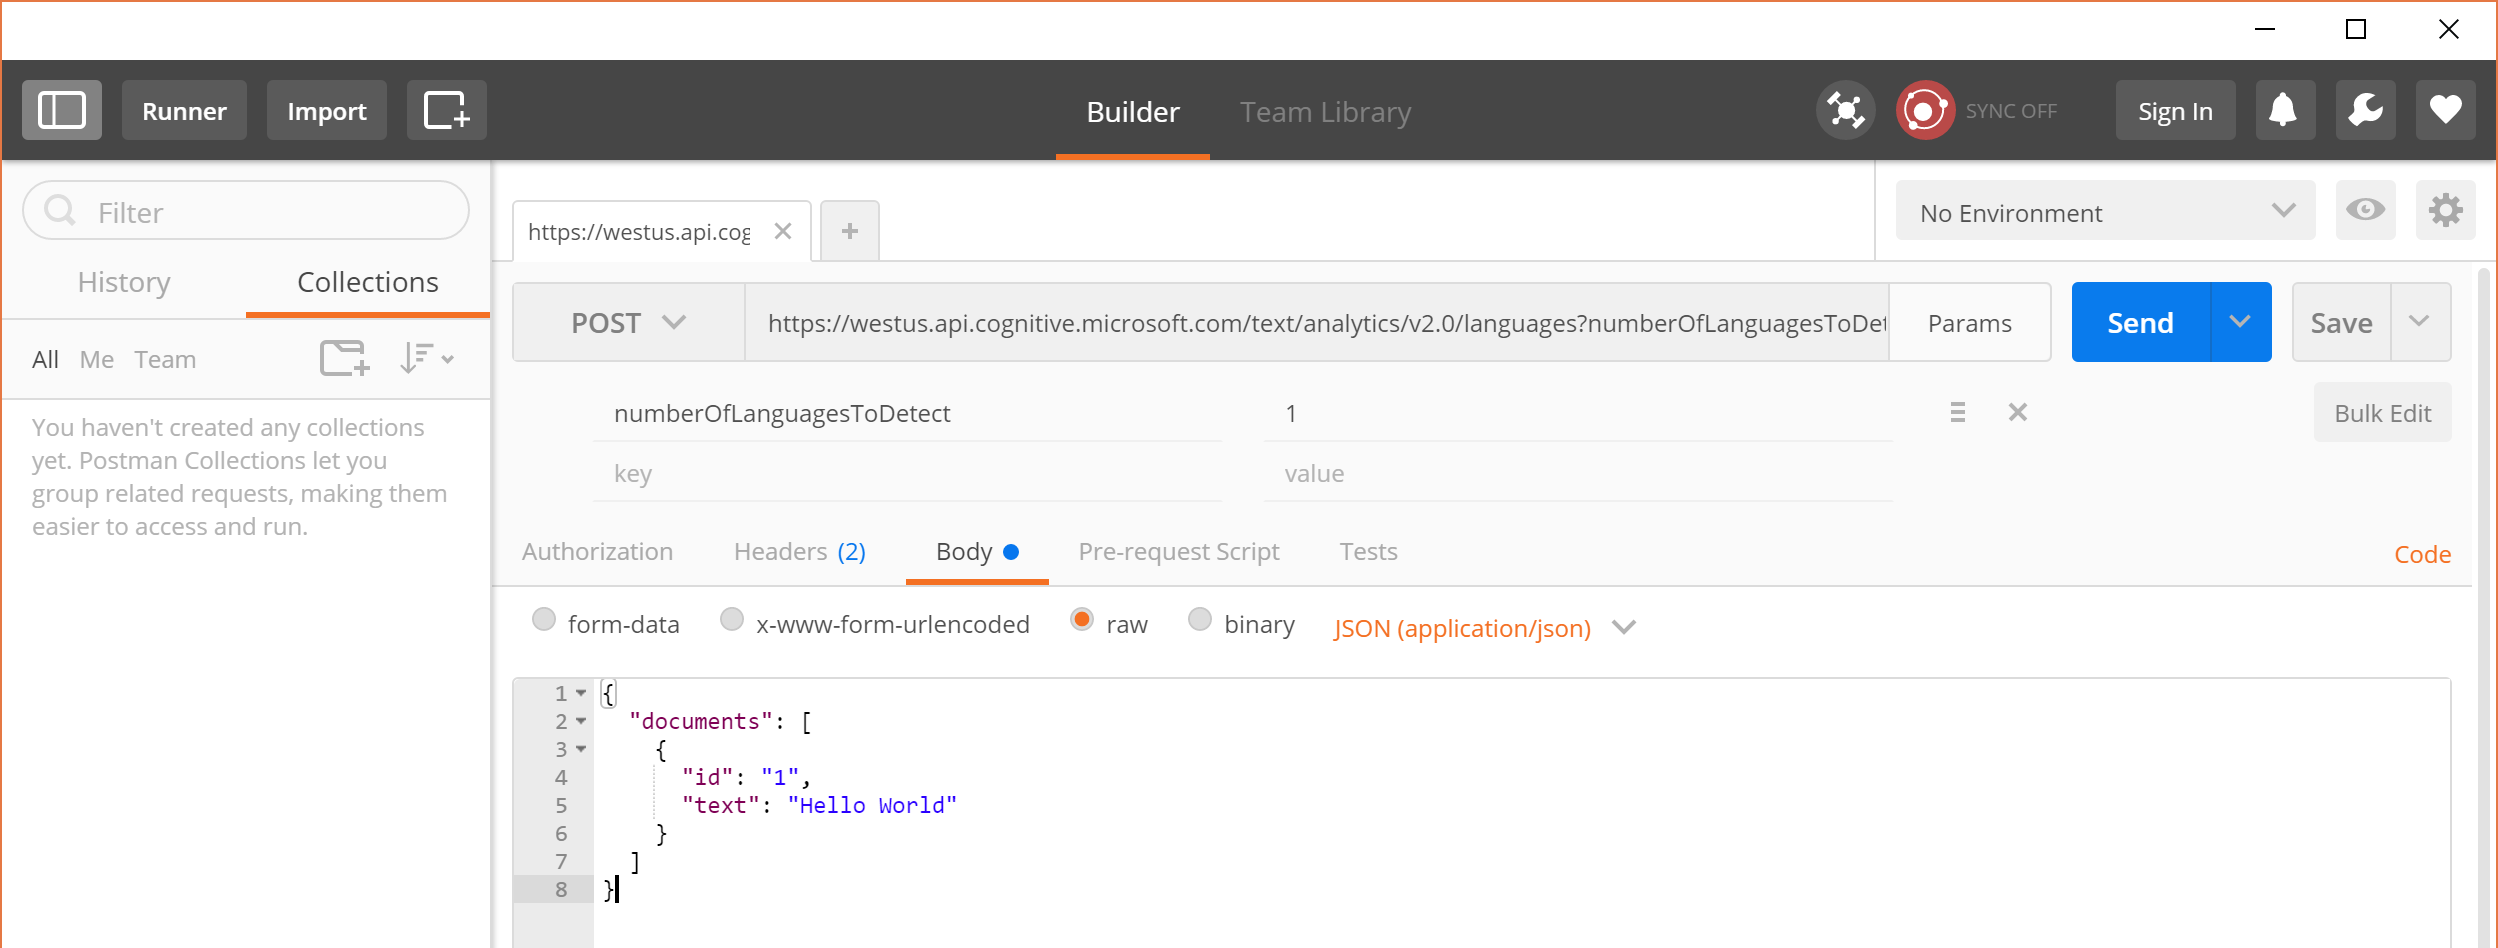
Throughout this post, we will use the Cognitive Services Text Analytics API as an example, which you can read more about here. For the Detect Language API endpoint, the values would be set as follows:
| Verb | POST |
| Request URL | https://westus.api.cognitive.microsoft.com/text/analytics/v2.0/languages |
| Params | numberOfLanguagesToDetect |
| Authorization | “No Auth” |
| Headers | Ocp-Apim-Subscription-Key = <your subscription key> Content-Type = application/json |
| Body |
{
   "documents": [
      {
         "id": "1",
         "text": "Hello World"
      }
   ]
} |
Once your request is ready, hit “Send” to make the request. The Response field will show the full response of the API, including the result or an error if one occurred.
The operation is now defined and working, you can save the request into a Postman Collection.
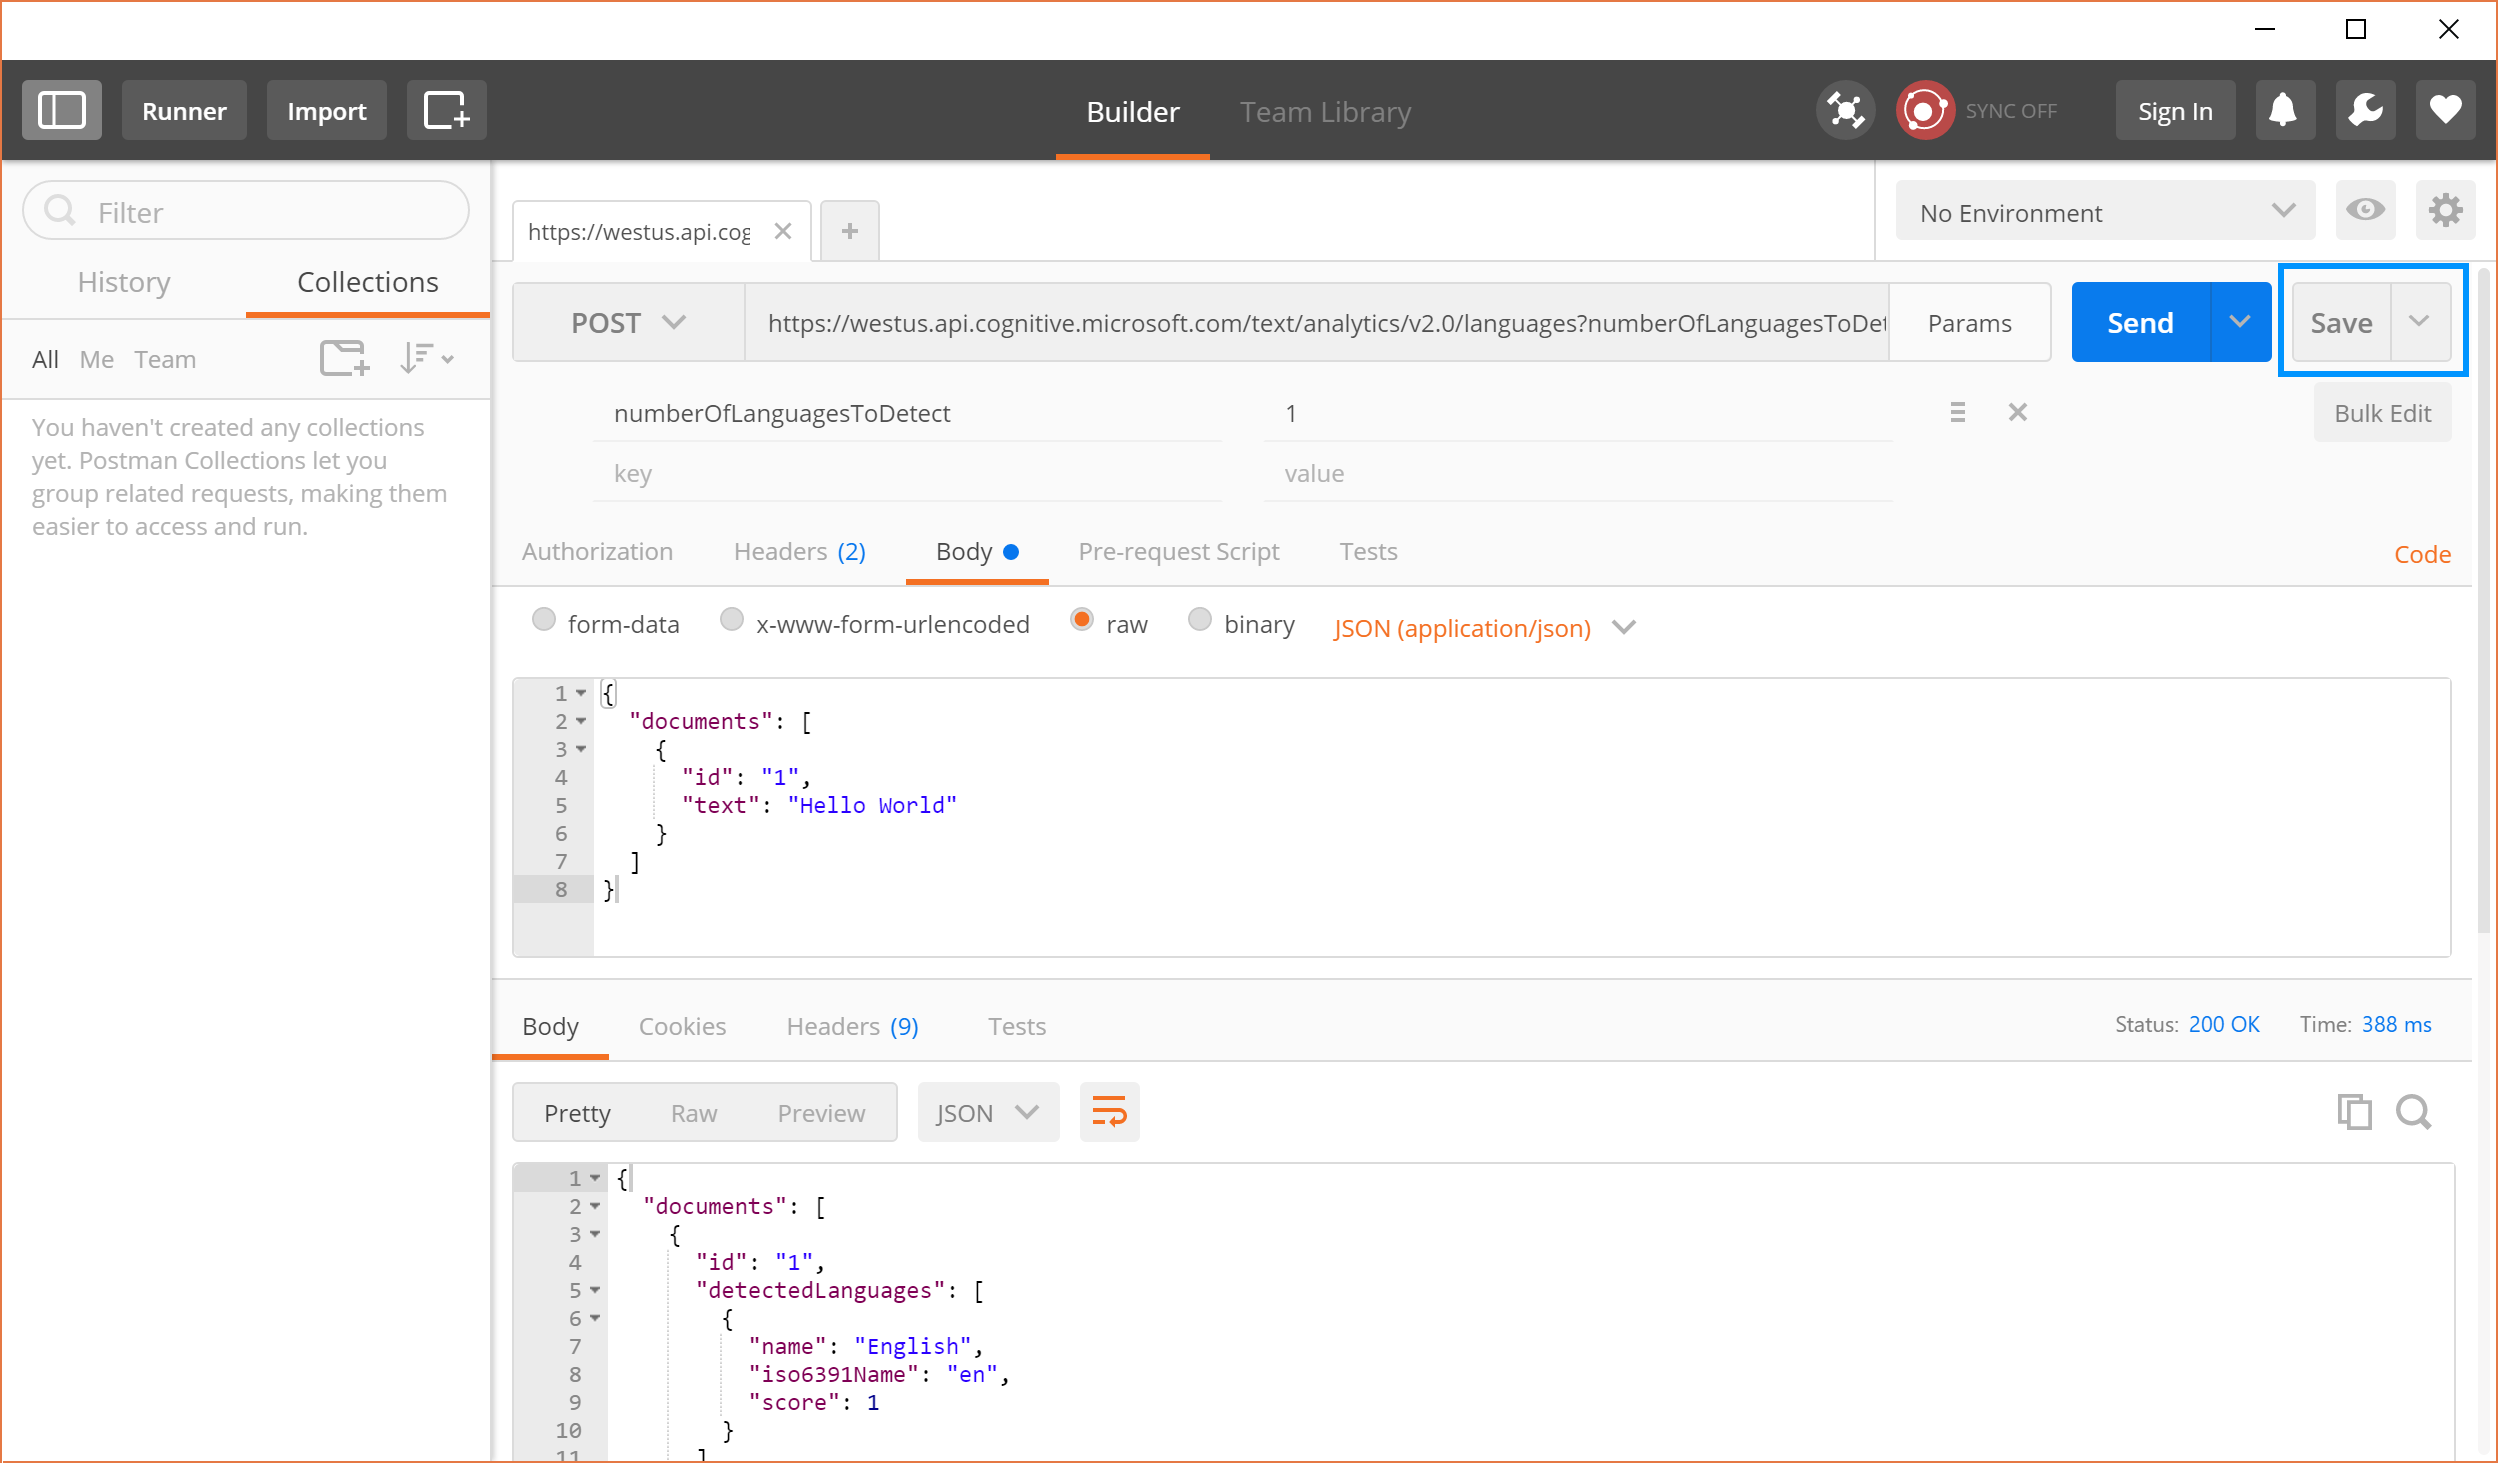
To save time later, ensure the Request name and description are set to the same values you would use for the operation summary and description in your Custom API.

You can also save the Response of the request. Custom APIs currently only support a single response per request; if the collection contains more than one then the first one will be used.

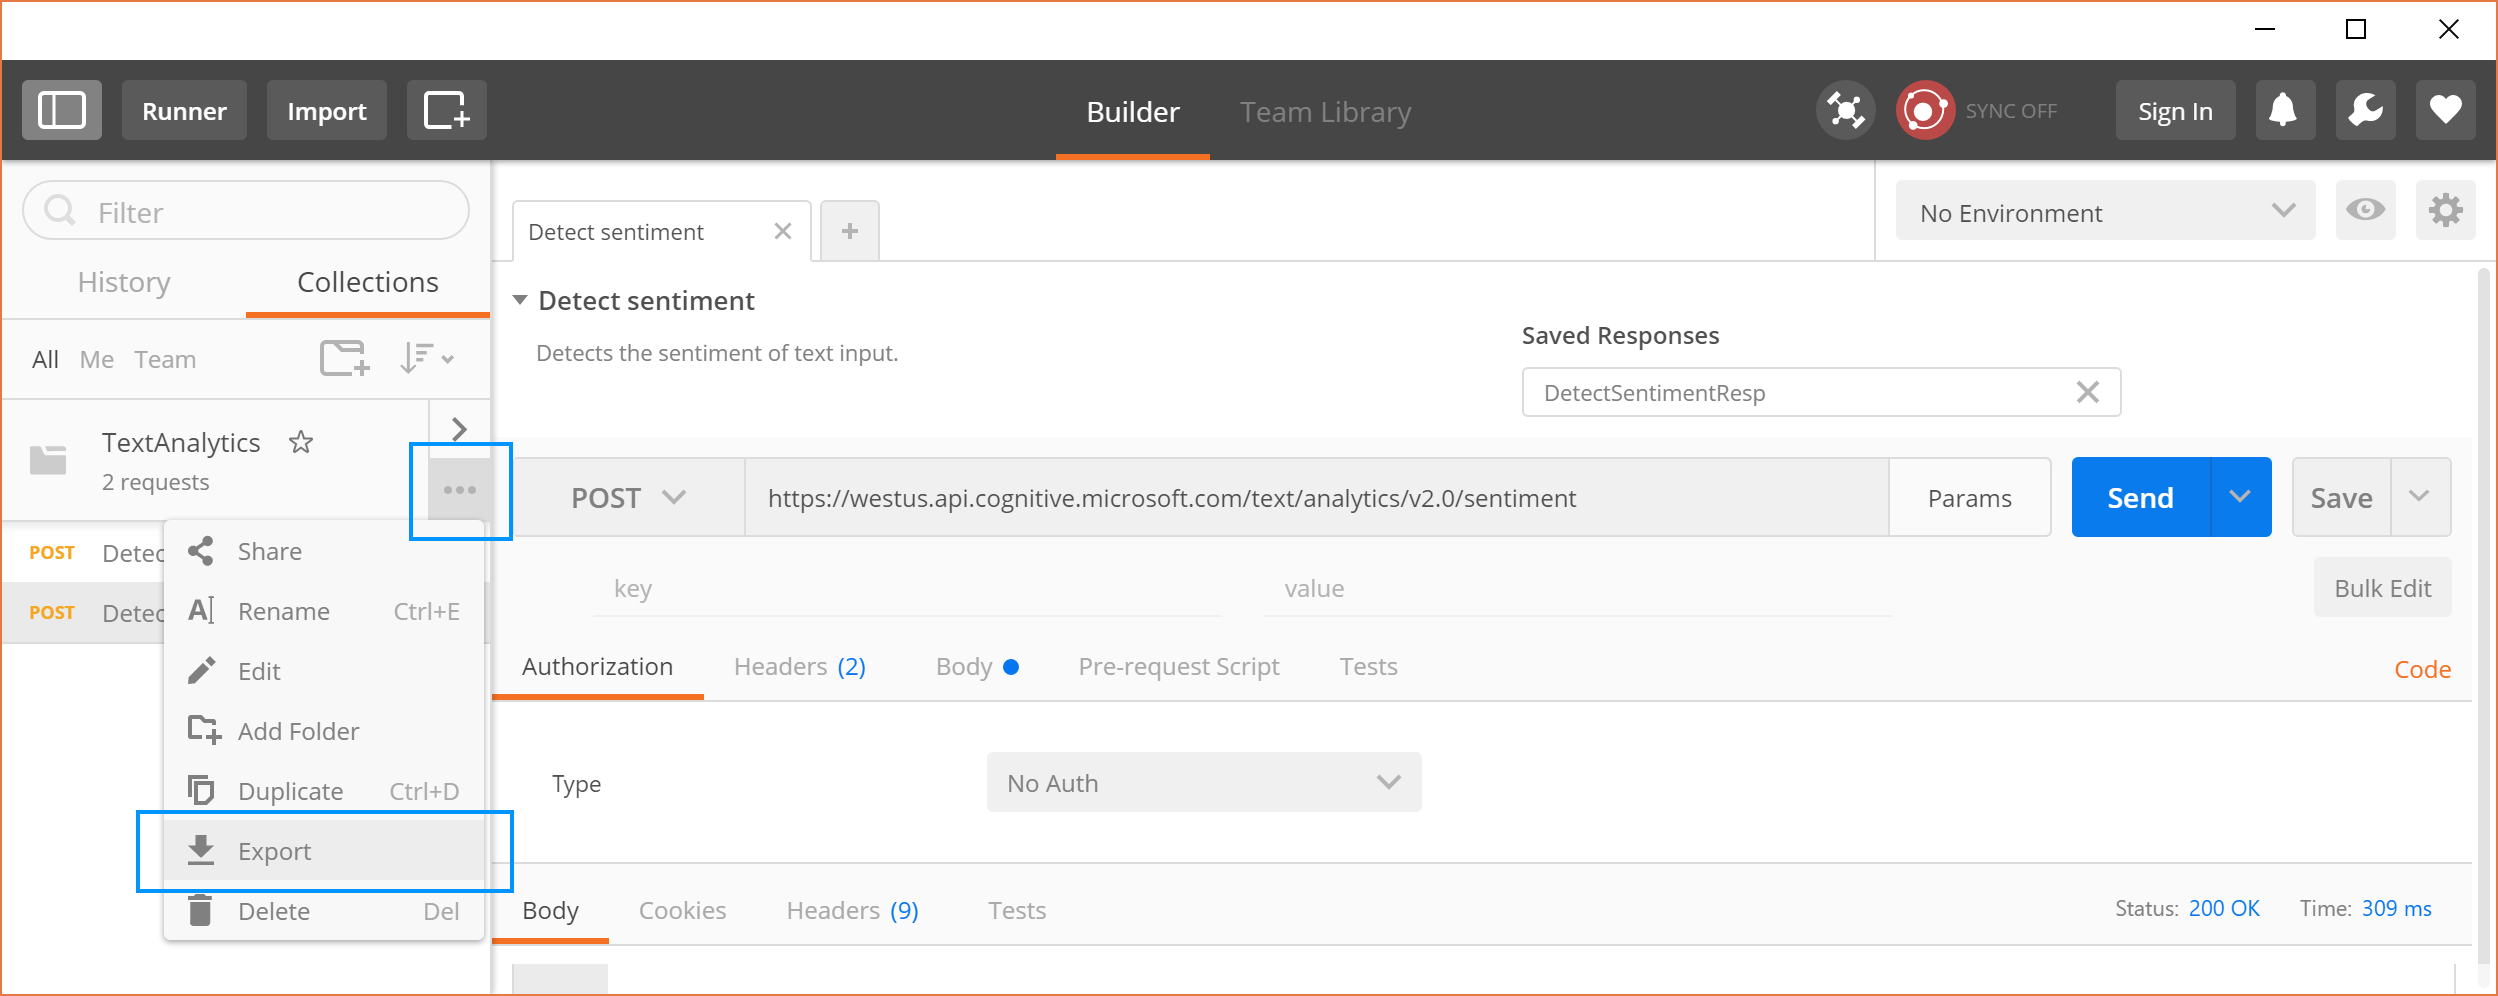
Continue building your Postman collection by creating and saving other requests. You can also duplicate existing requests as an easy way to get started. Once you’ve completed your Postman collection by adding all the requests for your custom API, you can export the collection in v1 format.
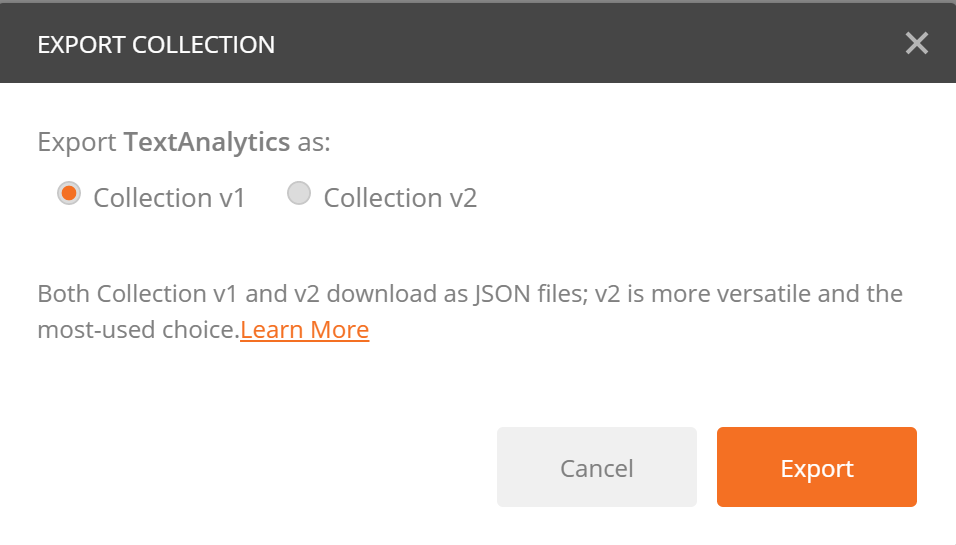
When prompted, select “Collection v1” and then Export to save your collection locally.
Once exported, you can use the custom API UI to import the saved json file. Select “Upload Postman collection V1”, browse to your saved collection and import it. At this point the Postman collection will be parsed and translated into a Swagger definition.
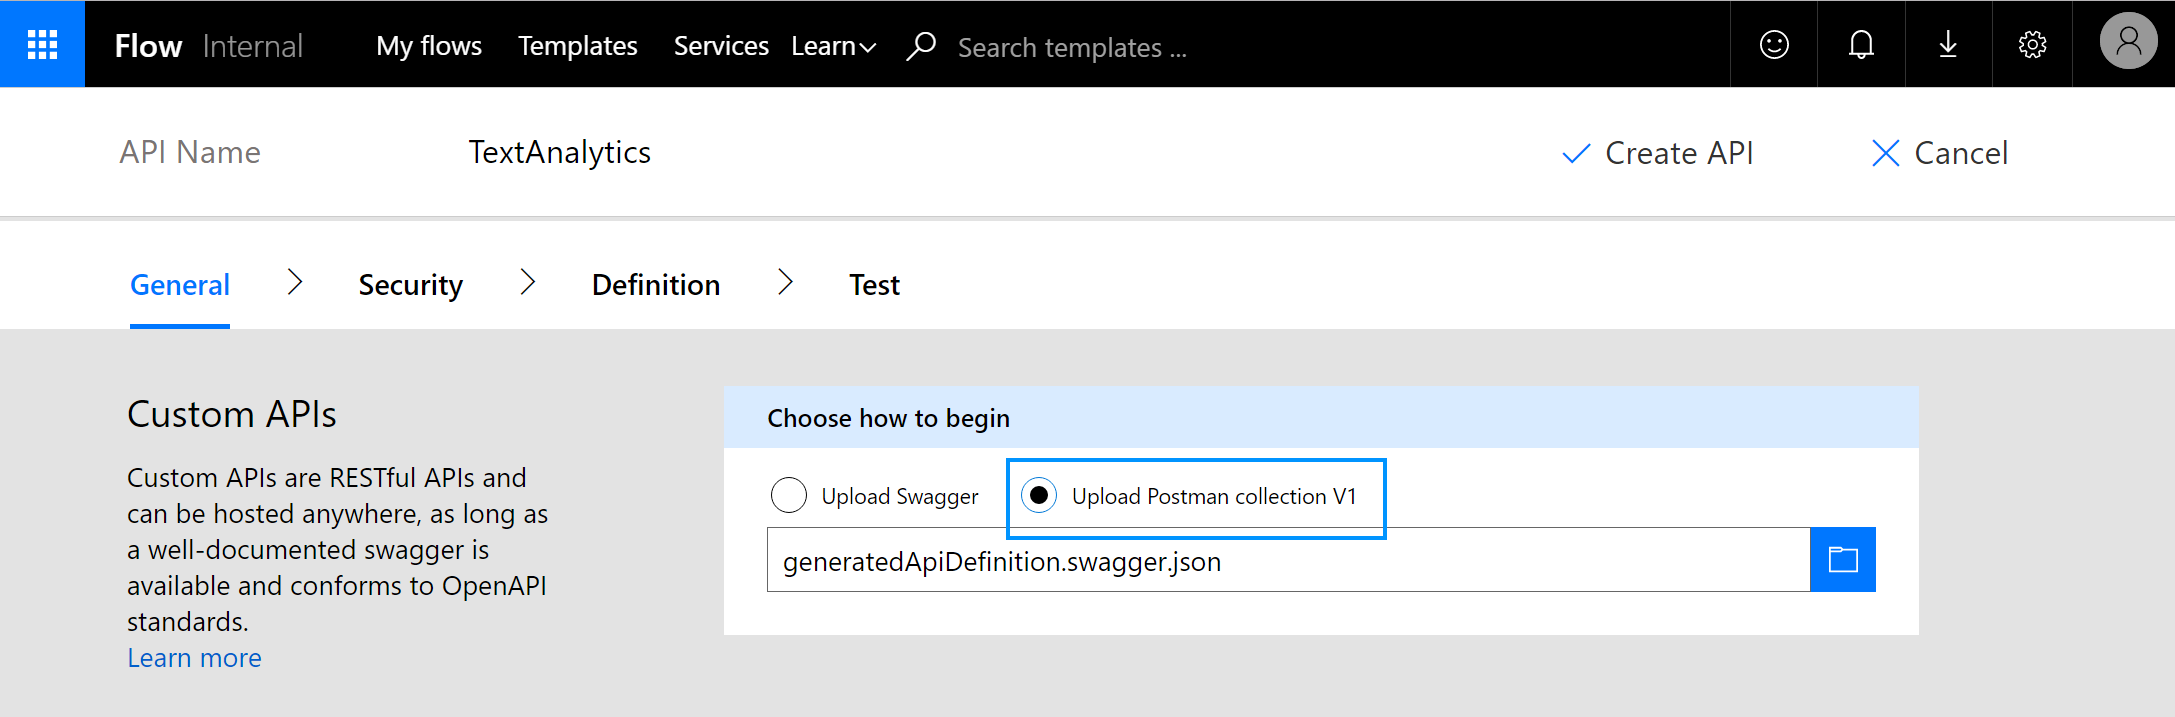
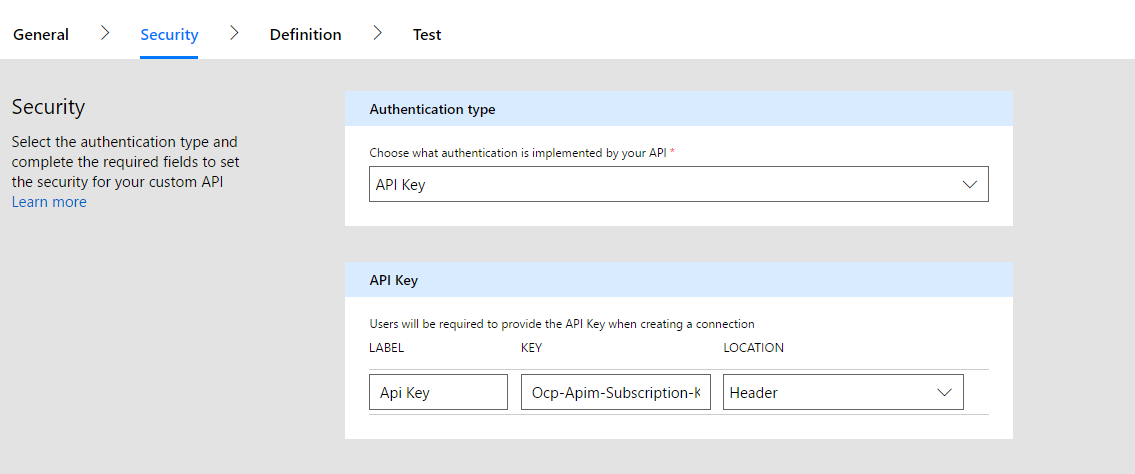
You can update the Security tab to specify API Key authentication type. When using one of the supported authentication types in Postman such as OAuth 2.0 or Basic then this would be automatically populated.
Switching to the Definition tab you can see the DetectLanguage and the DetectSentiment operations have been populated for you.
Finally, Click on Create API in the top right corner to finish creating the Custom API.
Edit and add new actions to your existing custom APIs
Once you have created a custom API, using either a Postman collection or a Swagger file, you can also edit or add new actions by clicking on the pencil icon to edit the custom API and then navigating to the Definition tab.
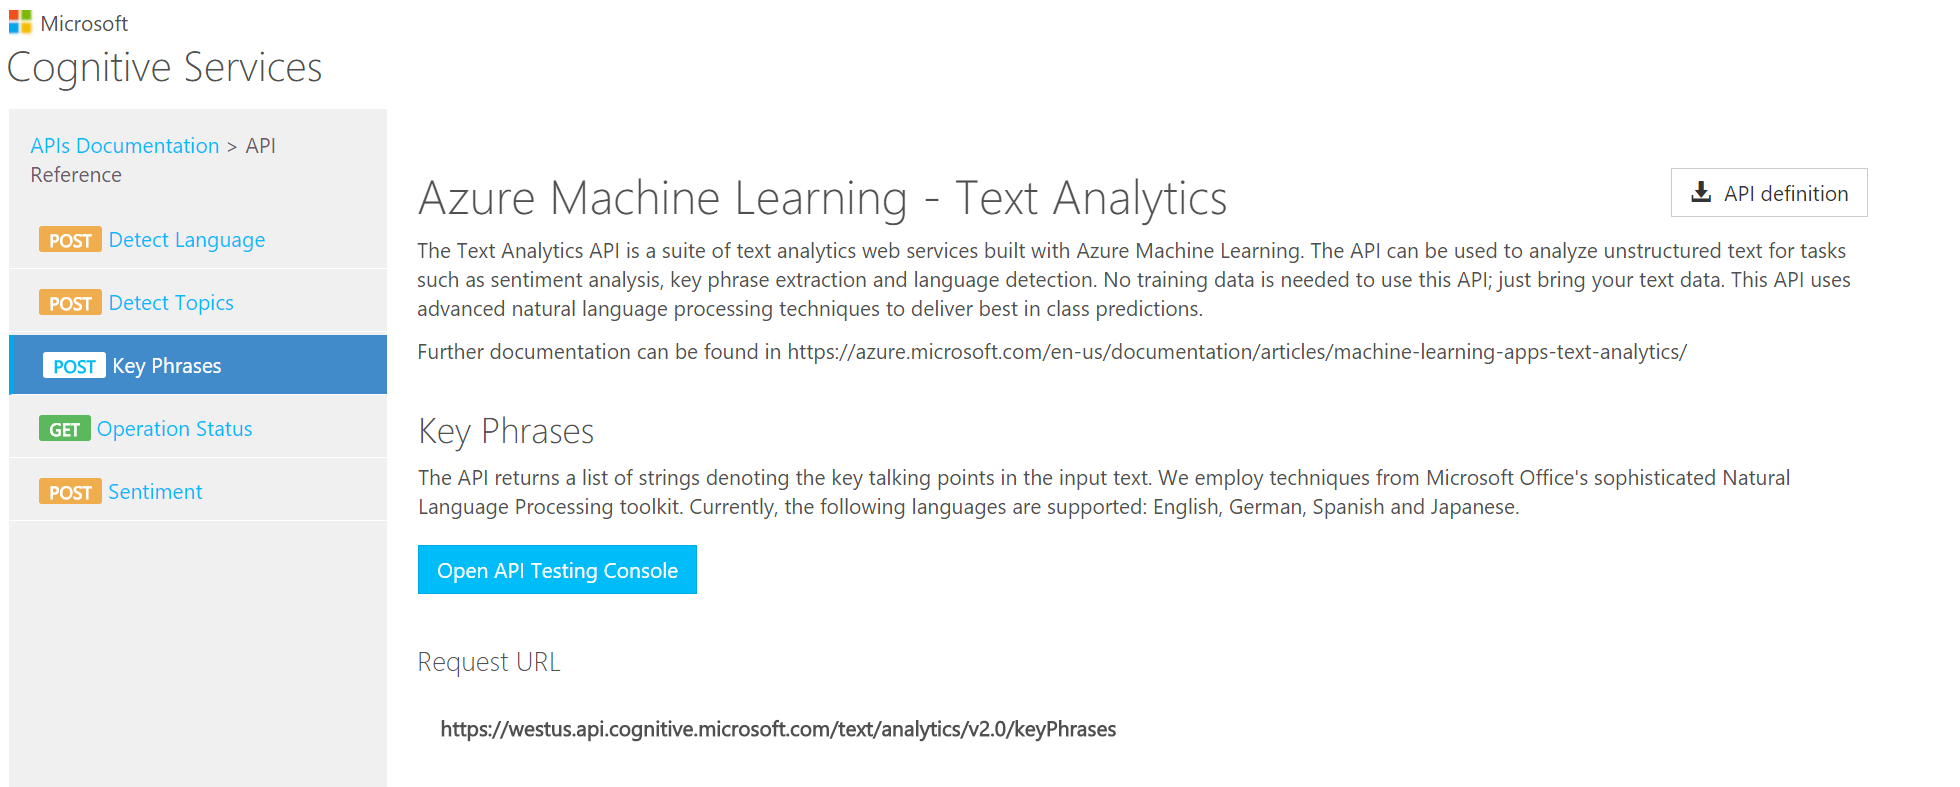
For instance, we will add the “Key Phrases” action from Cognitive Services to our existing custom API.
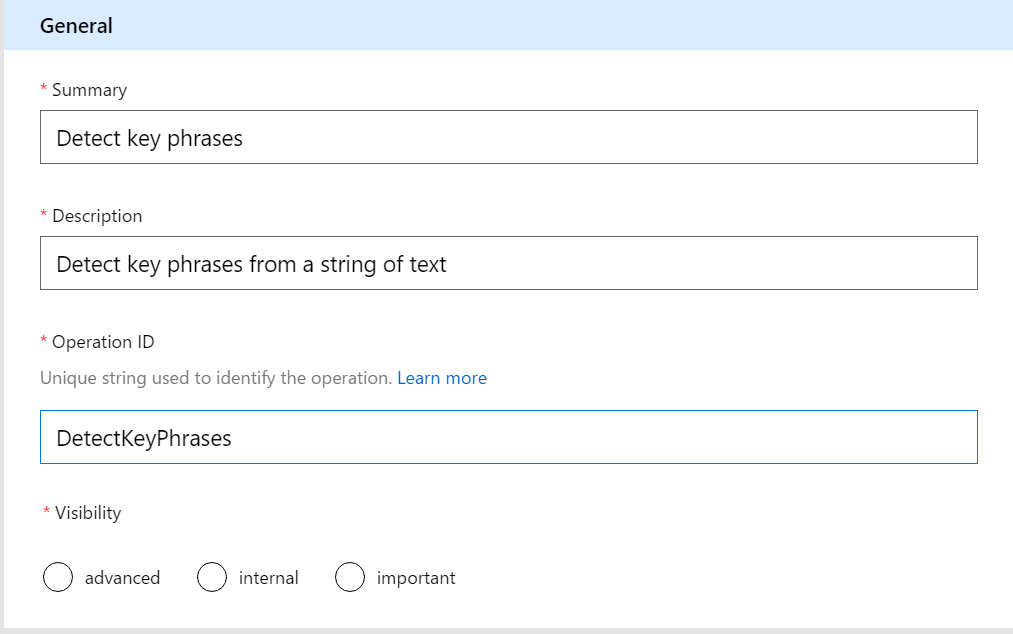
Start by clicking “Add action” and filling out the general details of the action
Then in the request section, click on import from Sample in the top right corner.
You will see a form where you can paste in a sample request, these sample requests are usually available on the API documentation.
For the Key Phrases API
-
The Verb used is POST
-
Request URL is : https://westus.api.cognitive.microsoft.com/text/analytics/v2.0/keyPhrases
-
Request Body :
{
"documents": [
{
"language": "string",
"id": "string",
"text": "string"
}
]
} 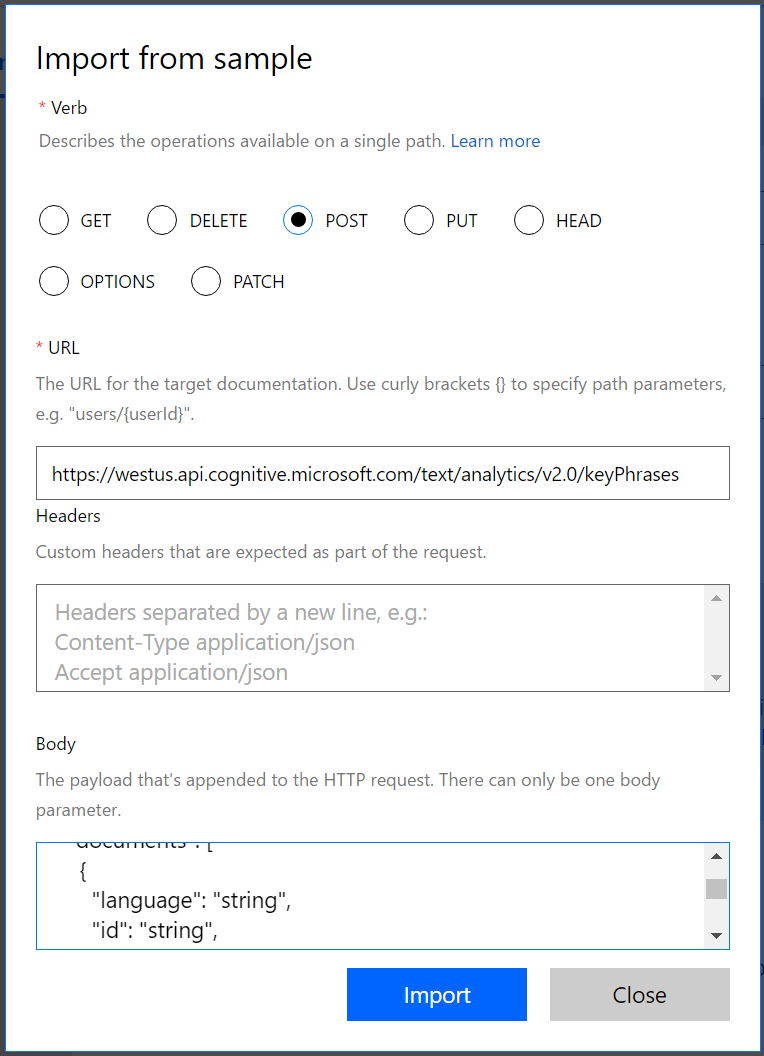 "
"
Once you have filled out the form click “Import” and you should see your request defined. Similarly, now we can define the response.
After defining the new “Key Phrases” action, click on the Update API button in the top right corner to update and save your changes.
Testing actions in a custom API
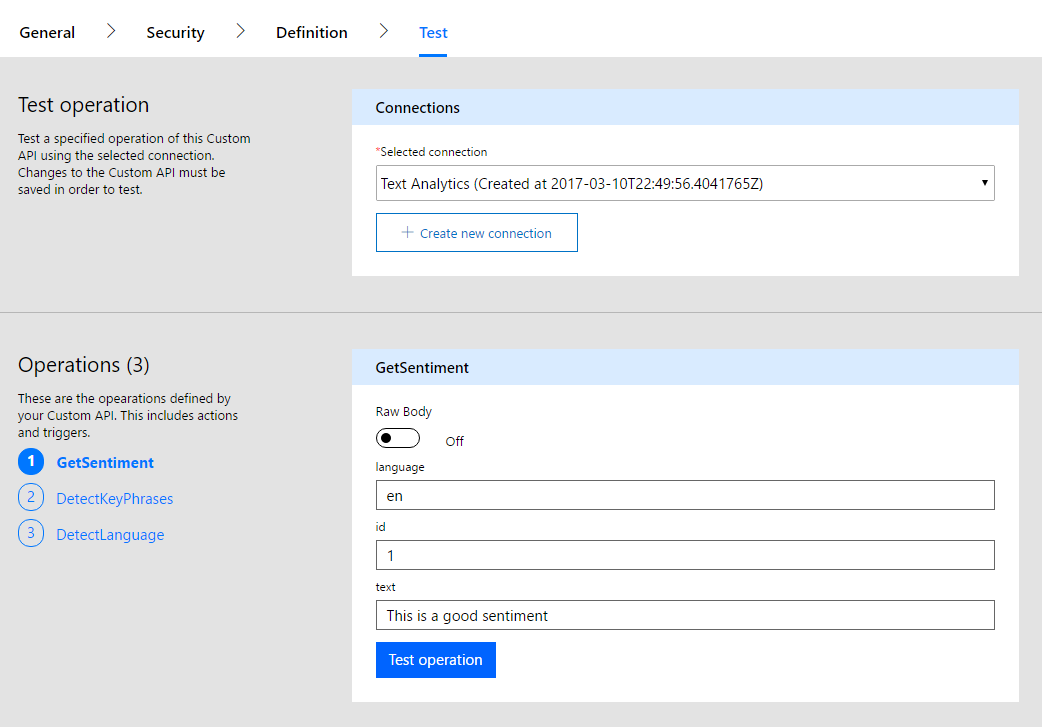
You can also test actions that you have defined in your Custom API, with this new update. After creating or updating your API – head over to the “Test” tab and select the Action you want to test.
NOTE: You will need to save the Custom API and create a connection before you can use the test functionality.
After choosing your connection, select the action you’d like to use to test. For this example, we will be testing the GetSentiment action. Fill out the inputs as needed and click test operation
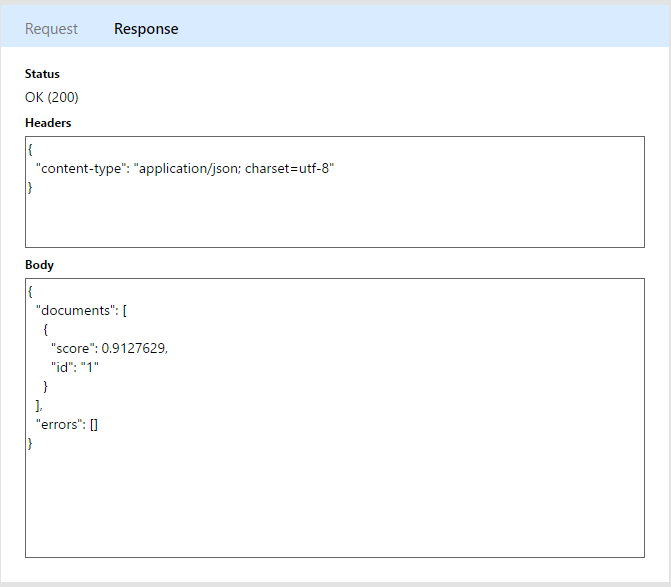
We can now inspect the actual request and response that goes over the wire through Flow infrastructure. The response for my request shows a score of 0.91217629 – which means the sentiment of the input text is good.
In closing, we are excited to show case these new features, but please keep in mind these features are in preview.
Two new services
First, Microsoft Flow now supports sending a push notification to the user of a PowerApp. You can read more about this scenario on the PowerApps blog here:
Push notifications are ubiquitous today to increase usage and retention of mobile apps and beyond. With our new Powerapps Notification connector you can to send various notifications that directly target your apps. You can trigger the notification from either another app or a flow depending on your trigger scenario.
Second, we are adding PivotalTracker. Pivotal Tracker is purpose-built to make it easy for you to convert an idea into a set of stories that you can prioritize, assign, and manage through completion.
![]()