Introducing Flow Launch Panel in SharePoint Lists and Libraries


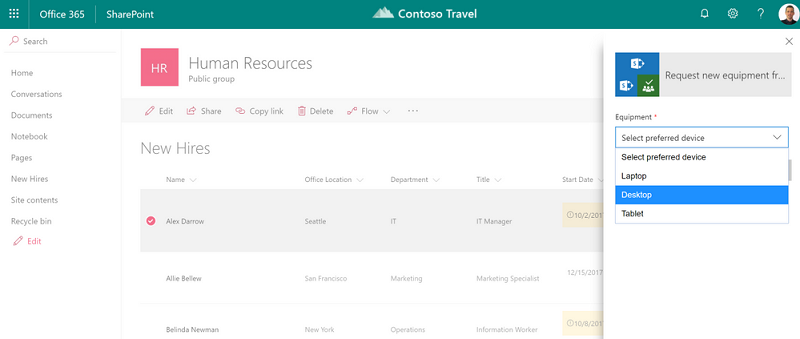
The Flow Launch Panel is now available on all modern SharePoint lists and libraries. Announced earlier at the Ignite conference, the panel allows you to add values to a flow before it runs. For example, a “Request new equipment” flow might ask you to select a desktop, laptop, or a tablet, and send that selection to the team responsible for handling the request.
In this post, we’ll walk you through an example of how to create and customize a flow that uses the launch panel’s capabilities using the For a selected item trigger. We’ll also demonstrate how you can enable other members of your organization to run this flow using run-only permissions.
Create a flow
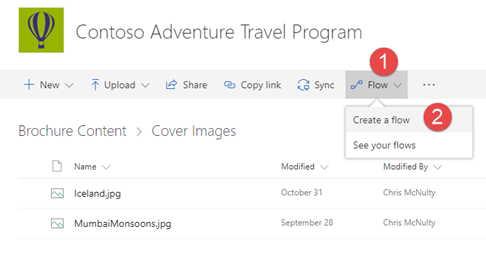
Let’s imagine that you work at a travel agency called Contoso Adventures and you store images used in your brochures in a SharePoint document library. Using the Flow launch panel, you can quickly collect feedback from your colleagues by runing a flow on-demand that posts a message to Microsoft Teams with a link to the selected item. To get started, simply select the Flow menu followed by the Create a flow button.
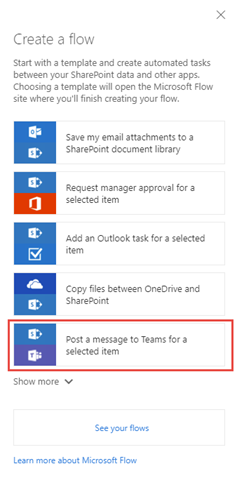
This will open a pane on the right-hand side of the window listing several templates you can choose from, enabling you to connect your SharePoint data to OneDrive, Teams, Yammer, Planner, and more. Select the template titled Post a message to Teams for a selected item.
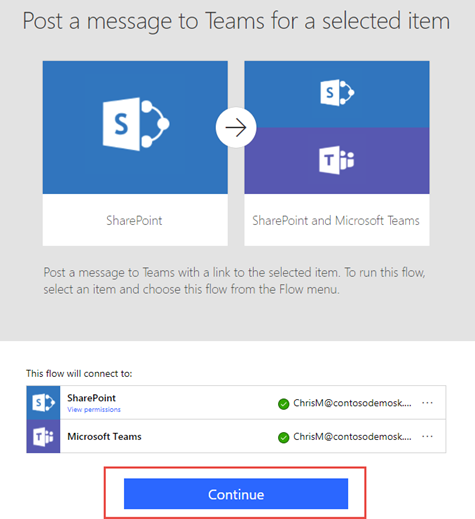
Selecting the template will open a new tab in the Microsoft Flow site with additional details about the template. Click Continue.
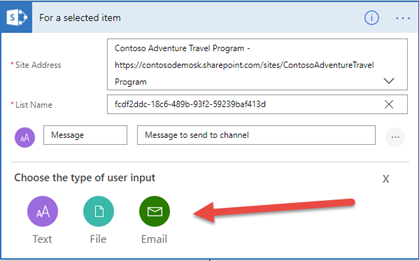
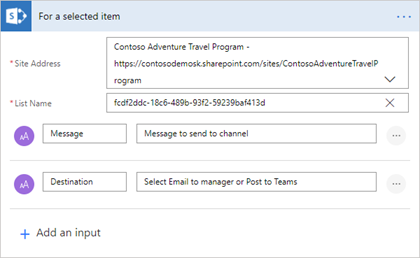
In the flow, you’ll notice a new trigger for SharePoint called “For a selected item.” The trigger is modeled after Flow’s button trigger, allowing you to run flows on demand and capture additional inputs that will be populated by the invoker of the Flow. These inputs can be of type Text (either a single choice or a list of options), File, or Email. We’ll learn more about customizing inputs later in this post.
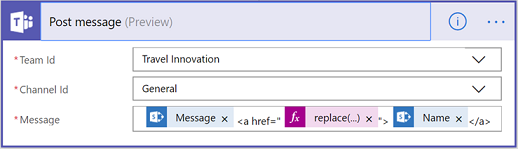
For now, create the flow by specifying a Team and Channel to post your message to. If you click on Edit, you can customize the content of the message to be posted. By default, we include the text description entered by the invoker (Message) followed by a link to the selected item.
Save the flow by clicking the Create flow button.
Run a flow using the Flow Launch Panel
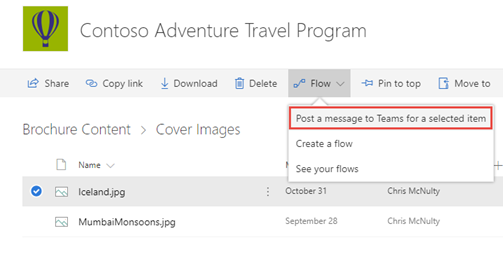
Back in your SharePoint document library, select a document and click on the Flow menu. Then, choose the newly created flow – “Post a message to Teams for a selected item.”
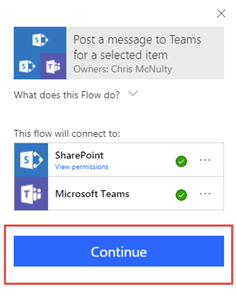
Clicking on the flow, opens the Flow Launch Panel. The first time you run this flow, you’ll be asked to confirm your credentials. You can also learn more about what this flow does. Click Continue.
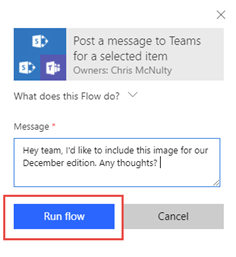
Now, enter a message to send to your team, requesting feedback. Click Run flow.
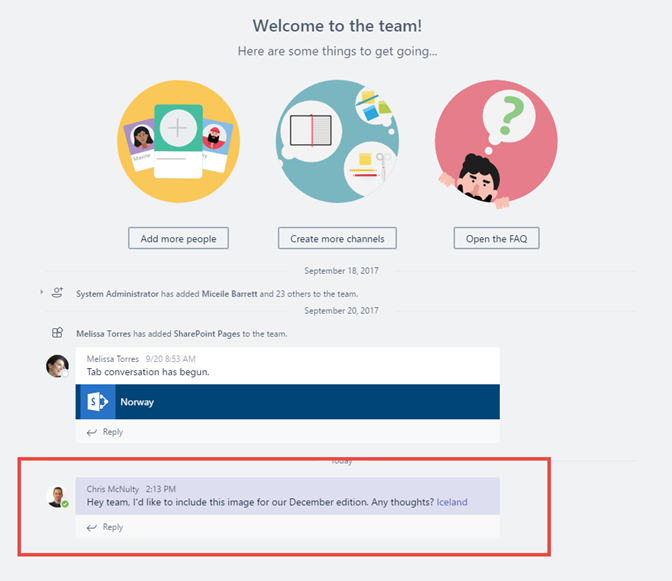
Voila! A new message is posted to Teams on your behalf including the note you added in SharePoint and a link to the selected item.
Share a flow with run-only permissions
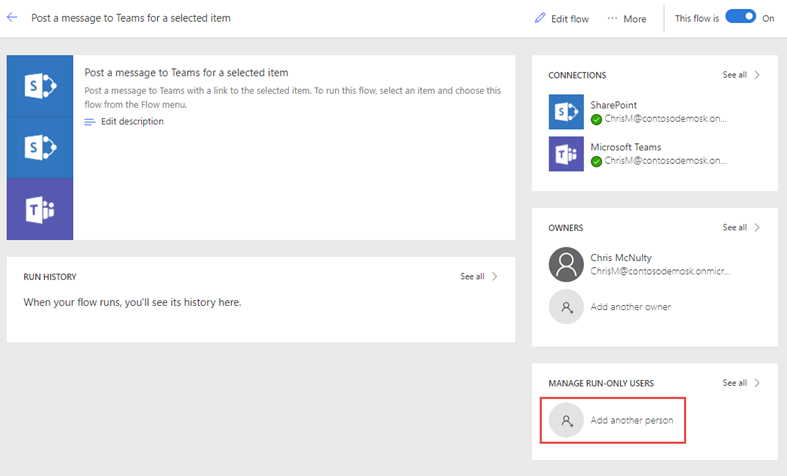
Now that you’ve created the flow, you can share it with colleagues either by adding them as an owner of the flow or as a run-only user. The latter allows you to maintain ownership of the flow, while enabling your colleagues to run it. In Flow, head over to My Flows and choose the Post a message to Teams for a selected item.

Under Manage Run-Only Users, click on the Add another person button.
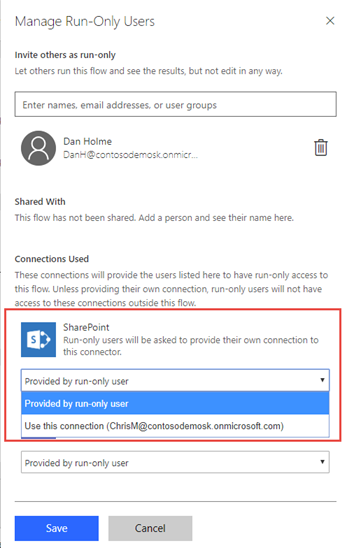
Here, you can enter individuals or AD security groups. We will be adding support for Office 365 groups in the future. For each connector used in the flow, you can decide whether the invoker should bring their own credentials (“Provided by run-only user”) or use your credentials (“Use this connection”). Click Save to add the user as a run-only user.
Customize the flow
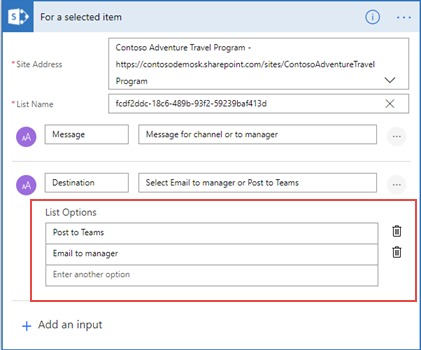
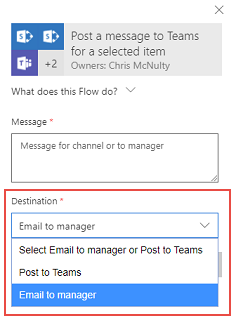
Let’s customize the flow you created earlier and ask the invoker whether they want to send the selected file for review to their manager or post it to Teams. In the For a selected item trigger, let’s add a text input called Destination. Let’s replace the hint text for this input with a custom message “Select Email to manager or Post to Teams”.
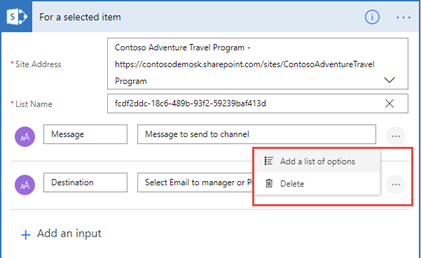
Then, click on the ellipsis followed by the Add a list of options button.
For the first option, enter “Post to Teams” and for the second option, enter “Email to manager.”
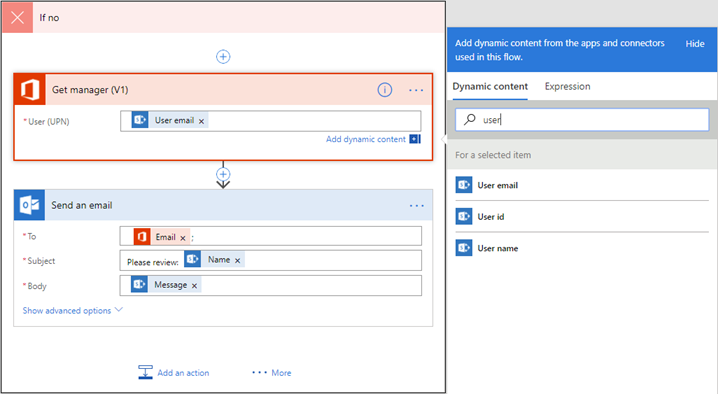
Now, let’s add a condition after the Get item step that checks whether the Destination is equal to Post to Teams. And, let’s drag and drop the Post a message action into the Yes branch.

Let’s finish off our flow by adding a Get manager and a Send an email action in the No branch. You can get the Invoker’s email, OID, or display name by referencing dynamic content such as User email, User id, and User name respectively.
Now when you invoke the flow in SharePoint, you’ll be asked to select a Destination and the flow will act (post a message to Teams or send your manager an email) depending on your selection.
We hope you enjoy this new update. If you have ideas for templates or other feedback, please leave us comments below or post on our Community forums.