Intermediate | Flow of the Week: Build a vendor contract approval process


This flow of the week will cover how to build a contract approval process. A community member brought up this process on the SharePoint Tech Community here and we wanted to share it since it's a great demonstration of how to build a detailed approval loop.
The Approval Scenario
The scenario looks like this:
- The contract author will upload a Word document contract to a SharePoint document library.
- Once the author is ready, they want an internal Approver to look at the draft contract and Approve or Reject. If approved, move on to the next stage, otherwise, the author will have an opportunity to revise the contract and send it back to the Approver again.
- If approved, the vendor, who is external to the company, will have an opportunity to review. As before, if they reject then the author has an opportunity to update the contract, and start the approval process over again.
- Once both have approved, a PDF will be generated for the vendor to sign.
- The vendor prints out the PDF, signs it, and then replies to the email with the signed PDF.
- Finally, the signed contract is uploaded to the original document libary.
You may notice that this deals with a few interesting concepts: approvals both inside and outside of an organization, as well as an approval loop (continue trying to get approval until it is complete).
Building the Flow
I will walk through how to build this flow from scratch, but you can also use this template to follow along yourself.
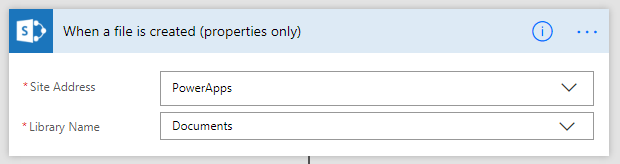
First, there's a SharePoint document library that you (the contract author) will upload drafts to. This flow will trigger based on the draft being uploaded to that document library. You can use the When a file is created (properties only) trigger.
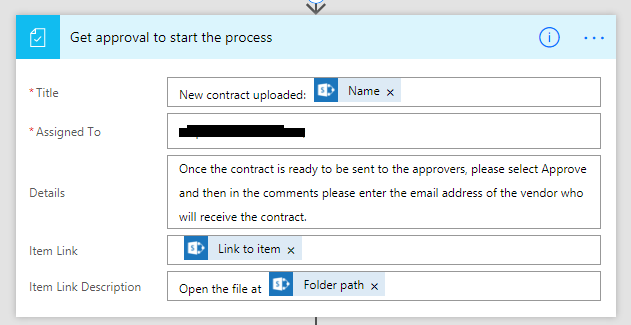
I assume that the author won't want to immediately start the approval process when they upload the draft. Instead, I've added a next step that lets the author decide when the draft is ready to be sent to the official approver(s). We also can use this step to collect the email address of the vendor that the contract will be sent to (you could also use a custom column in the document library to enter that information – but for the purposes here it's easier to enter it once you kick off the approval section).
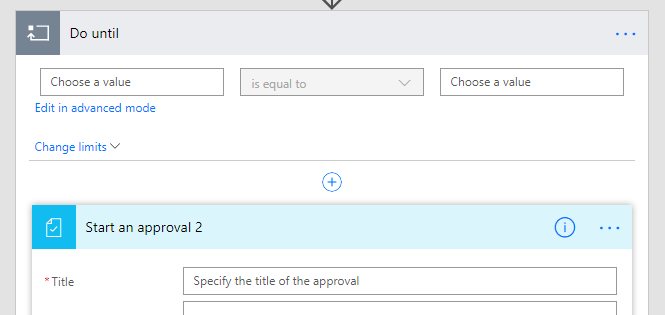
Now that the approval process is going to start, you'll need to add a Do until loop. This loop will continue until both the approver(s), and the vendor themselves, have approved the document. That will start out looking like this, once you add the approval step in:
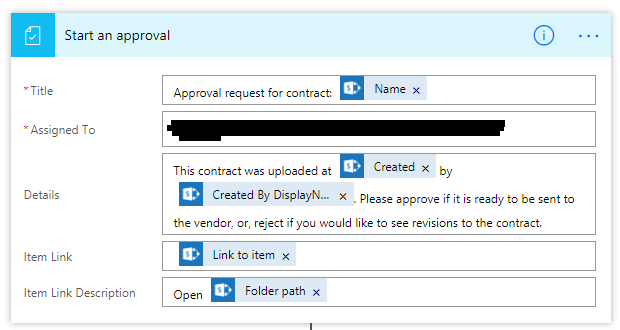
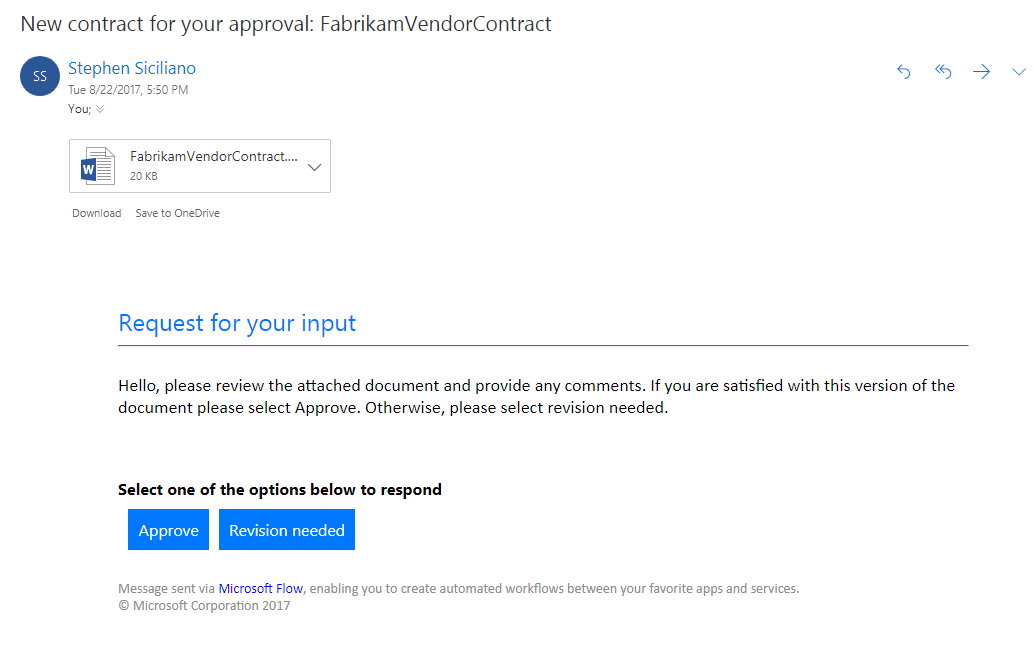
For the first approval step inside the do until, you'll want to send a link to the final draft of the contract to the approvers. You can provide any number of approvers on the Assigned To line. You will also want to include a friendly message to the approvers indicating what they are approving. Filled out, that will look like this:
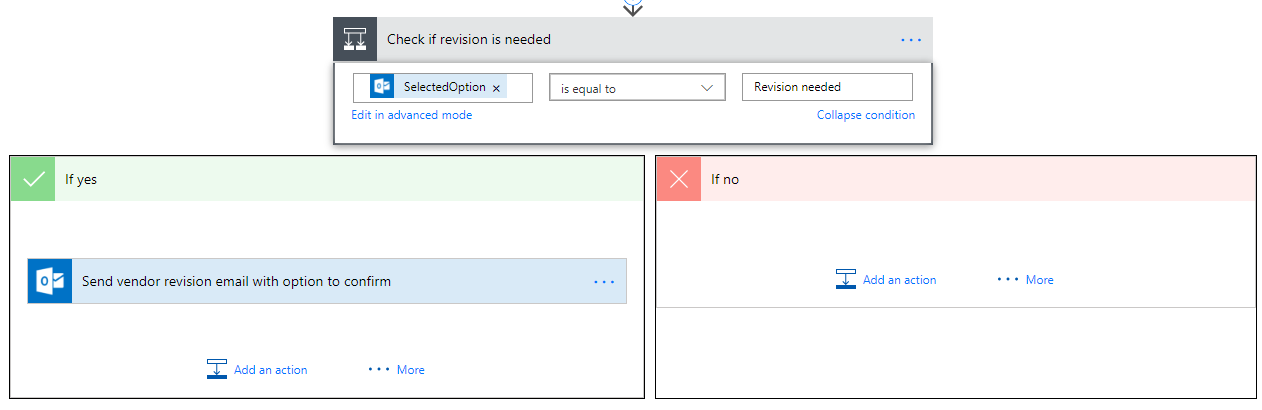
Now, there are two possibilities – either the approvers liked the contract draft and you can send it off to the vendor, or, they requested revisions and you want to be notified of those comments. To handle these two possibilities, you'll need a condition:

Inside the top condition box, on the left hand side you'll use the Add dynamic content option to pass in the Response from the approver. Let's look at each side of the condition one-at-a-time.
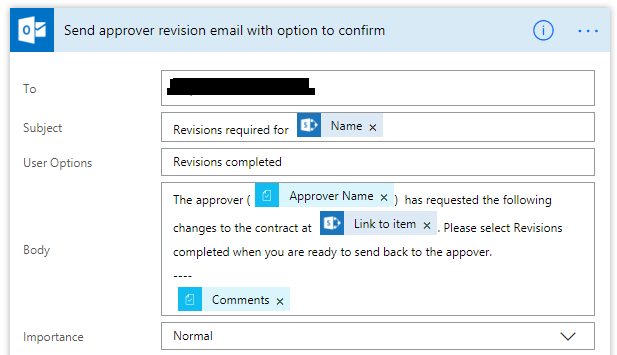
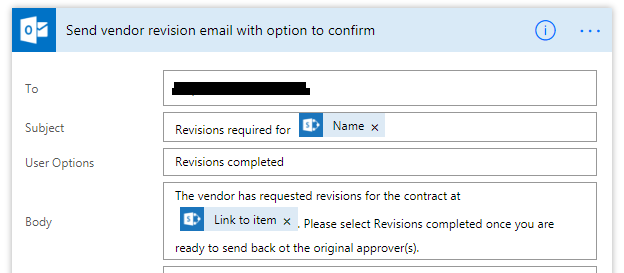
Starting with the If no side – we will send the author an email requesting their revision. That email will also contain a button that they can click once they are done with the revisions to the contract to inform the Flow to restart the approval loop.
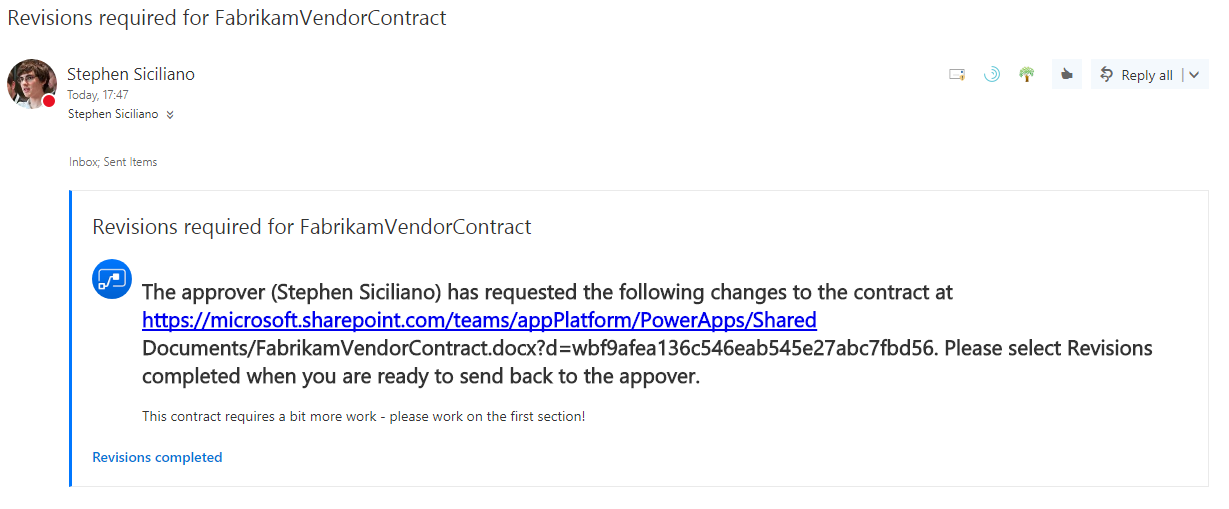
This email, when it gets sent, will look something like this:
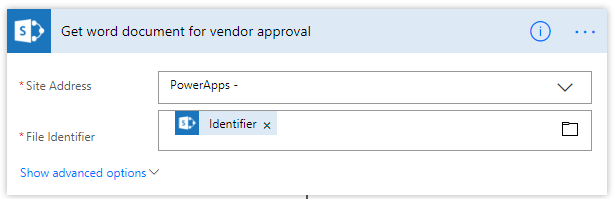
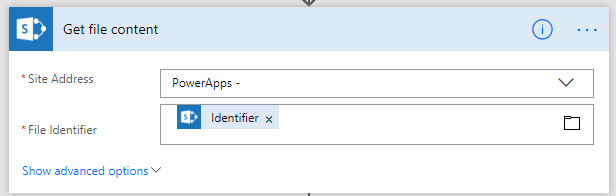
Now, let's look at the If yes side. First, we are going to get the latest word document content so we can send an attachment to the contractor.
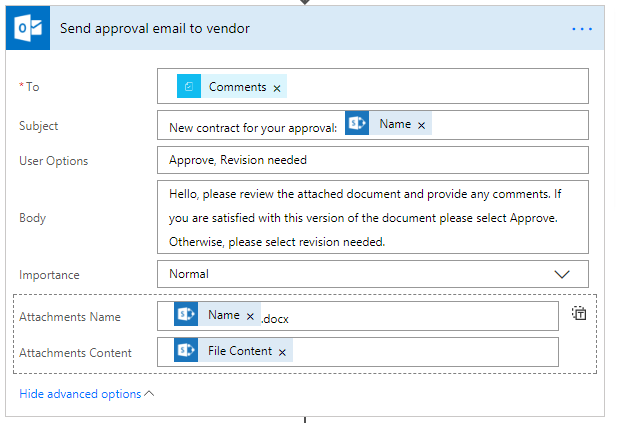
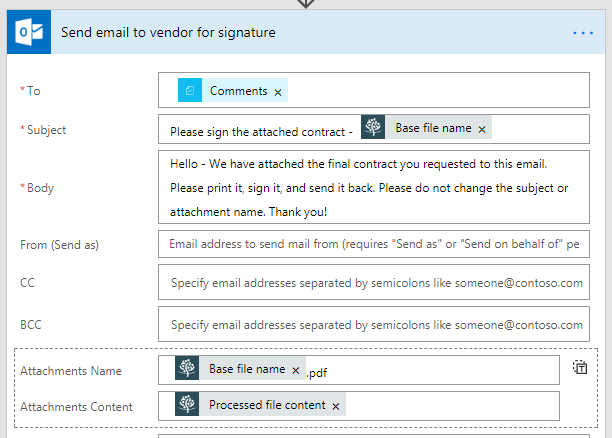
Ideally, you could get a link but since the vendors may not be in your Office 365 tenant, an attachment is likely the easiest way to accomplish this. Next, send an email to the vendor with the document attached:
This email, when it's sent, will look something like this:
Now, you'll need a second condition to check if the vendor is happy with the contract or not:
If they select Revision needed then you'll need to send a similar mail as above to the author to update the contract. Thus, in the If yes side you'll add this step:
The flow will now wait for the author to edit the word document, and then select the Revisions completed button in their email. When they select that button, the approval process will loop to the top again and restart with the latest version of the document. You won't need anything in the If no side because no further revisions are required if the contractor approves.
You may have noticed that I skipped over the condition of the Do-until. This is because you need to add the actions inside first, before you can reference them in the Do-until condition. The condition will have two parts, because you want both your approver, and the vendor to approve. To build such a compound condition today you'll use the Edit in advanced mode button. In advanced mode you can use Microsoft Flow's excel-like syntax to build powerful boolean statements. In this case, that expression will look like:
@and(equals(body('Start_an_approval')?['response'], 'Approve'),equals(body('Send_approval_email_to_vendor')?['SelectedOption'], 'Approve')) The exact values inside the quotes of the body() functions may vary depending on the names of the actions you give in your flow.
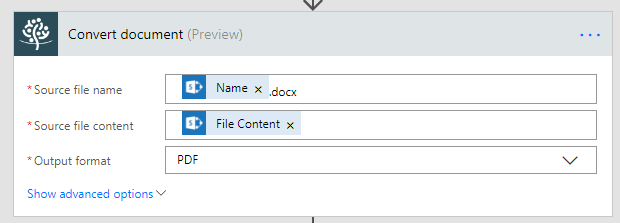
Now that you have completed the approval loop, the next step is to generate a PDF of the finalized contract and send it to the contractor for signature. First, download the finalized content of the word document:
In Microsoft Flow, we have a partner, Muhimbi, who provides functionality to generate PDFs from Word documents. If you haven't used Muhimbi before you can sign up for a free trial. That action is very simple, it takes the Word document content from the above step and the file name:
We will use the generated PDF to send the contract to the contractor for signature. Notice I have included the file name in the subject line, that's important for the next step. You can also provide additional instructions, for example:
Next, you will have the flow wait for the contractor to respond to the above email with an attachment. The reason that you must include the file name in the subject is because flow will specifically wait for the contractor to respond to that thread – if they happen to send you another email with an attachment in the meanwhile you don't want that being uploaded to your SharePoint. So, add on the When a new email arrives step and fill it out like below:

Notice the use of the file name in the Subject filter, as well as the fact that you're looking for emails that have attachments, and that you want to Include Attachments in the step.
The final step of the flow is to upload this attachment to your document library. Be sure to add (signed).pdf to the name of the file.
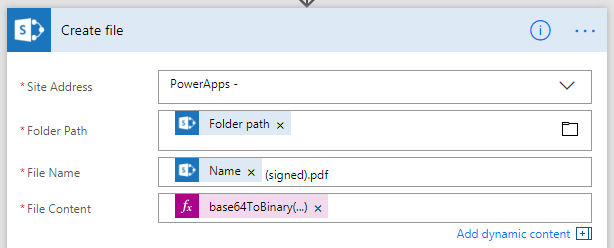
The most complicated part of this is email attachments can normally be a list of items — but in this case you just want the first email attachment. You can use another flow expression to get this attachment by itself. That's what the pink value is above in the File content field. The full expression would look like this:
base64ToBinary(first(first(body('Wait_for_vendor_response')['value'])['Attachments'])['ContentBytes']) Now you're almost done. However, there is one more change that needs to happen. Because the above attachment is being uploaded to the same document library you're monitoring — this whole process will also be triggered on the signed PDFs being uploaded. This isn't what you want, so you should go back to the top of the flow, and add one more condition:
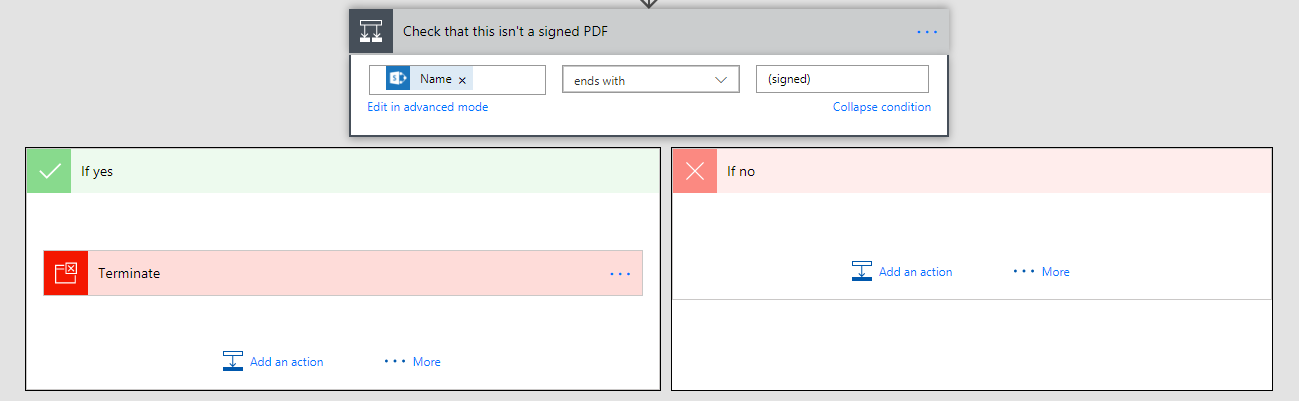
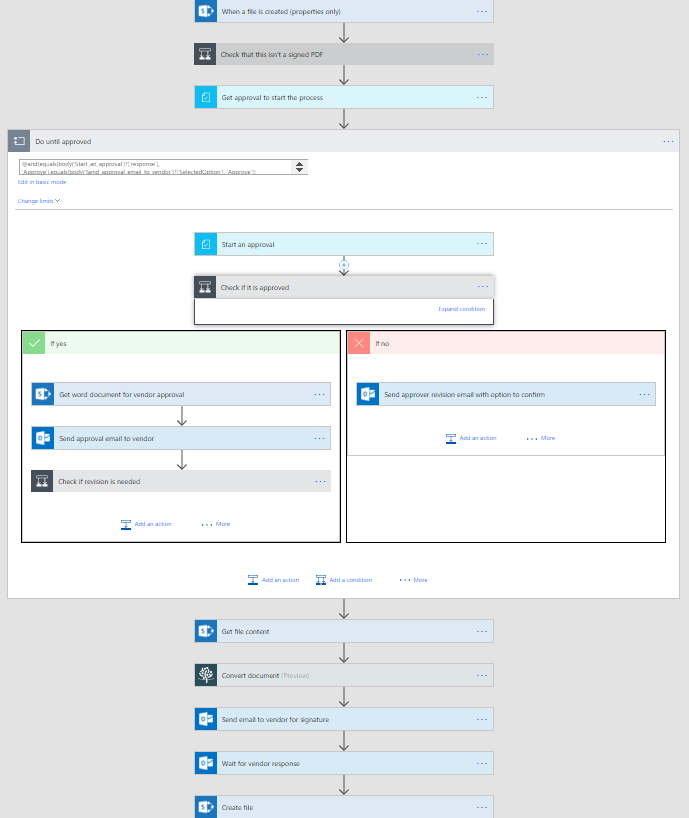
In the condition, we check to see if the Name ends with (signed). If it does then we immediately terminate the flow. This will prevent you from getting double approval flows. You could also accomplish something similar by having a separate document library for your signed PDF's. In the end the full flow looks like this:
Summary
This flow made use of many different approval steps, a couple conditions, and a do-until loop. All together, this enables you to build a business process that spans both inside and outside of your organization. Once you create this flow, you can of course monitor it from the Flow details page. Check out the template for this flow yourself, and, please let us know on the community what you think of this scenario and how you can use flow in similar approval processes.