Calling Microsoft Flow from your application


Microsoft Flow allows you to turn complex repetitive tasks into automated multistep flows. In many cases, you want your flow to be triggered by an event, such as a document update. In others, you want to let the end user initiate a flow. In this case, Microsoft Flow will serve as an integration glue between your application and large number of other services. For example, you may want the user to click on a button and send an email to her customers. In this article, we will demonstrate five simple steps that will help you build flow and trigger it using simple REST API call. For the sake of simplicity, we are using the Postman Chrome App to send REST API calls.
Step 1:
Before we start implementation, let's think about the format of the call. In this example, triggering an email from application, we want to pass the following information from the client to the flow: email address, email subject and the text of the email. Our request body will look like this:
"emailaddress":"<your address goes here>",
"emailSubject": "Hello",
"emailBody": "Hello from Microsoft Flow"
}
We will also need a JSON schema defining the format of the request. To simplify schema creation, you can use one of many schema generators available on the web. We used jsonschema.net.
Copy/paste the request body and click on Generate Schema. The tool will generate a schema like this one:
{
  "$schema": "http://json-schema.org/draft-04/schema#",
  "type": "object",
  "properties": {
    "emailadress": {
      "type": "string"
    },
    "emailSubject": {
      "type": "string"
    },
    "emailBody": {
      "type": "string"
    }
  },
  "required": [
    "emailadress",
    "emailSubject",
    "emailBody"
  ]
}
Step 2:
We start in https://flow.microsoft.com/en-us/ by creating a new Flow (click on My Flows and Create from blank). When prompted to search for triggers, choose Request.
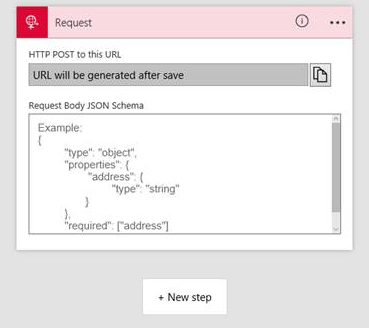
There are two boxes in this form: one for the URL that your application will call, and one for the JSON Schema defining format of the request. Start with the JSON Schema field, and paste the schema generated in Step 1 into it.
Step3:
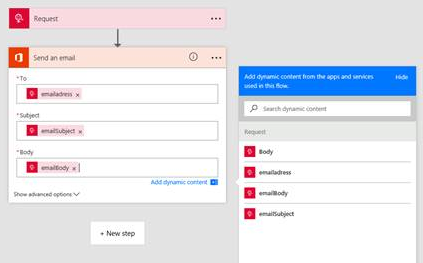
Add an action by clicking on the "+ New Step" and choosing "Office 365 – send an email."
When you click on any field in the form, you can see JSON parameters (from the schema) that can be added into the fields.
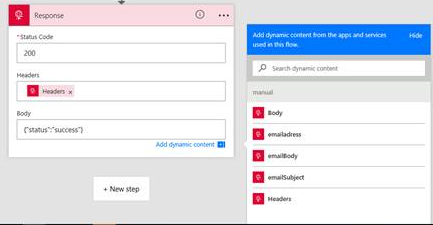
Click again on the "+New step" and choose the "Response" action. Here you have an option to either specify the JSON body of the response, such as {"status":"success"}, or use the Body of the original request by clicking on the "Body" property.
Please note that if one of the previous steps of the flow fails, this action won't execute and your application will receive an error response:
{
  "error": {
    "code": "NoResponse",
    "message": "The server did not receive a response from an upstream server. Request tracking id '08587237214980038925577763844'."
  }
}
Step 4:
Give your flow a name and click on the "Create Flow" button. Once your flow is created you can click on the Request bar and see that a URL has been generated by the system:
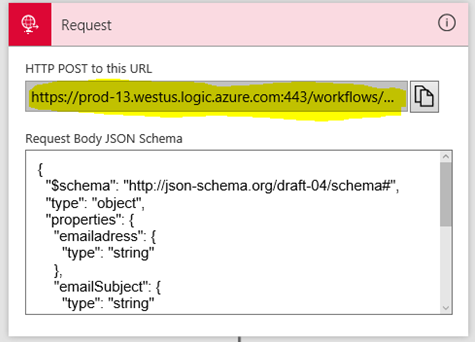
Please note that generated URL contains an access key. We recommend that you avoid sharing your URL with anyone else.
Step 5:
Copy this URL and JSON body into Postman:
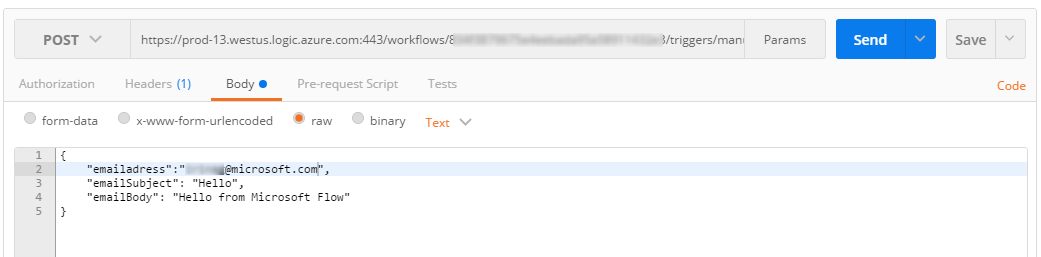
Don't forget to add a Content-type header = application/json.
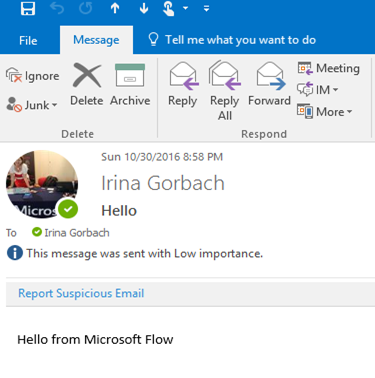
Send the request, wait a moment, and then check your inbox for the email. Voila!
In Postman, you will also see a response:
{
"emailadress":"myemail@miosoft.com",
"emailSubject": "Hello",
"emailBody": "Hello from Microsoft Flow"
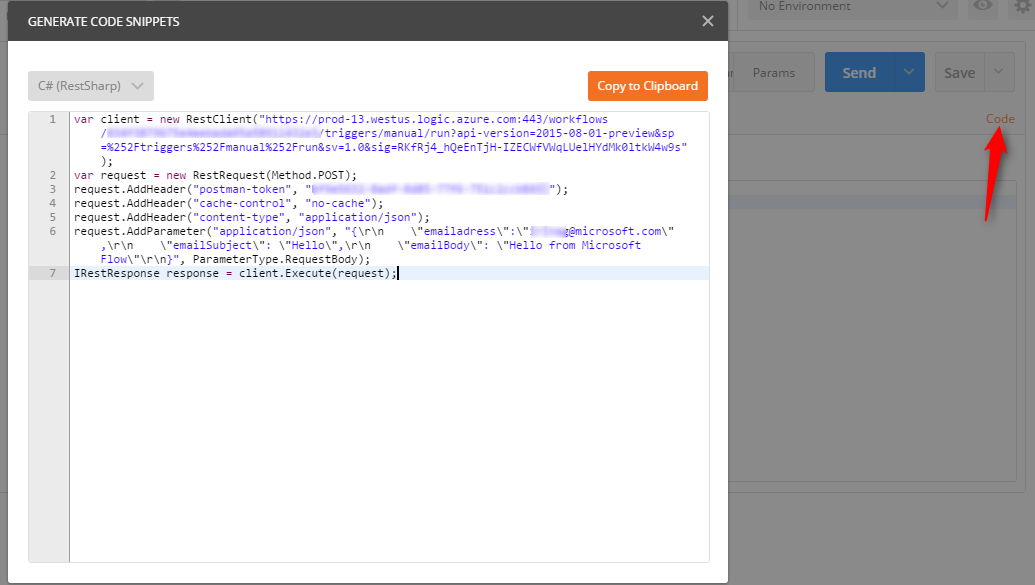
} Postman can also generate a code snippet for you in programming language of your choice. Click on the Code button and choose programming language.
To summarize:
Decide on the call format, create a flow with an HTTP Trigger, add an email action and Response Action, and issue a Post request.
Now you can use Flow to create powerful custom HTTP triggers that your application can invoke at any time. Please try it out and share with us your integration stories.