Beginner | Flow of the Week: How to Extract Email Data and Send to SharePoint List


The following is a FOTW blog written by Flow Community member Courtenay from Parserr.com. This tutorial highlights how the recently added Parserr connector can be used with Microsoft Flow. Let's begin.
Hi there, Courtenay from Parserr.com here – let’s jump straight into it!
Parerr is an easy connector for Microsoft Flow that allows you to easily extract email (and attachment) data and send it directly to the application that actually needs it.
In the steps outline below, we will show you how to select the exact data you need from your email body and add it straight into a SharePoint List. However you could take your extracted email data and add it into any one of the 3rd part connectors supported by Microsoft Flow!
How to Extract Email Data and Send it to a SharePoint List:
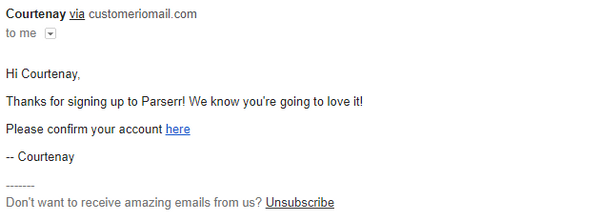
1. Sign up for a free Parserr account and confirm your email address:
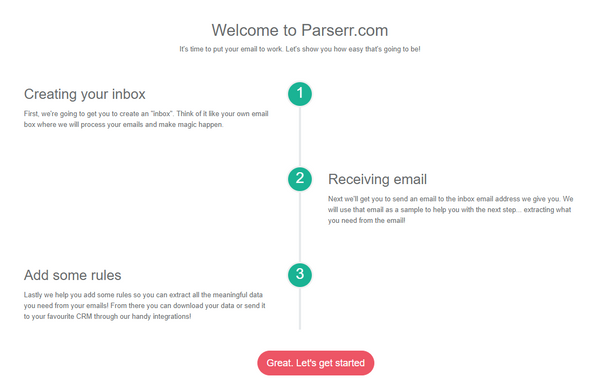
2. Click on the confirmation link in the email and login with the details you provided previously. Once logged in, you should be presented with the setup screen. Click the "Great. Lets get started" button
3. The next screen will provide you with your incoming email address. This address is where you will forward all your incoming inquiries that you wish to extract to SharePoint. Go ahead and copy the email address provided. Then make sure to forward a valid inquiry or email you wish to extract and make a note of your unique Parserr inbox (eg. BSB8GEBA@mgparserr.com) as shown below

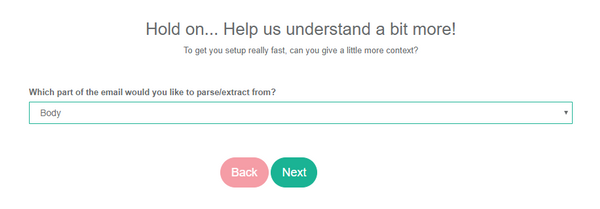
4. Once you have forwarded the email to the assigned email address (ending in mg.parserr.com), Parserr will detect the email and then ask you a few onboarding questions. In our case we would like to extract information from the body of the email:
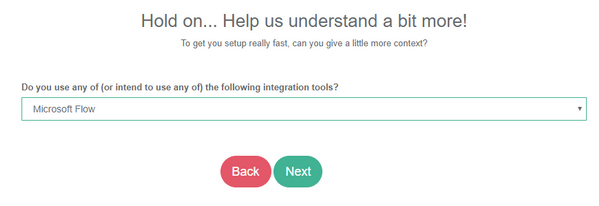
5. Choose "Microsoft Flow".
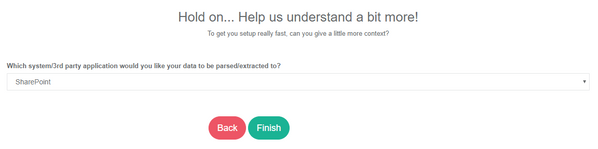
6. Next Parserr asks us where we'd like to extract our data. Choose SharePoint and click "Finish".
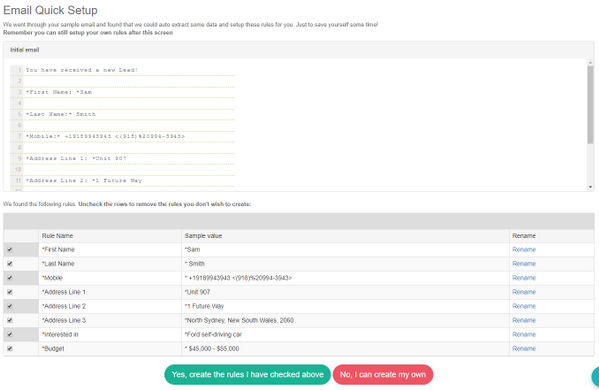
7. Depending on your email, Parserr may be able to automatically set your rules up automatically. In the case below, Parserr has detected that there are some parts of the body that may be able to be auto-extracted. If you don't see this screen, not too worry, parsing rules are very simple to setup. Choose the rules you want to setup. If you arent sure if you want the rule, simply create it anyway. You can always delete it later. Click the "Yes, create the rules I have checked above" button.
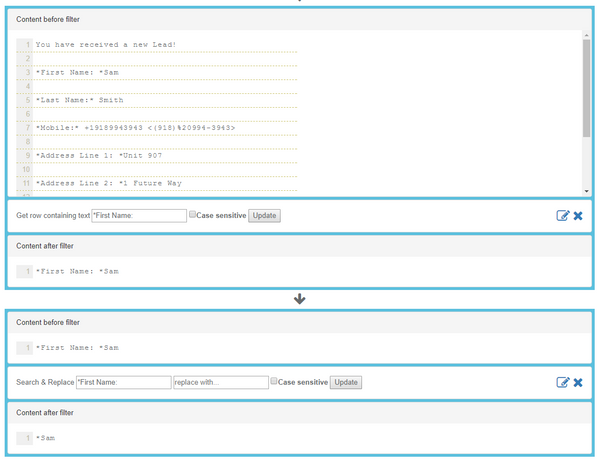
8. Next, you will have the option to create further rules, or if you have no rules yet, an option to create a rules. Creating rules is really easy once you get the hang of it. The idea is to "chain" a number of steps together to extract the content you need. For instance in my rule for "First Name" above, the following steps happened:
a) Step 1: Get row containing text "First Name": This gets me the row in the body of the email that contains that phrase, First Name
b) Step 2: Search & replace: So simply remove the part, "First Name" so i can end up with the value that I need:
Give your rule a name and click "Save".
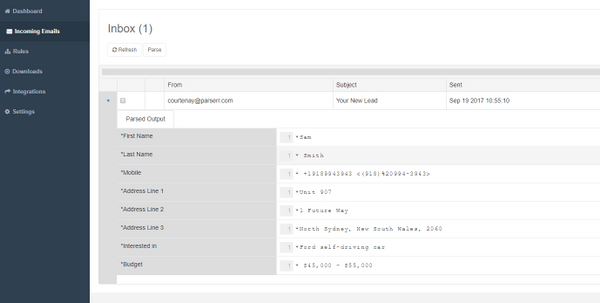
9. Once you have your rules sorted, go have a look at your parsing results. You do this by clicking on "incoming emails" in the left navigation and click the small arrow icon to open your first email:
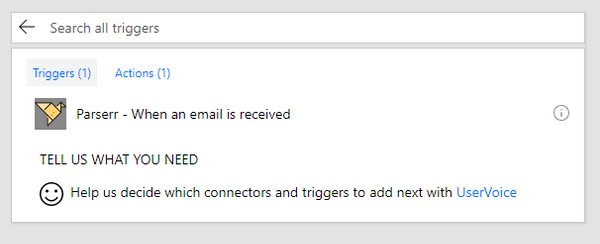
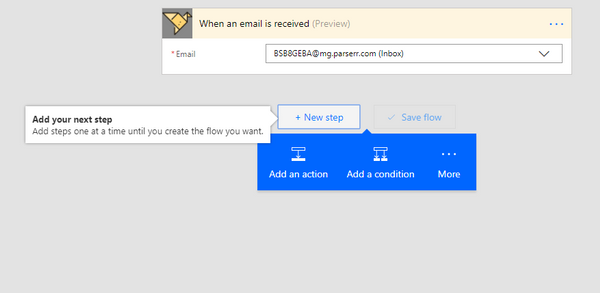
10. Now its time to jump into Microsoft Flow and connect Parserr to SharePoint! Choose to create a new Flow and choose the Parserr connector and the trigger "Parserr – When an email is received".
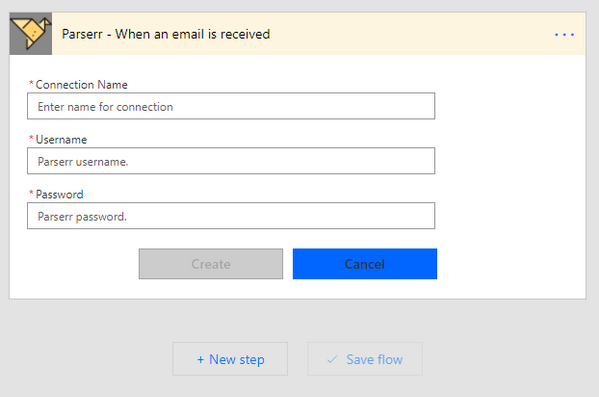
14. Next you will be prompted to add your username and password for Parserr. Please use the same username and password as would when you login to Parserr. This step needs to be 100% correct or the integration will not work correctly.
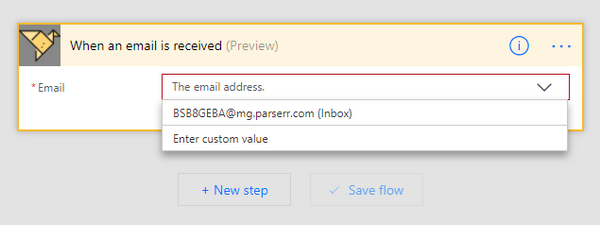
15. If you are connected properly to Parserr (previous step), you will see your Parserr email address appear in the trigger step. If you don't see a value, don't add your own custom value. This means your username and password were incorrect previously. Go back a step and try and edit your connection (username and password) to Parserr:
16. Click "New step" and then click "Add an action" as shown below:
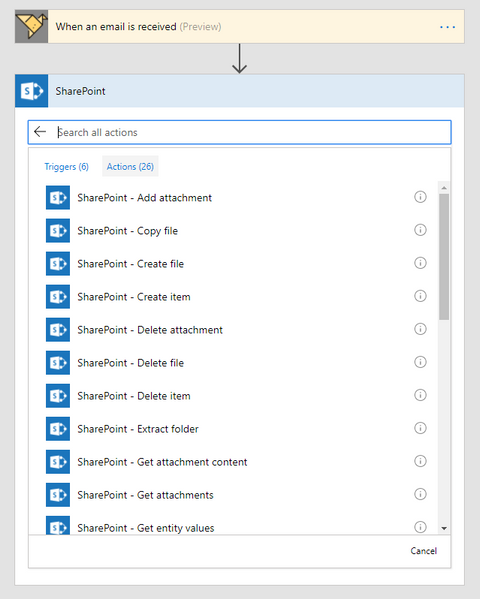
17. Choose SharePoint and "Create Item" as your action.
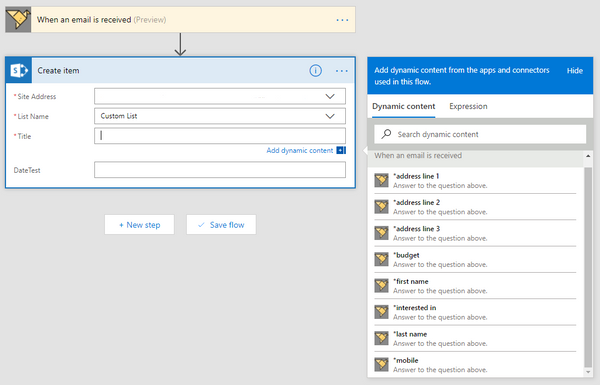
18. For this example, we will add the rule we created in Parserr, "First Name", as the "Title" field in SharePoint (Site address has been obfuscated for this example). The "Dynamic content" box shown on the right of the screen represents the rules created in Parserr and are available to be used as fields within your SharePoint columns. This is how we map Parserr extracted email data to SharePoint
19. Once you are complete, save your Flow. You should now be ready to test the entire process. Exciting! Firstly send through a new email to your Parserr email address (eg. 43HGH43@mg.parserr.com). Then check your Parserr incoming emails to see that Parserr has received the email and that the data has been sent to Flow (under Flow Data)

If you don't see the "Flow data" this means the data has not been sent to Flow. To resolve this, check that your Flow has been saved and that you have followed the steps correctly above.
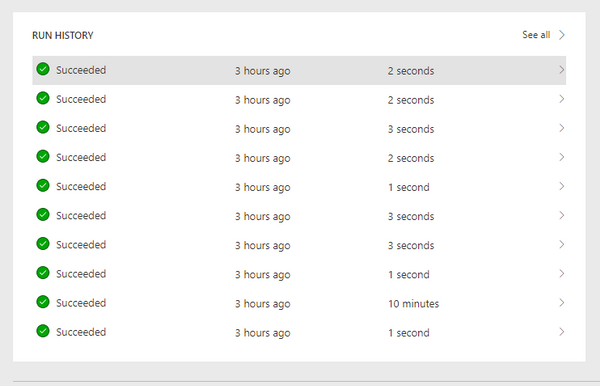
If you do see the "Flow data" tab, this means that the data has been sent successfully to Flow. If you load up your Flow dashboard, you should see some successful runs of your new flow:
Thanks again to the Microsoft Flow team for collaborating with us to bring you the Flow of the Week!
If you have any questions or comments, please leave them in the comments below or post your questions in the Flow Community!
Until next time.
P.S. To never miss another blog post from the Flow blog – Use This Flow