Work better with the Common Data Service in Power Automate
There are now a number of different features available in the Common Data Service (current environment) connector that bring automated flows closer to parity with the classic Common Data Service workflows – and in some cases, bring new functionality that was never possible with classic workflows.
The Common Data Service (current environment) connector is available for all new flows created from the Solutions tab in the left navigation in the Power Automate portal. Whenever you build a flow against CDS we strongly recommend using Solutions – as that provides you a way to group and package your flows, for example, to move them to a production environment after you’ve completed development. This connector is not available for flows built outside of Solutions.
Calling bound or unbound actions
Automated flows can now call actions that are available in Common Data Service. This includes everything from fulfilling a sales order to exporting a solution. Actions represent operations that might have side effects in the database, such as creating or updating records. There are two new steps in a flow that you can use:
- Perform an unbound action – Unbound actions aren’t bound to an entity type and are called as static operations.
- Perform a bound action – Bound actions target a single entity or a set of records for a single entity.
An action might require parameters and might return a value. You can see all of the actions that are supported, as well as their input and output parameters in the documentation.
Working with relationships
Relationships are an important concept in the Common Data Service – and Power Automate allows you to work with them in a few different ways.
Updating or creating records directly with relationships
On the create or update of records there are fields that hold relationships. For example when you create an Account there is a Primary Contact field.
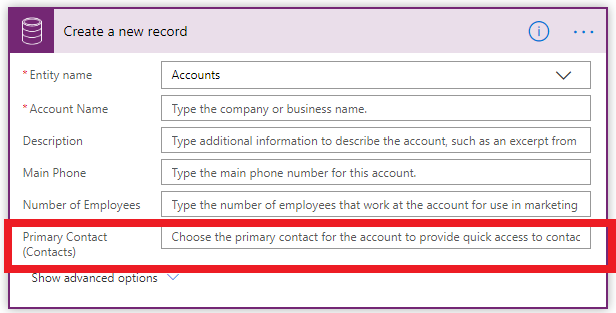
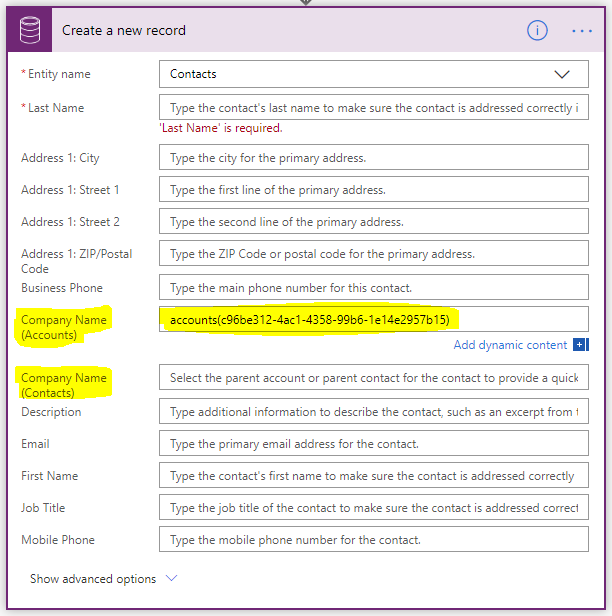
When you want to create or update a relationship you should use standard OData notation. For example, while creating an account record, you should set the primary contact field to OData id of a contact record like contacts(c96be312-4ac1-4358-99b6-1e14e2957b15).
Note, if you try to just pass the guid from another step you’ll get an error like: Resource not found for the segment <segmentname>. The Common Data Service (current environment) connector expects the full OData ID of the target record, including the type of the record.
If the lookup field is polymorphic (meaning it can have more than one possible target types) then the target record OData ID should be provided in the right field. For example the Company name field for Contacts is polymorphic and can take either an Account or Contact but not both.
Using the “Relate records” action
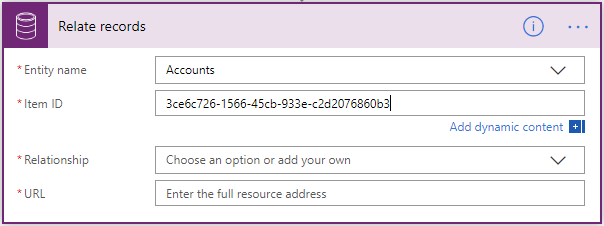
We have added support for the relate and unrelate record actions in the Common Data Service (current environment) connector. This makes it possible to associate or disassociate two CDS records whether they have one-to-many or many-to-many relationships.
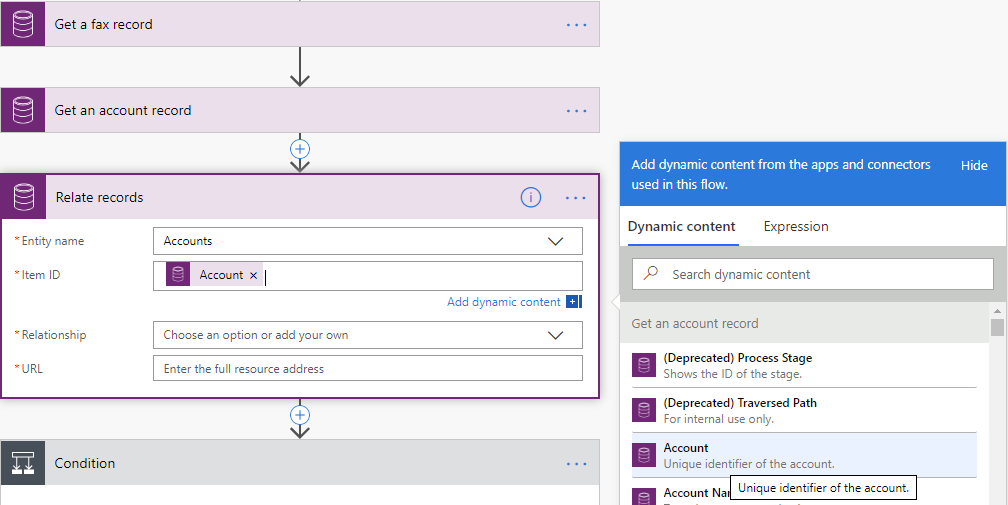
- Like other actions in this connector, a dropdown list of supported entities will show up. Select the type of entity you want to relate to or enter your own custom value for the entity set name.

- Enter the identifier of the record you want to relate to matching the entity type from 1 above.
NOTE: You can normally grab the record identifier from a previous request by using the dynamic content.
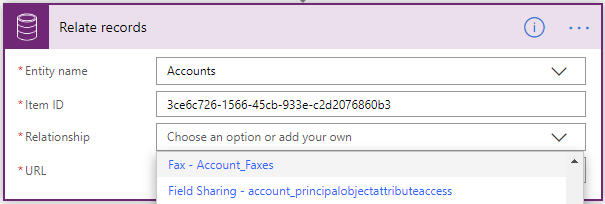
- The list of supported one-to-many and many-to-many relationships based on the entity type selected in 1 above will be populated in the format <Related Entity Type> – <Relationship Schema Name>. Select the relationship you want to relate the related entity to or enter your custom value of the relationship schema name.
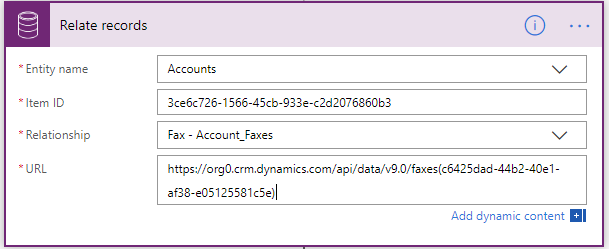
- Enter the full resource URL of the related entity you want to relate. This will be the full OData identifier of the resource.
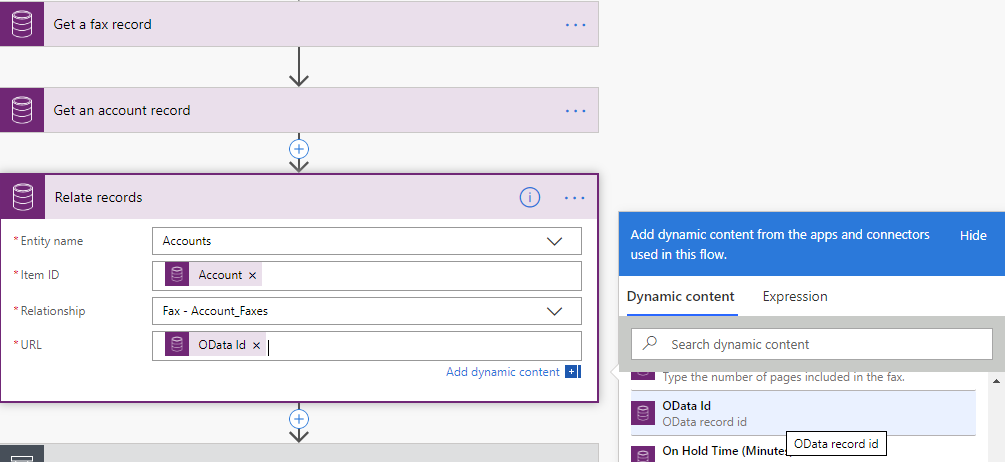
NOTE: You can normally grab the OData identifier of the resource from a previous request by using the dynamic content.
Using the “Unrelate records” action
Like with relate records, this feature is available when you select the Common Data Service (current environment) connector.
- Like other actions in this connector, a dropdown list of supported entities will show up. Select the type of entity you want to unrelate from or enter your own custom value for the entity set name.

- Enter the identifier of the record you want to unrelate from matching the entity type from 1 above.
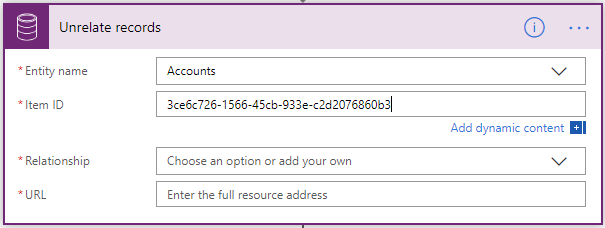
NOTE: You can normally grab the record identifier from a previous request by using the dynamic content.
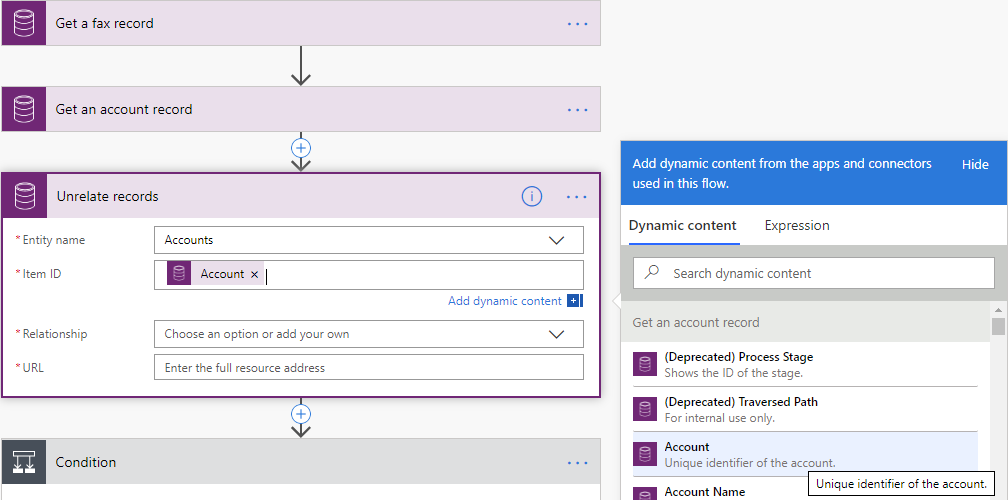
- The list of supported one-to-many and many-to-many relationships based on the entity type selected in 1 above will be populated in the format <Related Entity Type> – <Relationship Schema Name>. Select the relationship you want to unrelate the related entity from or enter your custom value of the relationship schema name.

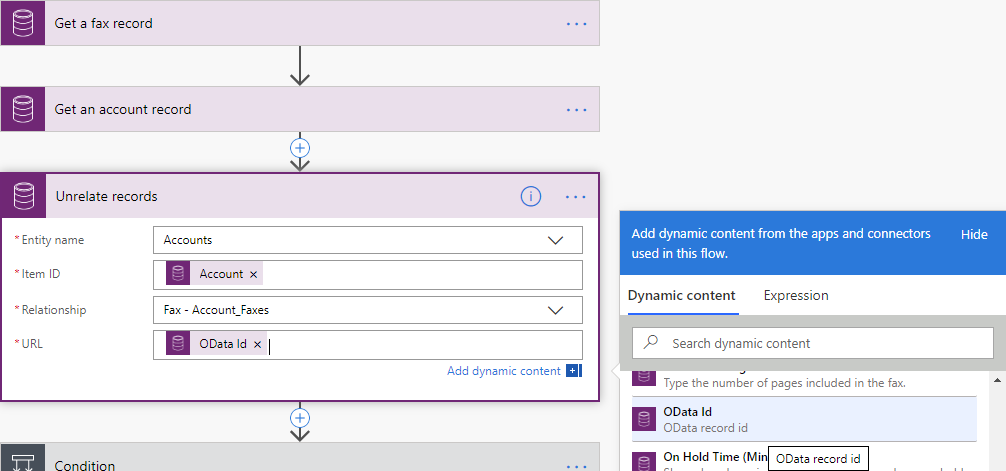
- Enter the full resource URL of the related entity you want to unrelate. This will be the full OData identifier of the resource.
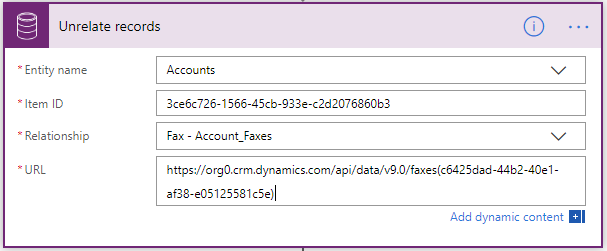
NOTE: You can normally grab the OData identifier of the resource from a previous request by using the dynamic content.
Activity party relationships
Activity parties are a special type of relationship in the Common Data Service, and are now supported as well. For example, when you create an Appointment the Required Attendees and Optional Attendees are related to the System Users entity.
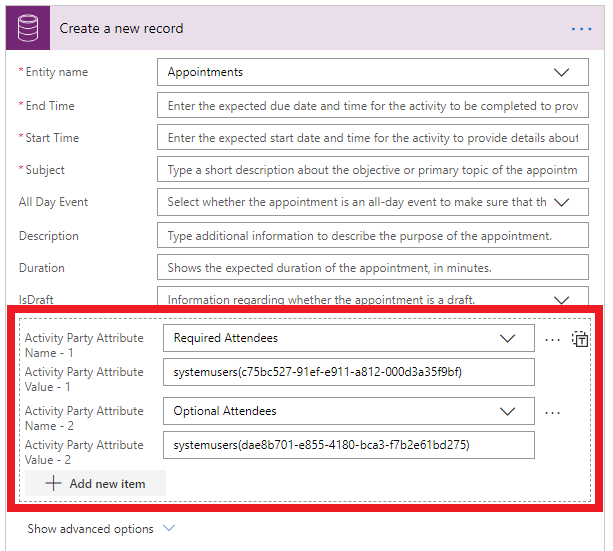
You can add multiple values for an activity party by selecting Add new items and entering data. As above – be sure to use the OData ID syntax of systemusers(<ID of the user>).
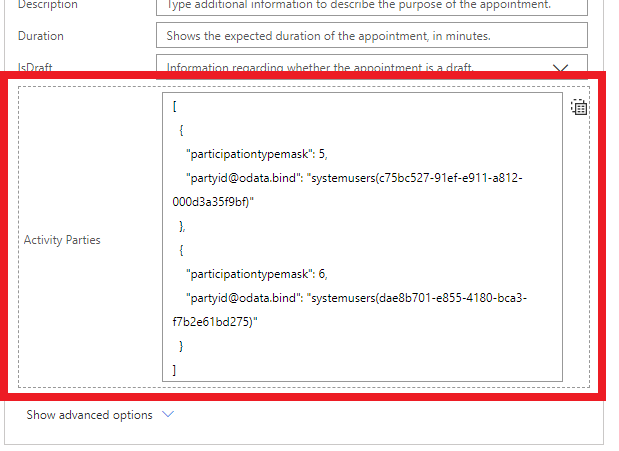
You can also pass in a list of different activity parties by toggling from the item mode to the array mode (it’s the “T” button at the top-right). When you do that you can use expressions to pass in data from a previous action, for example, to send an array.
Use change sets to run multiple actions at once
Change sets provide a way to bundle a number of operations that either succeed or fail as a group. When multiple operations are contained in a change set, all the operations are considered atomic, which means that if any one of the operations fail, any completed operations will be rolled back.
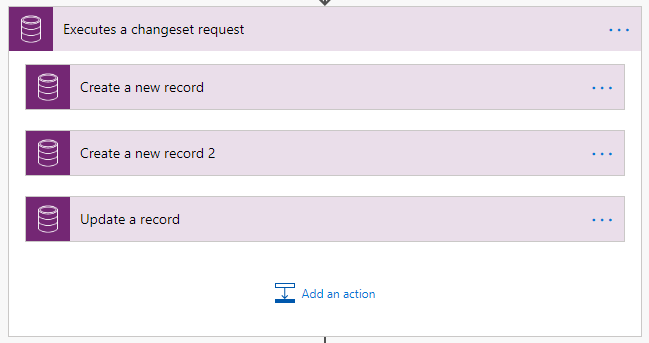
To get started with change sets – add the Executes a changeset request scope to your flow.
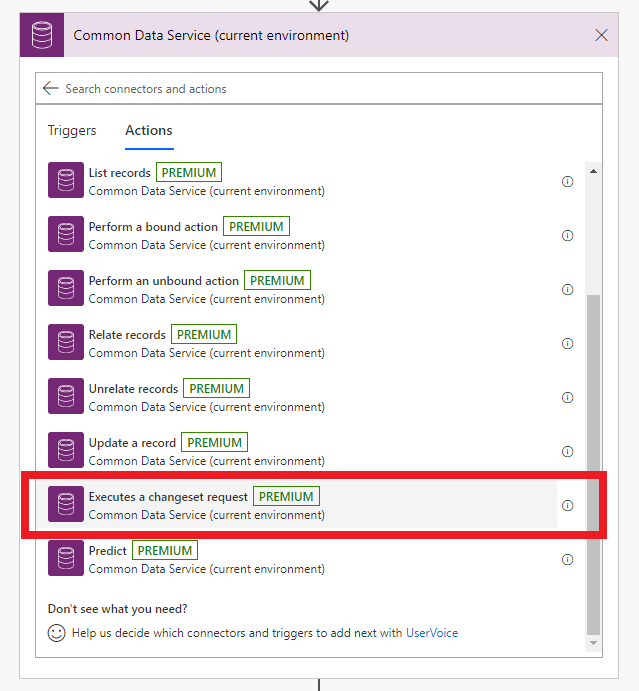
You’ll notice that this is different from any other action you’ve added – instead of inputs and outputs, this is a container that you can add actions inside of. When you select Add an action you’ll see just three different actions:
- Create a new record
- Delete a record
- Update a record
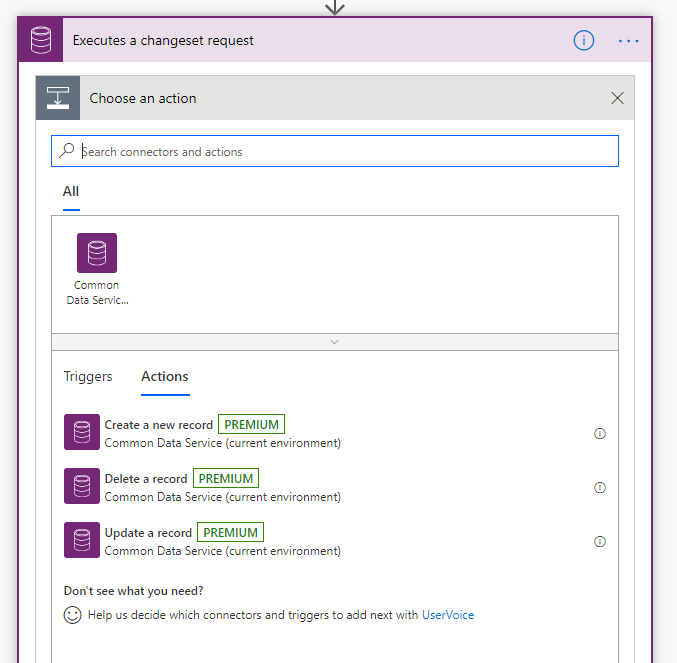
You cannot have additional built-in actions inside of a change set scope because all actions are evaluated together inside of CDS. You will see that there are no arrows between each of the actions, indicating that there are no dependencies between these actions (they’ll all be executed at once).
Upload or download from image and file datatypes
Last week we released two new field datatypes in the Common Data Service:
- File – this allows you to have an attribute that stores arbitrary file data for your entity (read more here).
- Image – in addition to an attribute for storing the full sized image as a file, the image datatype also can include thumbnail information (read more here).
You can work with both of these new datatypes in Power Automate when you use the Common Data Service (current environment) connector.
Using “Get file or image content”
The Get file or image content action is for downloading content from corresponding file or image fields in CDS records so you can use the file content elsewhere in your flow.
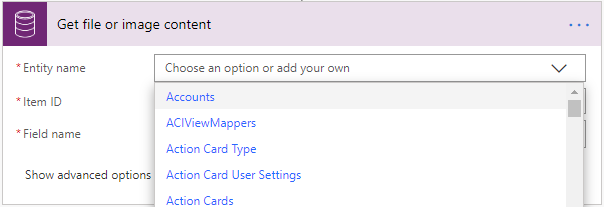
- As with any action in this connector, a dropdown list of supported entities will show up. Select the type of entity you want to download file/image content for or enter your own custom value for the entity set name.
- Enter the identifier of the record you want to get the file or image content from matching the entity type from 1 above.
NOTE: You can normally grab the record identifier from a previous request by using the dynamic content.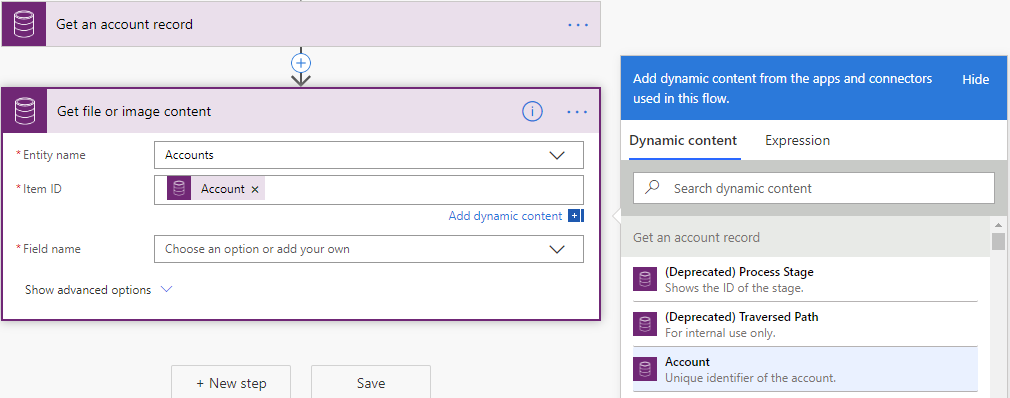
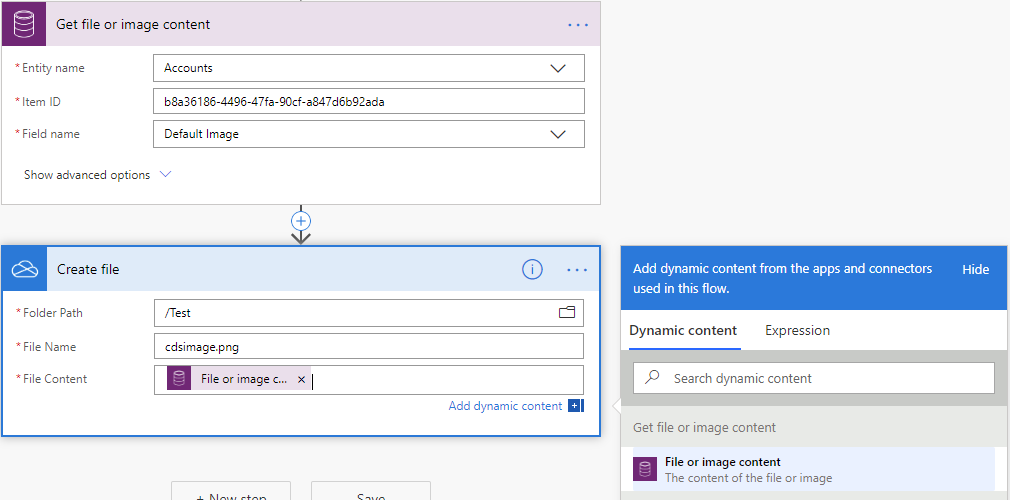
- The list of supported file and image fields based on the entity type selected in 1 above will be populated for selection. Select the field you want to download the content for or enter your custom value.
- With the content output of the action you can pass it to any action as you want.
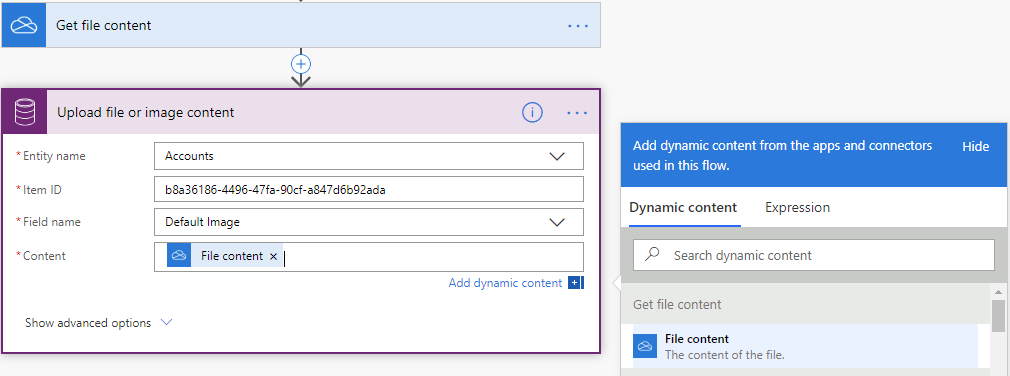
Using “Upload file or image content”
- As with any action in this connector, a dropdown list of supported entities will show up. Select the type of entity you want to upload file/image content to or enter your own custom value for the entity set name.
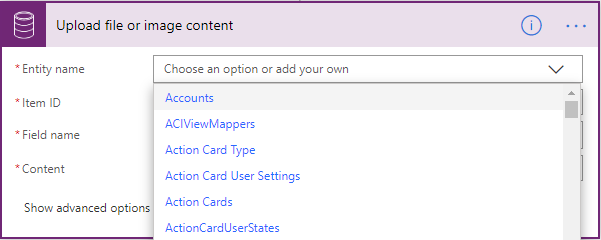
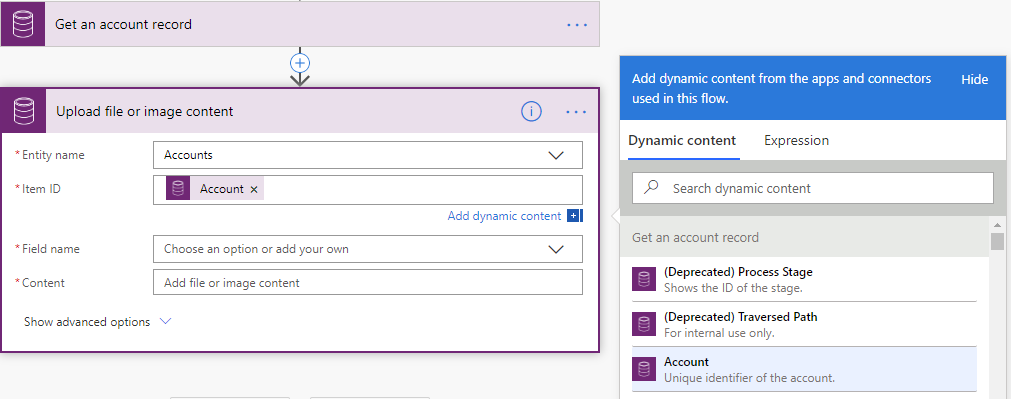
- Enter the identifier of the record you want to upload the file or image content to matching the entity type from 1 above.
NOTE: You can normally grab the record identifier from a previous request by using the dynamic content.
- The list of supported file and image fields based on the entity type selected in 1 above will be populated for selection. Select the field you want to upload the content to or enter your custom value.
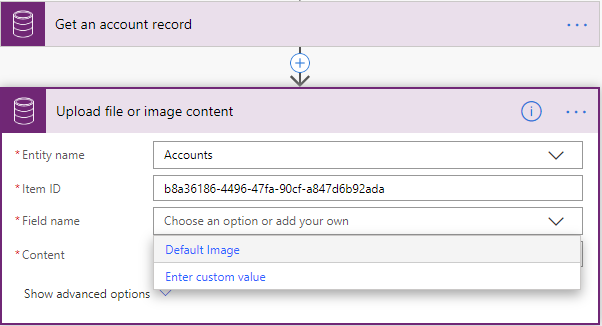
- Enter the content you want to upload to the record field.
