Intermediate | Flow of the Week: Remind you to follow up on High Importance emails you send


Background
It can be difficult to stay on top of email. To help reduce noise, you can turn off notifications for every email and instead use Microsoft Flow to send notifications to the Flow app for iPhone, Android or Windows Phone to highlight specific threads. Some popular examples are getting a Notification when your manager emails you, or, a notification for emails marked as High Importance. These flows are great for emails your receive, but what about emails thot you send? That is where this new Flow of the Week comes in — it will notify you if you send an email that is marked as high importance, but, nobody responds to it in a certain period of time.
Building the flow from template
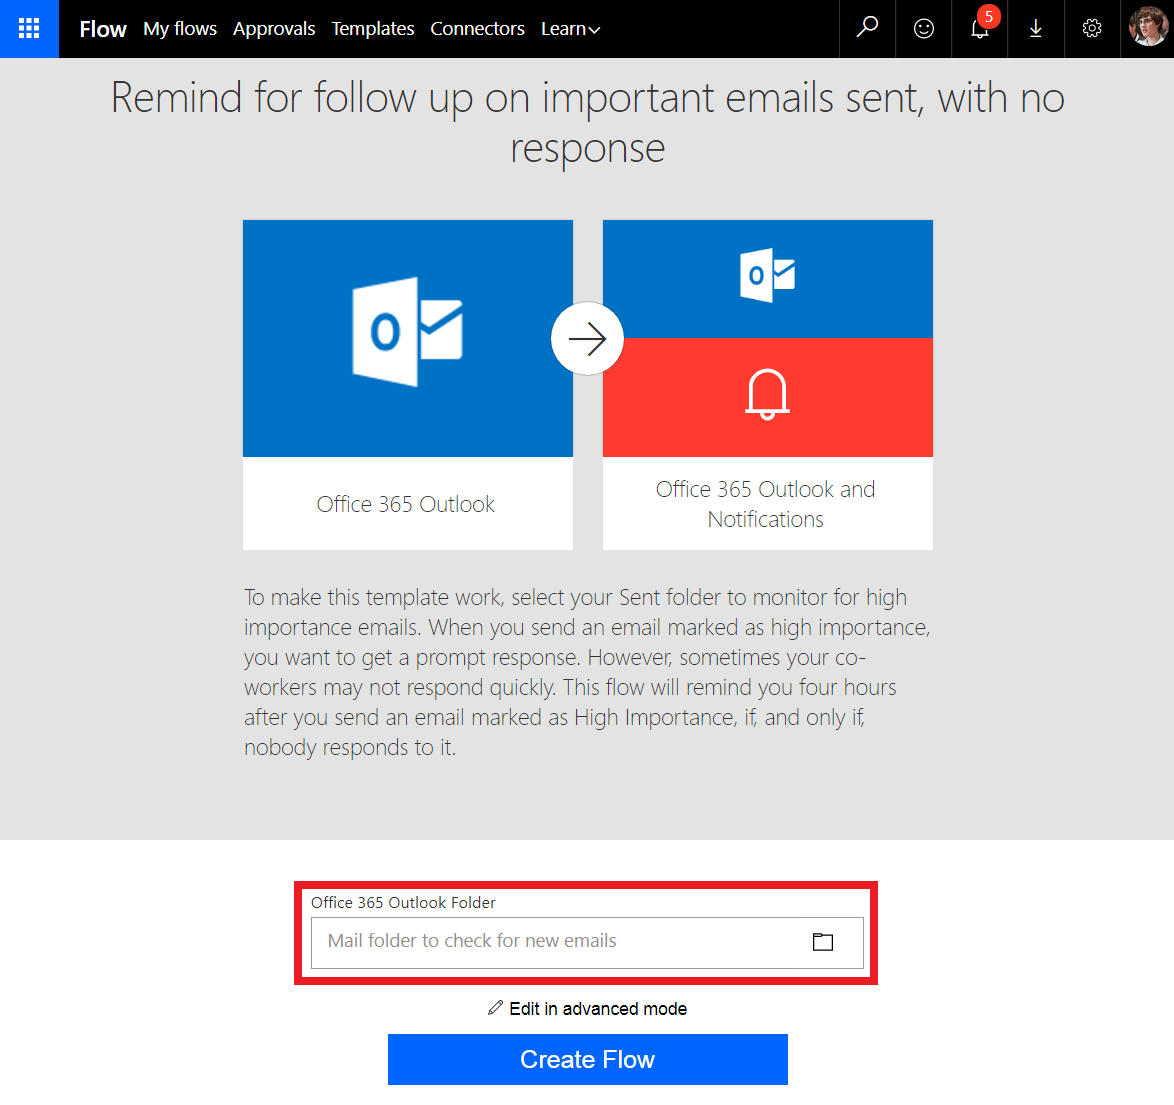
The easiest way to build the flow is to use this template here. To configure the template, you just need to select your Sent folder from the folder chooser on the template page. Then select Create flow – that's all!
Build the flow from scratch
If you would like to understand each of the steps in the flow, you can also build it from scratch instead.
Set up the trigger
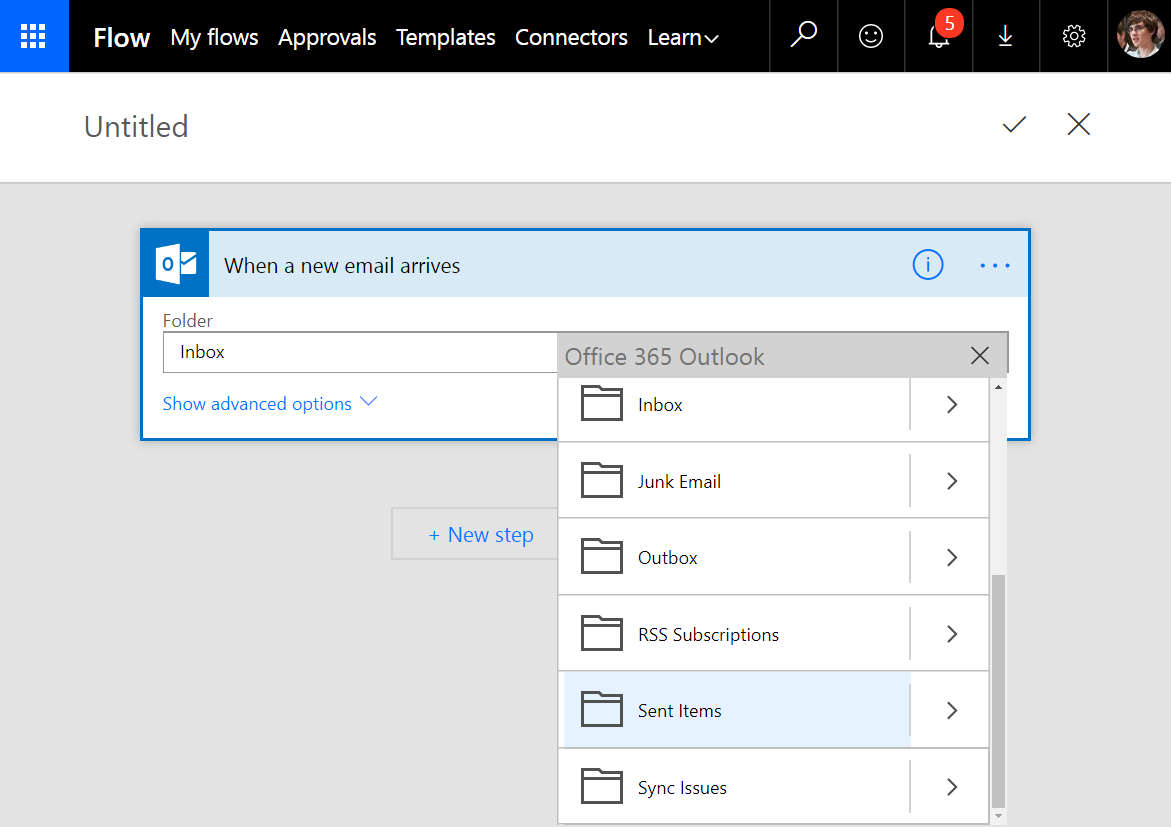
Select Create from Blank on the My Flows page and then choose the first item – When a new email arrives.

You will need to configure the trigger to monitor your Sent folder instead of your Inbox (which is the default). Open the folder menu and select that folder. This flow would then trigger whenever you send an email.
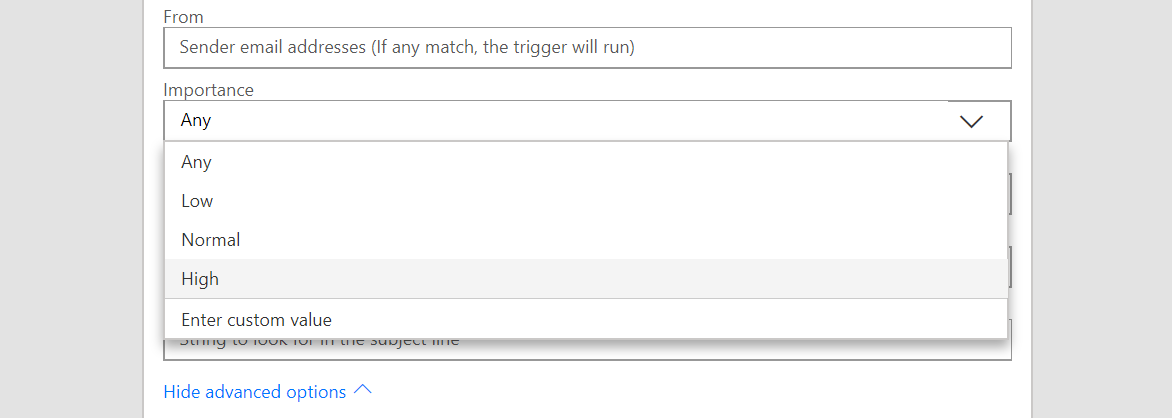
However, you may not want to get a reminder for every email you send (although you could). To ensure that this flow will only run for High Importance emails, select Show advanced options and then choose High under the Importance option.
Wait to see if there is a response
Next, you will have to add a step that waits for a response to the email that you sent. Although it may not be obvious, Microsoft Flow supports adding triggers anywhere in a flow. These triggers will pause the flow until the event happens, running the remaining steps just like they would run the entire flow if they were the first step. In this case, you need to use the same trigger you used as the first step (but you will set it up slightly differently).
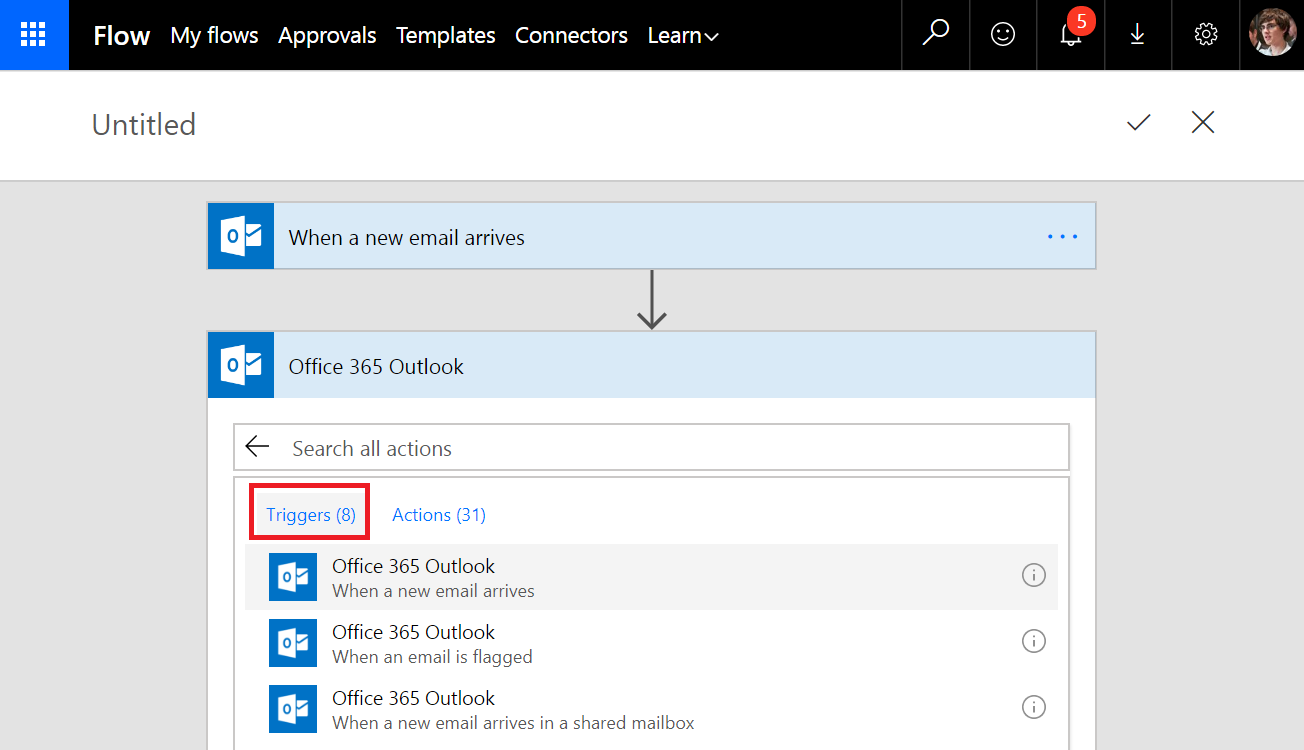
Select New step – Add an action and then Office 365 Outlook. Instead of selecting an Action, select the Trigger tab. This will let you choose any trigger that Office 365 Outlook has – in this case When a new email arrives.
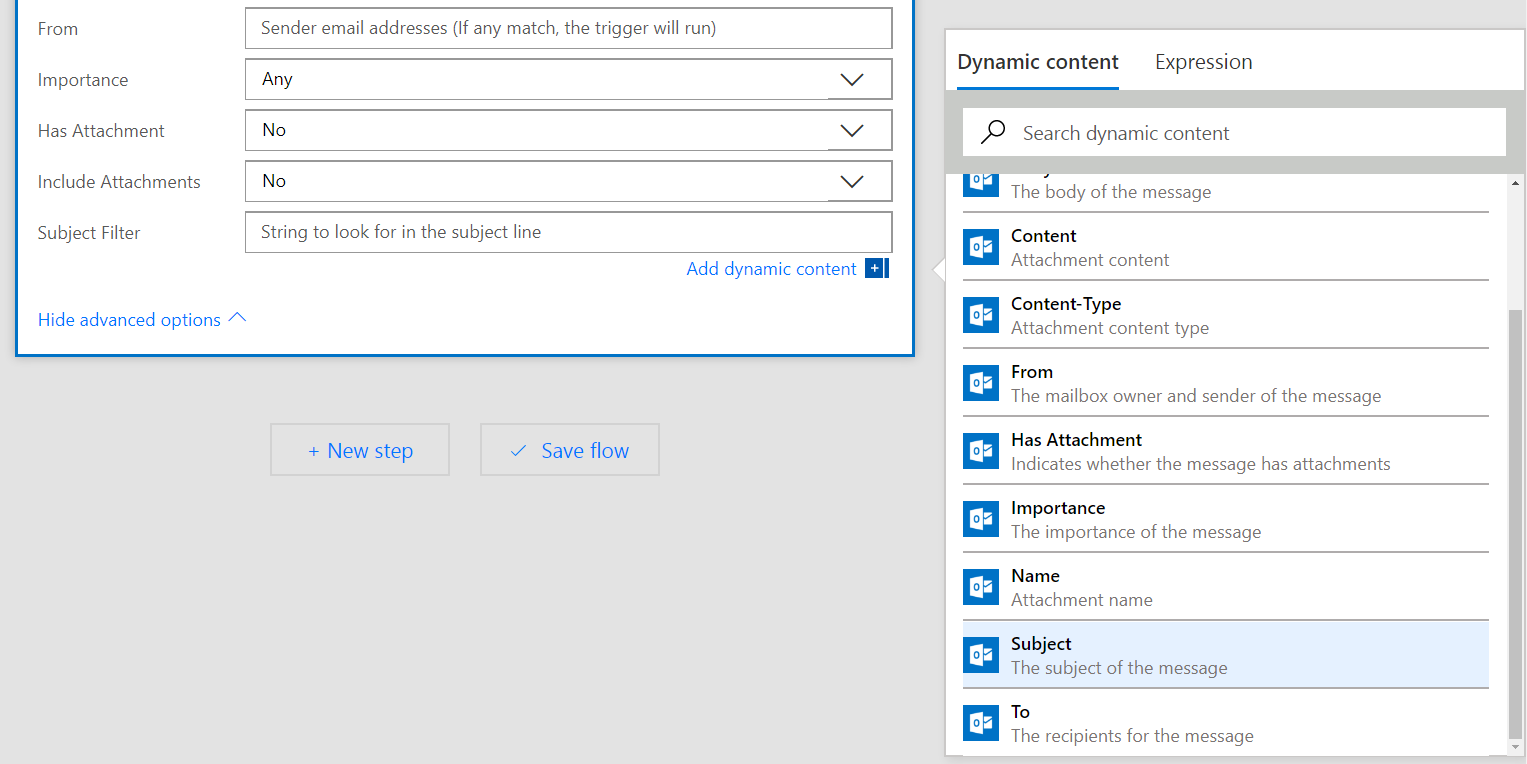
You want to ensure that the flow will only continue if there is specifically a response to the email you sent – not just any email you receive in your inbox. To do this you will need to select Show advanced options. Find the Subject Filter input and open the Add dynamic content. Select Subject from the list of dynamic content from the trigger. This will ensure that the email contains the same subject as the original mail you sent.
You also don't want your flow to wait indefinitely for the email to be replied to, you want to only wait a certain period of time. To set this up you will adjust the "Timeout" of the action. To configure timeout duration, select the "…" menu on the action and choose Settings.
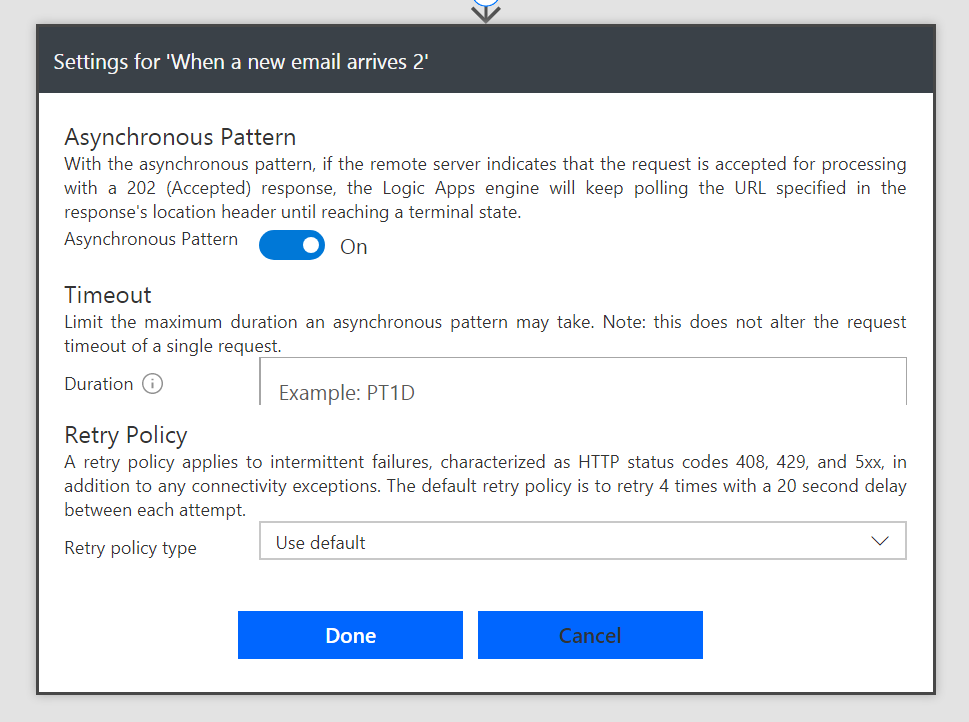
In the second input box, you'll type in PT4H which means four hours. If you wanted 30 minutes you could enter PT30M, or if you wanted 2 days you could enter P2D. Once you've entered the timeout duration you want, select Done.
Add the push notification
As the final step in the flow, you'll need to add the push notification. Select Add an action again and choose Notifications. Then select Send me a mobile notification.

You can define whatever Text or Link you want to be in the notification. You should probably include the Subject, for example, so you can see which thread didn't get the response in the notification itself.
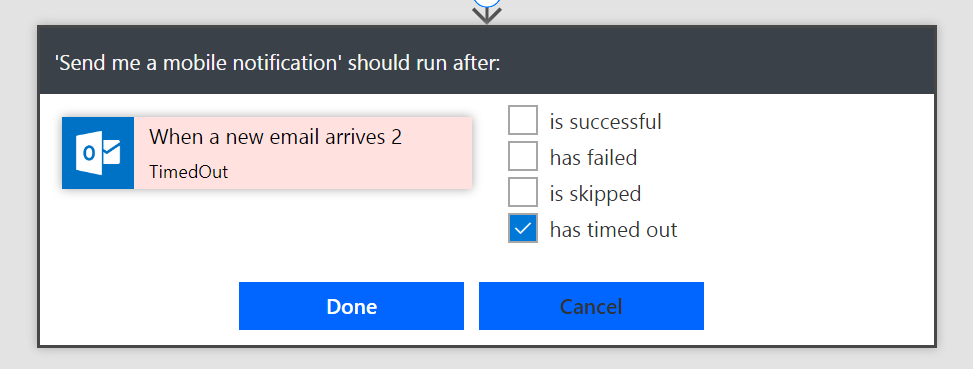
There is one more thing that's very important. You may have realized that this flow will not do what you want — it will send you a notification if there is a response within four hours. However, you want a notification if there is not a response. To change this, you will need to adjust the run after of the notification step. Select the "…" menu and choose Configure run after. Uncheck the is successful option and check the has timed out option instead.
Now, you will only get a notification when four hours have elapsed, and there's been no response to the email – or, in technical terms, the trigger "has timed out". We hope that you find this flow useful, let us know your thoughts here or on the community!