Advanced | Flow of the Week: Notify me on best traffic conditions to drive home


This week we want to highlight a Flow that lets you constantly check traffic conditions and notify you on the best time to start your commute. Simply open the Flow mobile app, press the button, and specify the travel time you want to target. The Flow will notify you as soon as traffic drops below the threshold. I'll go through the steps behind this flow, and you can also find it now in the template gallery.
I often find myself constantly refreshing Bing Maps in the evening, waiting for the optimal time to start my commute home. I know if I leave at the wrong time I may spend an extra 30 minutes waiting in traffic. In just a few minutes, I was able to build a Flow that will automatically monitor traffic conditions for me, and notify my phone once traffic has subsided. The Flow mobile app can send my current location, while the Bing Maps connector will give me the current travel time with traffic. Awesome new features like expression editing in the Flow designer allow me to write a simple expression to convert the seconds returned from Bing Maps commute time, into the minutes I want to specify on my button.
The until loop allows me to continue checking the Bing Maps route until the commute time is less than the time I specified when pressing the Flow button. I’m also able to set a limit on the until loop, so that after 30 minutes of checking a notification is sent to my phone to leave anyway with the current estimated commute time.
Building the Flow
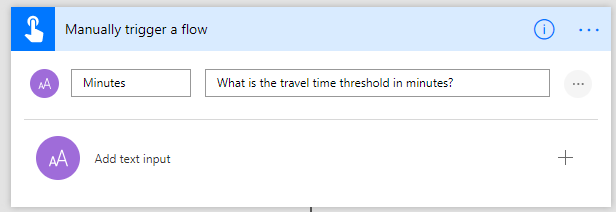
Let’s walk through how this flow was built step-by-step. The first component is the trigger. I’m using the button trigger so I can invoke this manually using the Flow mobile app. I’ve added a single input called “Minutes” where I can provide the number of minutes I want to wait for traffic to be under.
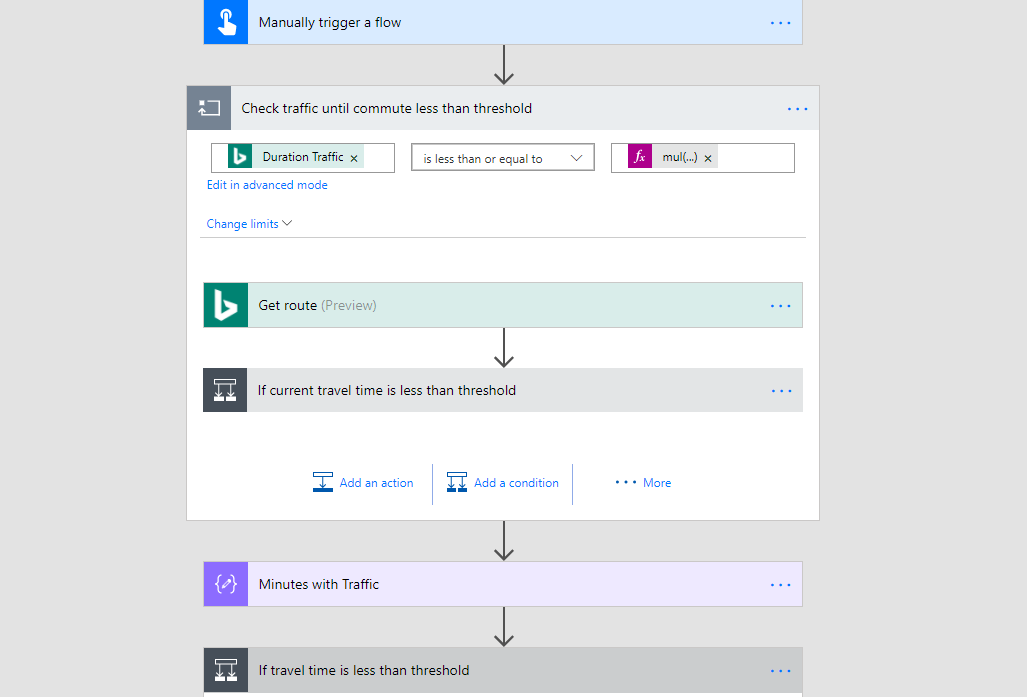
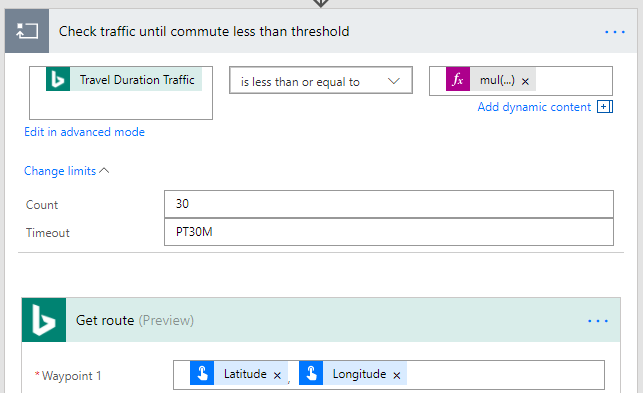
Next I’m adding an until loop. The until loop can sometimes be tricky to understand, but the until loop allows me to keep executing an action until something happens. In this case I want to keep checking traffic until travel time is below the minutes I specified. I add the until loop (under the “…More” when adding a new step), and add a “Get route” step from the Bing Maps connector. We’ll leave the until condition blank for now.
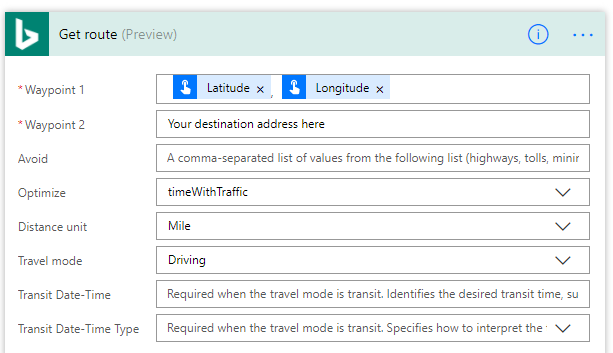
Follow these instructions to get a Bing Maps API key, and once you have a key you can add the “Get route” action. I’m going to pass in the latitude and longitude of my current location (provided by the button trigger). You’ll notice I added a comma between latitude and longitude so it’s a valid coordinate. I provide my destination address (my home), and let it know I want time with traffic when driving.
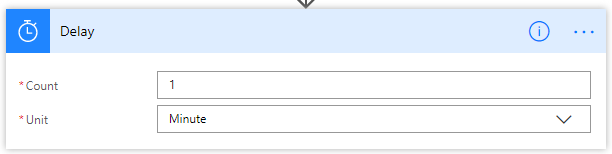
If I leave the until loop here, it will call “Get Route” instantly right after it finishes until it reaches the limit. For my flow I want to add in a delay before checking traffic again. I’m going to add a “Delay” action and have it wait 1 minute (this is also within my Until loop). This way it waits for 1 minute before checking traffic again.
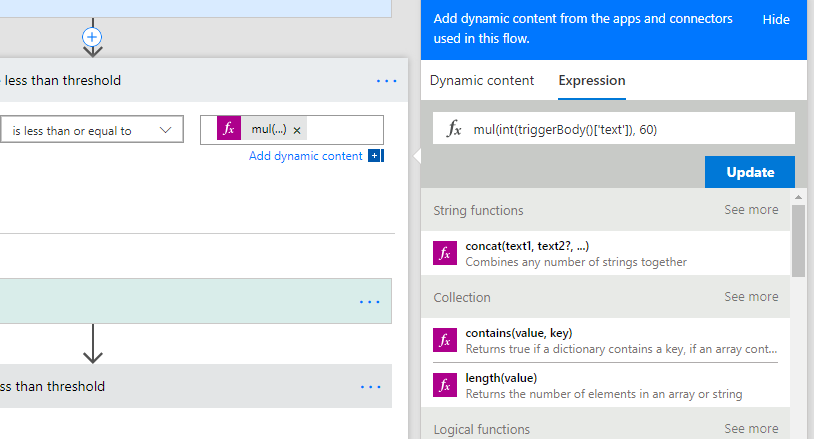
Now that my until loop has the actions I need, I can set the condition at the top of the loop. My condition is to loop until the travel duration with traffic is less than or equal to my threshold. So I add Travel duration traffic on the left hand, and select is less than or equal to as the operator. This next part requires some calculation though, as you can see from the outputs that “Travel Duration Traffic” is in seconds. My button trigger has minutes, so I need to convert minutes to seconds for the comparison to work. To do that I’m going to click the Expression tab of the outputs, and write the following expression:
mul(int(triggerBody()['text']), 60)
Expressions are evaluated from the inside-out. First it grabs the “text” from my trigger (button trigger), which is the number of minutes I am looking for. I then convert that to an integer (number with no decimals) using int(). Finally, I multiply that number by 60. After clicking OK I have the following condition setup on my until loop. You’ll notice I also set the limits to only perform this loop 30 times or for 30 minutes, whichever comes first. That way after 30 minutes even if traffic is still bad I'll get a notification to head home.
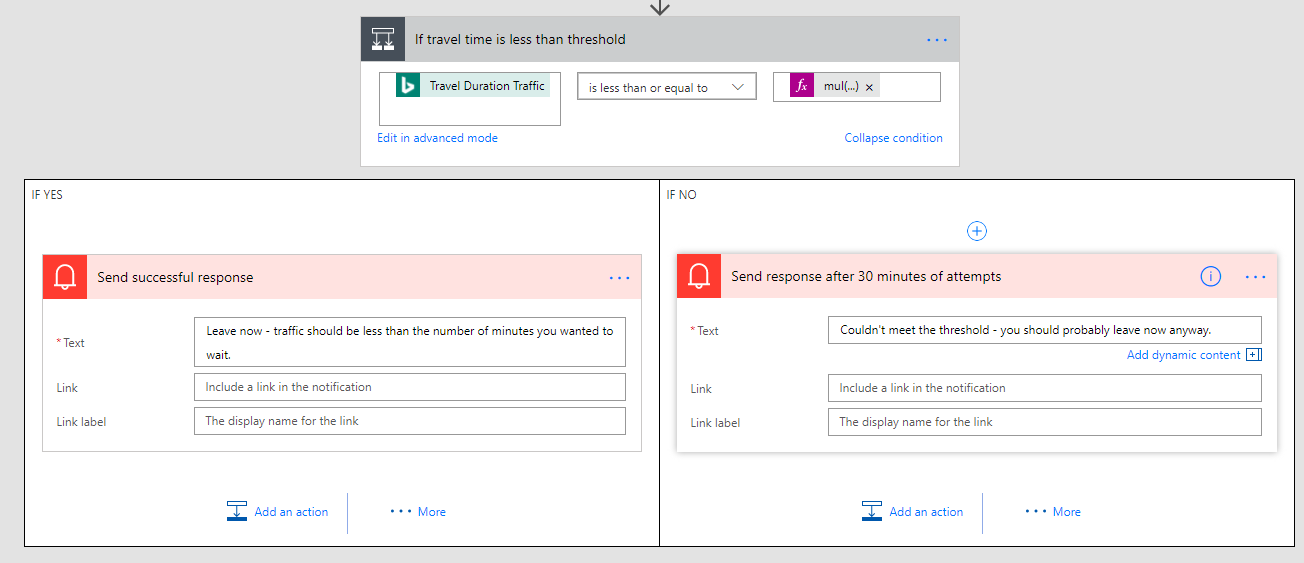
Finally, I need to send a notification to my device when it’s a good time to leave. I’m going to add a condition after my until loop to see if traffic is currently below the threshold. I need this check because it’s possible 30 minutes passed before the threshold was met, meaning the until loop would complete. The condition is the same one from above — check to see if current travel time is less than or equal to the number of seconds I am willing to sit in traffic. If the current travel time is less than my threshold, I use the notification action to send a notification to leave now for the commute I’m looking for. If I never hit my threshold, I still send a notification letting me know I never hit the threshold.
Flow for Productivity and Flexibility
Not only did Microsoft Flow enable this powerful and intelligent automation of my day, I can easily customize it to any scenario. Instead of a button trigger, I could replace with a schedule trigger to automatically start checking traffic every day at 5:00pm, or perhaps I want to configure the Flow to notify me exactly when I need to leave if I want to get to the airport by a certain time. These types of customizations become as simple as modifying a few conditions and inputs, and highlight the productivity that comes from Microsoft Flow.
Try this flow out yourself, and find it now in the template gallery. Follow these instructions to get a Bing Maps API key, and make sure you have a mobile device with the Microsoft Flow mobile app installed. Have any ideas of how to make this better? Feel free to reach out to me on Twitter @jeffhollan. I’d love to hear it!