Getting started with a Microsoft Flow template


Hi! My name is Anjli and I’m a Program Manager on the Microsoft Flow team. I want to see you have a delightful experience as you interact with Flow – right from signing up and using our offering for the first time to when you are a seasoned user and want to be efficient with your time in finding and using templates that interest you.
Sign Up
First things first, you need to sign up for the product in order to start using it. You can do so by clicking Sign Up for free on the top right hand corner of the website, and provide an email address from your work or school.
If you’ve used an online Microsoft product (such as Office 365 or Power BI) with your email address, simply click on Sign in.
You are unable to use your personal email to use Microsoft Flow at this time. If you’d really prefer to use your personal email or are unable to use a work or school email, let me know why in the comments.
Find a template you like
We have a gallery full of templates that may interest you. Click on Browse on the top of the website to view all the templates available.
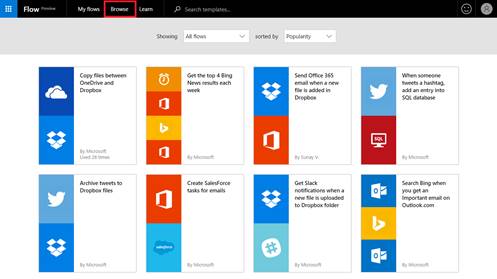
You can also search for a specific task that you are looking to accomplish – for instance, you may be looking for a workflow to go through your email, or you could search for a service that you are interested in creating a flow for – for instance, you may be interested in SharePoint.

Create your own flow
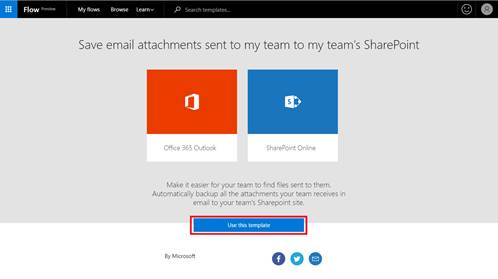
Let’s say you are tired of searching through your email for attachments, and find a template that backs up all of the attachments that your team receives onto Sharepoint. You’ve found exactly the template to help you with this problem. Click on Use this flow.
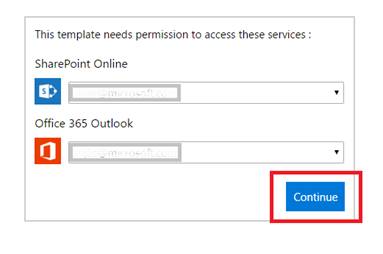
Sign into the services that the template needs with your credentials. For this template, you need to connect to two services – Office 365 and Sharepoint.
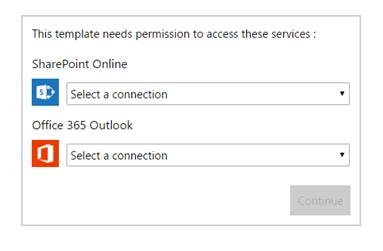
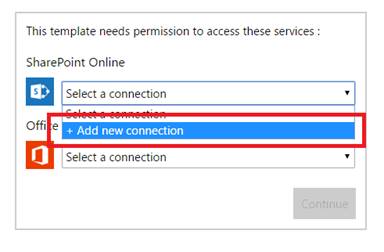

Click Continue after you are done connecting to the services.
Next, you will need to provide required parameters as required by this template. This template requires you to provide your team’s email address and the Sharepoint site where you would like to store the attachments. It’s always a good idea for you to look through the steps in detail in case you want to change any of the default parameters.
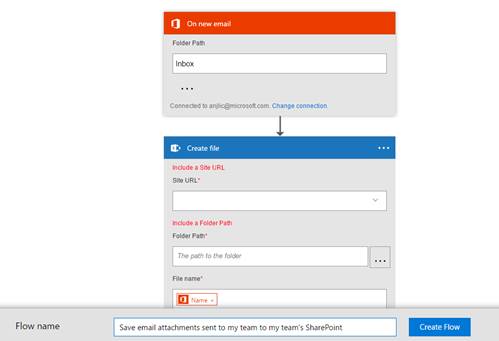
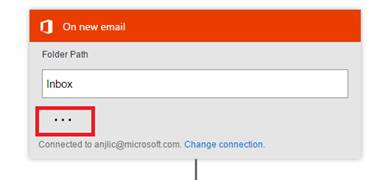
Click on the first step, and also click on … to see more advanced parameters. In the designer, you can easily distinguish between the different steps of the flow by the names of the triggers and the actions and the services that they are associated with.
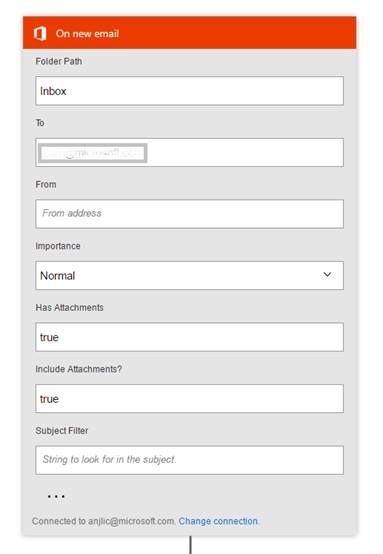
In addition to providing your team’s email address in the To line, you could also update the folder that you receive the attachments in, or the importance of the email in this step.
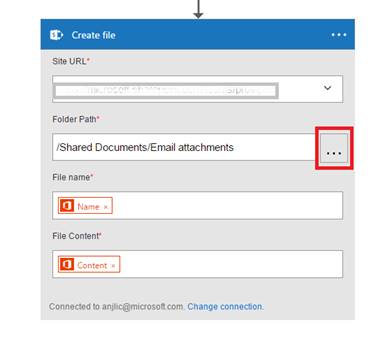
Click on the next step to save the attached file from your email to a folder on your team’s Sharepoint site. Provide your team’s sharepoint site url and the folder path where you’d like to store the email attachments. Note that you can browse to the folder path by clicking on …
You could also choose to modify the flow by adding additional steps or conditions. Just click the plus sign, and click on Add an action. A new custom step will open up in the designer.
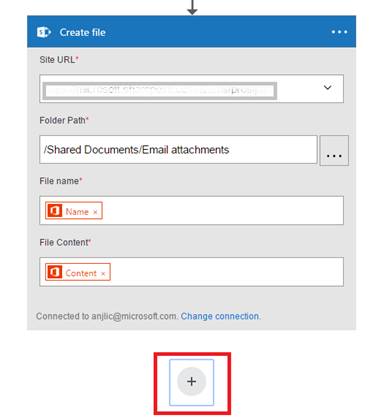

A new custom step will open up in the designer.
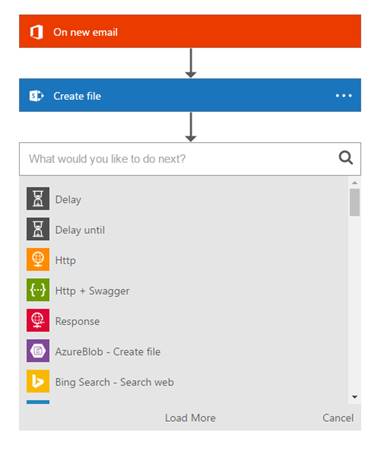
Let’s say you also want your team to get a notification in Slack about a new item being created on the team’s Sharepoint folder.
Search for Slack and choose the trigger to Post Message. You’ll have to connect to the Slack service by signing in.
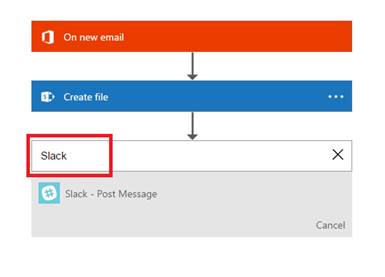
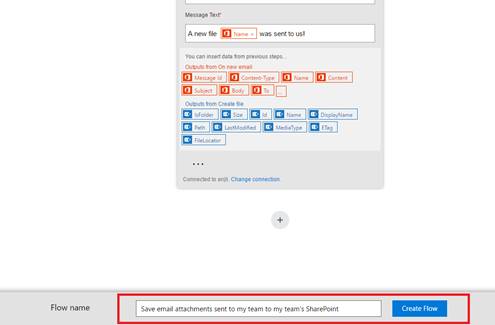
Provide the channel name where your team gets notifications, and a custom message.
At the bottom of the site, update the name of flow if you’d like, and click on Create Flow.
Once the flow is created, our backend engine will continuously monitor for the flow trigger to fire. In this case, the trigger is when your team receives an email with an attachment.
That’s it – you’re done! You’ll notice that attachments are automatically backed up in your team’s Sharepoint site folder and your team is notified on your Slack channel of new files.
Testing your newly created flow
For the folks who want to dig into the workings of our flow engine a bit more:
Test your new flow out by sending your team an email with an attachment. Once the email arrives in your mailbox, you can see if the attachment was successfully copied over to Sharepoint in the flow history.
Go to My Flows in the header and click on the information icon next to the flow name that you just created.
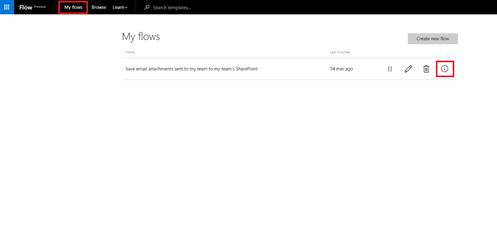
You’ll see the history of all the runs for this flow in this view and whether the specific run has failed or succeeded.
You can click on each of these rows to further investigate exactly what data was passed along the various steps of the flow. We also have a detailed blog post on testing and debugging flows if you are interested in this topic.
I would love to hear back on if you had a great experience getting started with your first flow. Please leave a comment on this blog post or join in on our community forum. Look forward to hearing from you!