Walkthrough: Use Flow in PowerApps to upload files or return data tables


Since the release of the new Respond to PowerApps functionality this month, we've seen people ask about a few different scenarios. In this post we’ll walk through two examples:
- Upload, and then display in the PowerApp, images stored in OneDrive for Business (or other cloud locations)
- Return a Table of data back to a PowerApp (such as from a SQL query or Excel workbook)
Uploading and Returning files
The first step is to use the PowerApps trigger. For the first action, choose Create File from OneDrive for Business. On the Create File action, in the File name, select Ask in PowerApps from the Add dynamic content menu. Then, in the File Content, do the same. Your action should look like this:
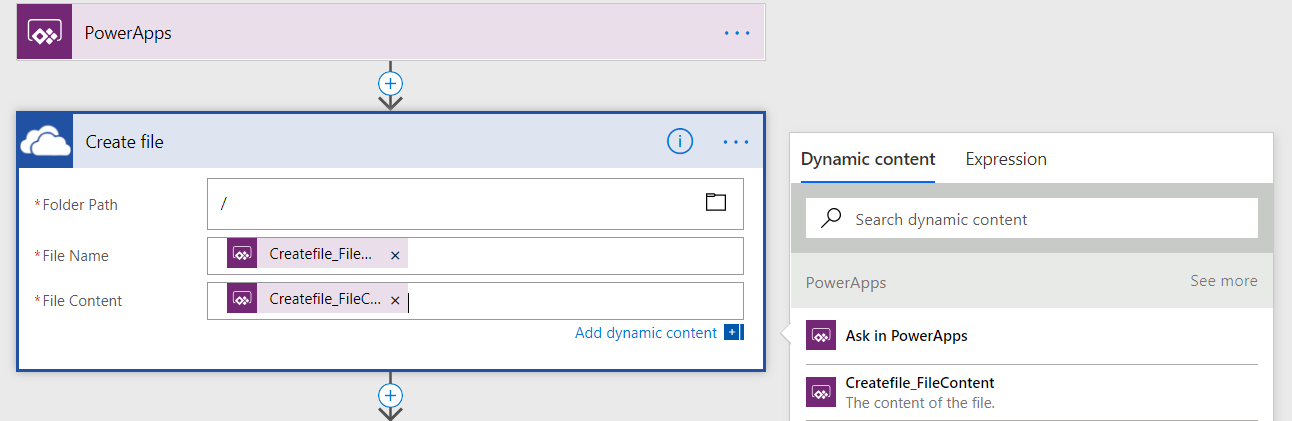
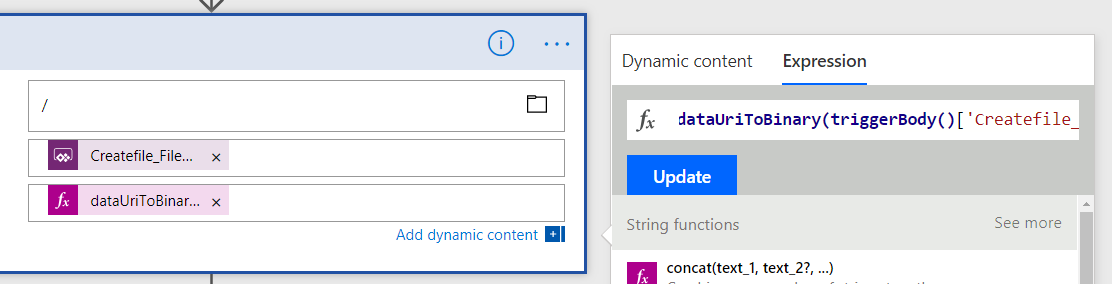
However, there is a problem with this approach. When PowerApps takes an image in encodes it in a dataURI. However, the Create File expects its File Content parameter to be binary. Thus, you will need to use an expression to convert from dataURI to binary. It should be: dataUriToBinary(triggerBody()['Createfile_FileContent']).
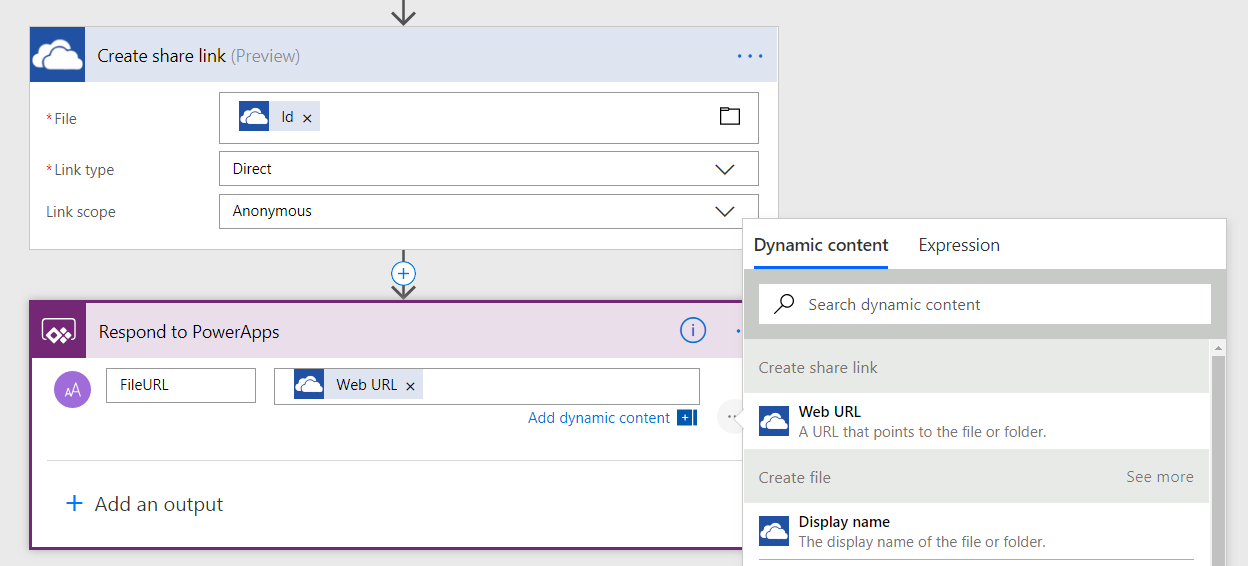
Next, you will add an action to get the direct link of the file. Add the Create share link action and pass in the ID from the Create file action. You will want to choose Link type of Direct and Link scope of Anonymous. Finally, you will add the Respond to PowerApps action. Add an output for File URL, and pass the Web URL into that output from the previous action. Now save the flow.
Next, go to your PowerApp and add go to your Camera control that will be taking the image. Go to the OnSelect of the Camera control and select the Flow button from the Action tab in the ribbon and add the flow you just created.
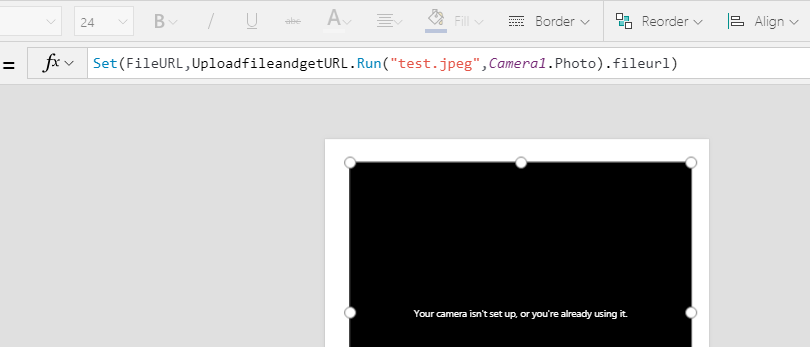
You will modify this formula slightly in order to set the file URL to a variable that you can use on a different control: Set(FileURL,UploadfileandgetURL.Run("test.jpeg",Camera1.Photo).fileurl)
Finally, just use the variable you created (in the above example, it's FileURL) on the Image control, and it'll render the image inline. Note: when this Flow runs from the PowerApp, it will use the connection of the user who is signed into PowerApps, so you should only be creating files in a folder that all app users have access to. With these few steps, you were able to build a PowerApp that uploads a file to OneDrive and then displays that file!
Returning tables of Data
Another scenario that is now possible is to use a flow to get a table of data — either from SQL, Excel, or another data source. The simple Respond to PowerApps action only allows you to return back basic strings of data. However, for more advanced users, we do have a way to return a full Table of data by building a JSON schema.
Once you have the PowerApps trigger and your action that returns a table (in this example, List rows present in a table), you will add the Request – Response action to the end of your flow. You can leave the Status Code and Headers options as-is, and then in the Body you'll want to pass the whole table of data (not just a particular field). To do this, in the Add dynamic content select Show more and you should see the outputs from that action – you'll want to include the List.
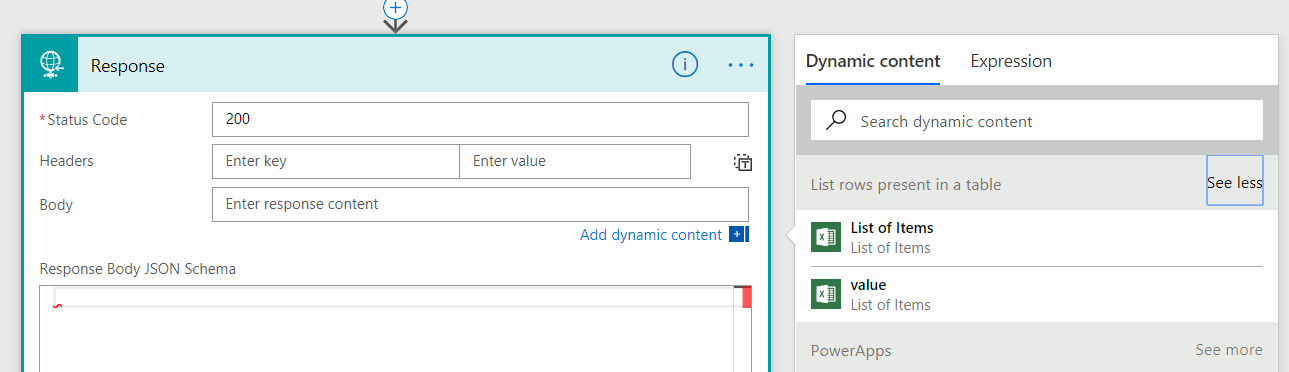
Now you should save your flow. However, unlike when you use the Respond to PowerApps you're not done yet — you will also have to get the JSON Schema for your response to send to the PowerApp. The easiest way to do this is to:
- Select Test in the command bar and choose I'll perform the trigger action
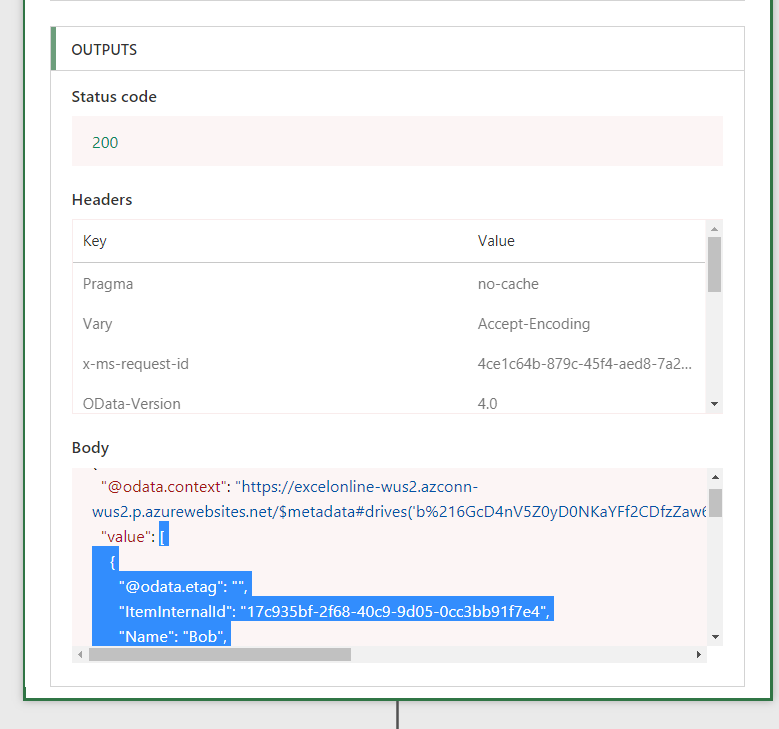
- Run the flow, you should see it complete successfully and the status of each action
- In the action (in this case, List rows…) go to the Outputs and copy the value of the list (which starts with [ and ends with ])
- Select Edit flow again
- On the Response action, select Use sample payload to generate schema
- Paste the content from step 3 in and generate the schema

You should now see the schema of your table in the Response action. Save your flow again.
Now you're ready to add your flow to your PowerApp, and use it like you would use any other Table of data in your PowerApp.