Rich text in approvals and multi-select inputs for buttons


Rich text in Approval messages
We're pleased to announce that you can now use rich formatting in the details portion of an approval request using Markdown. With this new capability, you can format your details for emphasis (bold, italics, strikethrough), create headers, paragraphs, and line breaks, and create lists (ordered or unordered) and tables. For further details about all supported formatting capabilities, visit https://aka.ms/approvaldetails.
For example, say you were sending an approval request for list items in SharePoint and you'd like to format your approval request to look like the following text.
- Session Title: Streamline business processes with Flow and Office 365
- Conference: Ignite 2018
- Presenter: Merwan Hade
- Session Level: 200
- Description: Easily add automation to workflows and approval processes for your Microsoft Dynamics 365 and Office 365 data that enable you to process requests, send notifications, and more – with just a couple clicks.
In your flow, annotate approval details with the Markdown characters for bold, italics, unordered lists, etc. For example, **Session Title**.
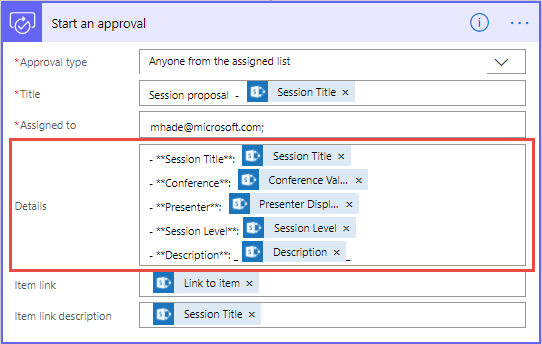
When the flow runs, and an approval request is sent to the designated approver they will see their approval request with rich formatting across all clients.
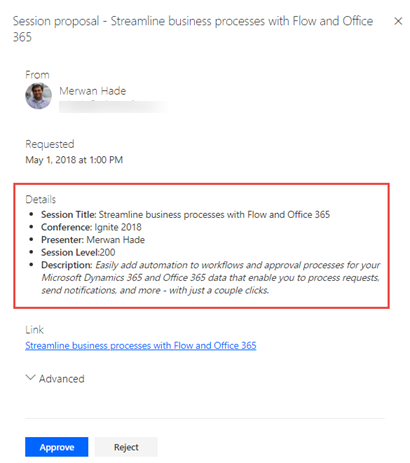
The above shows what it looks like on web. This is what the actionable message in Outlook looks like:

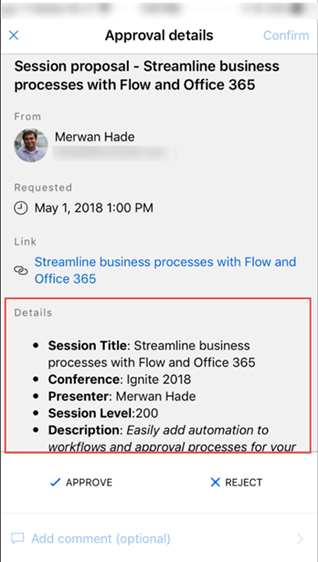
Finally, the message is also formatted in the Flow mobile app:
Flow buttons support multiple selection inputs
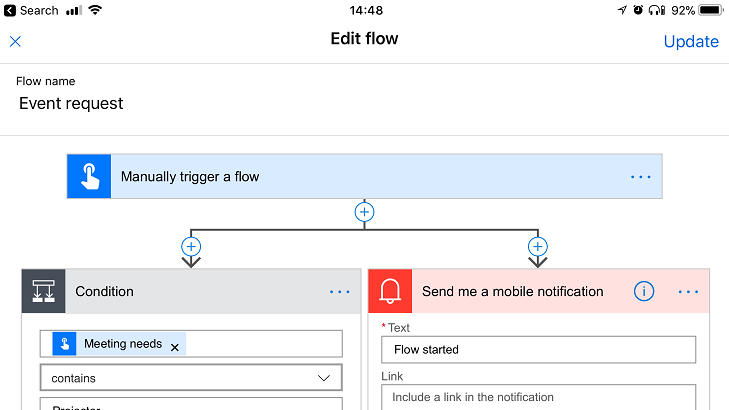
You can build flow buttons that collect information from the person clicking the button – now these buttons can use a multiple selection list to collect more than one value at once. For example, imagine you have a basic event request and you want to know if the event should have Food, Drinks and Projector. Now you can build a single button that collects this data and then uses it in different actions.
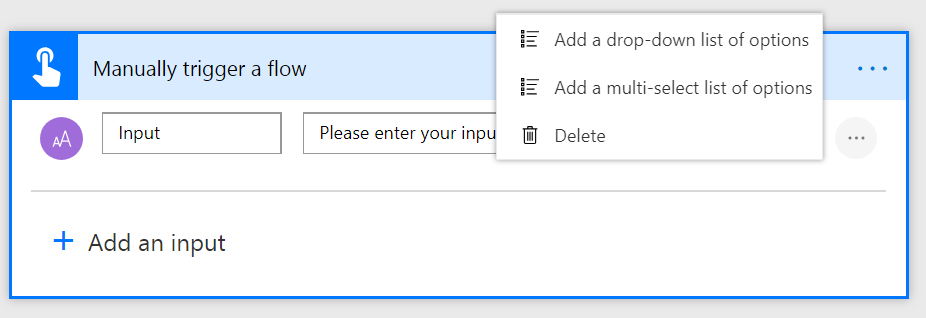
To get started Create from Blank, and select the Flow button trigger. On the trigger Add an input. Next, select the "…" menu on the right side of the trigger and select Add a multi-select list of options.
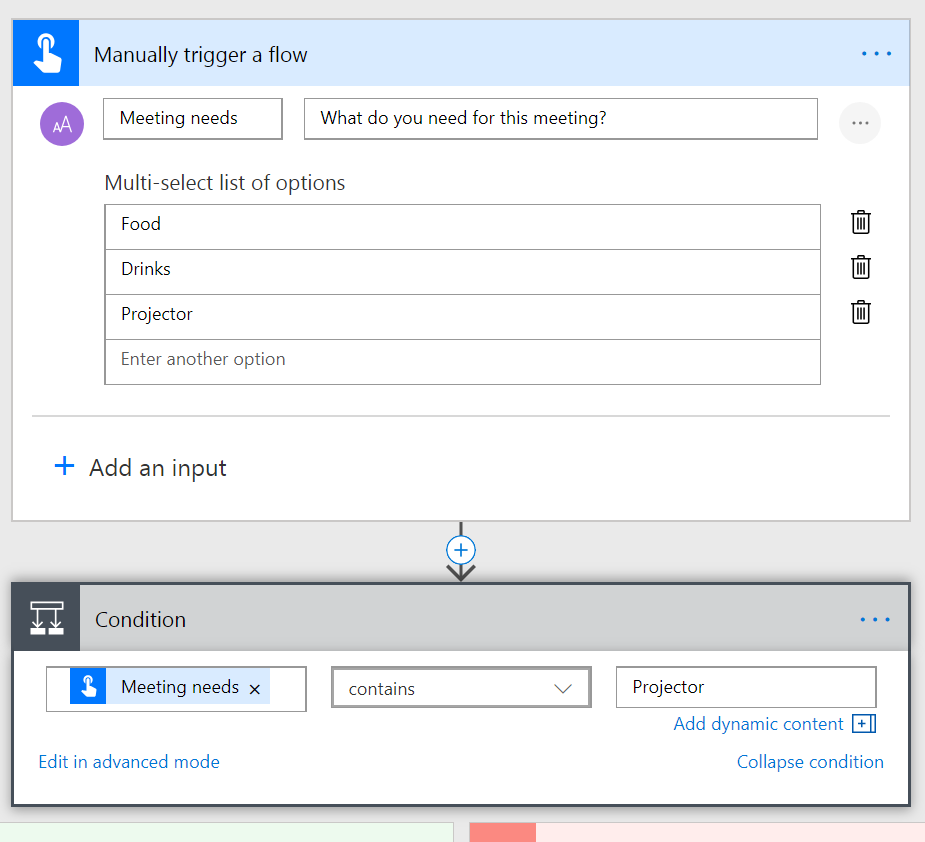
Now you can name your input, provide a description, and enter the set of options that you want the person running the flow to choose between. Once you have done this, you can add the actions for your flow. In the below example, the Meeting needs field will return back a list of options (even if the user ends up selecting only one), so you will need to use options like Contains in conditions – or – use the Join action to combine the select options into a single string of text.
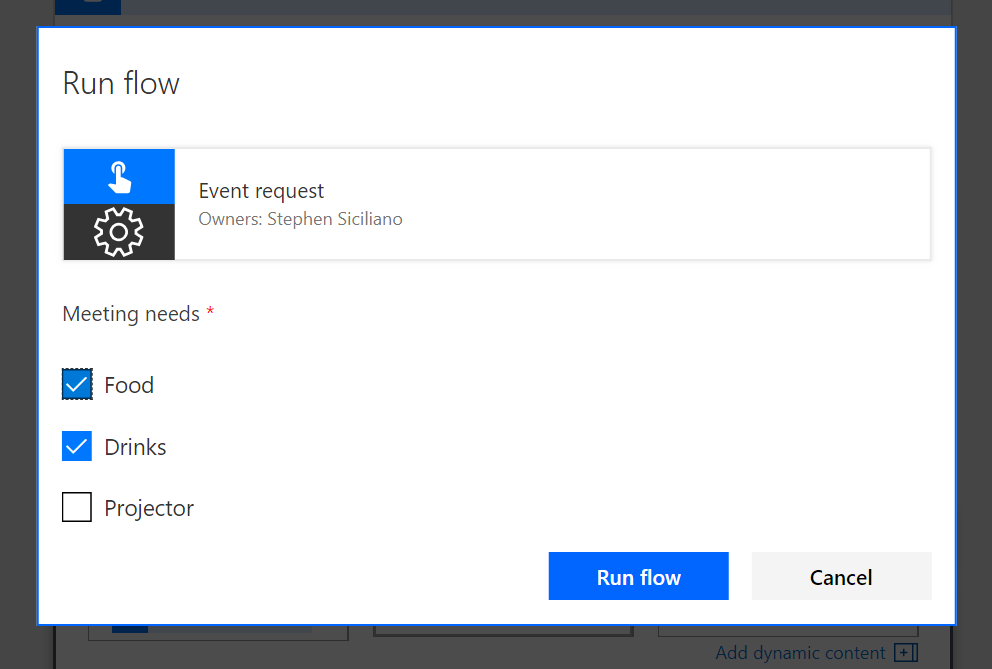
After you save your flow you can run it from the Flow mobile app or the Flow portal. When you do, you'll be provided with a checkbox for each option, so you can select which of the options you want to send:
Work with wider flows
To make it easier to work with wider flows (such as flows that have multiple parallel branches), we have made two small improvements:
- When working with the Flow designer on the website, there will be a horizontal scrollbar whenever it is needed.
- On the Flow mobile app, you can now rotate your phone to work in landscape mode.